Create a Hayabusa Timeline
Step 02 / your first scan
Make the scan choices visible
This is the original SUSA sample-log exercise, expanded to explain the command and its output. These samples are a collection of unrelated test logs from different hosts and dates. They are useful for learning detections, but must not be described as one continuous incident.
Get the sample logs
In Command Prompt, from C:\Tools\Hayabusa, clone Yamato Security's sample EVTX repository:
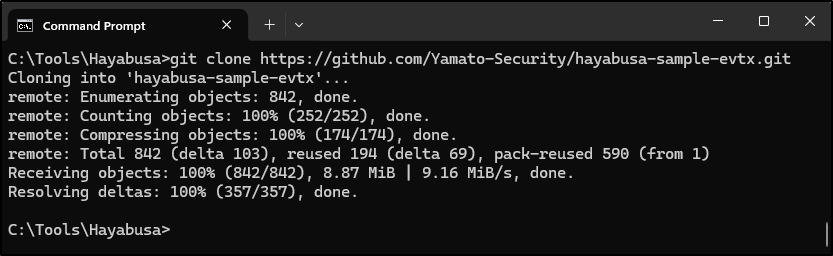
If Git is unavailable, download the repository ZIP from GitHub, extract it, and rename the resulting folder to hayabusa-sample-evtx. Keep a note of the source revision or ZIP download date. Sample contents can trigger antivirus alerts because of attack-related text; follow the approved handling process described in Install and open.
Generate a CSV timeline
For releases that list dfir-timeline in help:
The original command below is retained for the older release shown in the screenshots:
| Part | What you are choosing |
|---|---|
-d |
Read EVTX files in this directory. Use -f for a single saved EVTX. |
-o results.csv |
Save a timeline at this path. Use a fresh filename for each run. |
-p verbose |
Include useful rule and source references for validation. It selects columns, rather than increasing detection coverage. |
--iso-8601 |
Use UTC timestamps with a Z suffix. Keep that time basis in your report. |
-s |
Sort the output by time. Sorting can require more memory on large cases. |
Do not overwrite the previous run just to try a different option. Name the next output results-core-plus.csv, for example, and record what changed.
Choose the Scan Wizard settings
For the original walkthrough, select Core rules and Include Sysmon rules: yes, as shown. Use arrow keys and Enter for listed choices and follow the displayed key prompts. Labels and additional questions can vary by release.
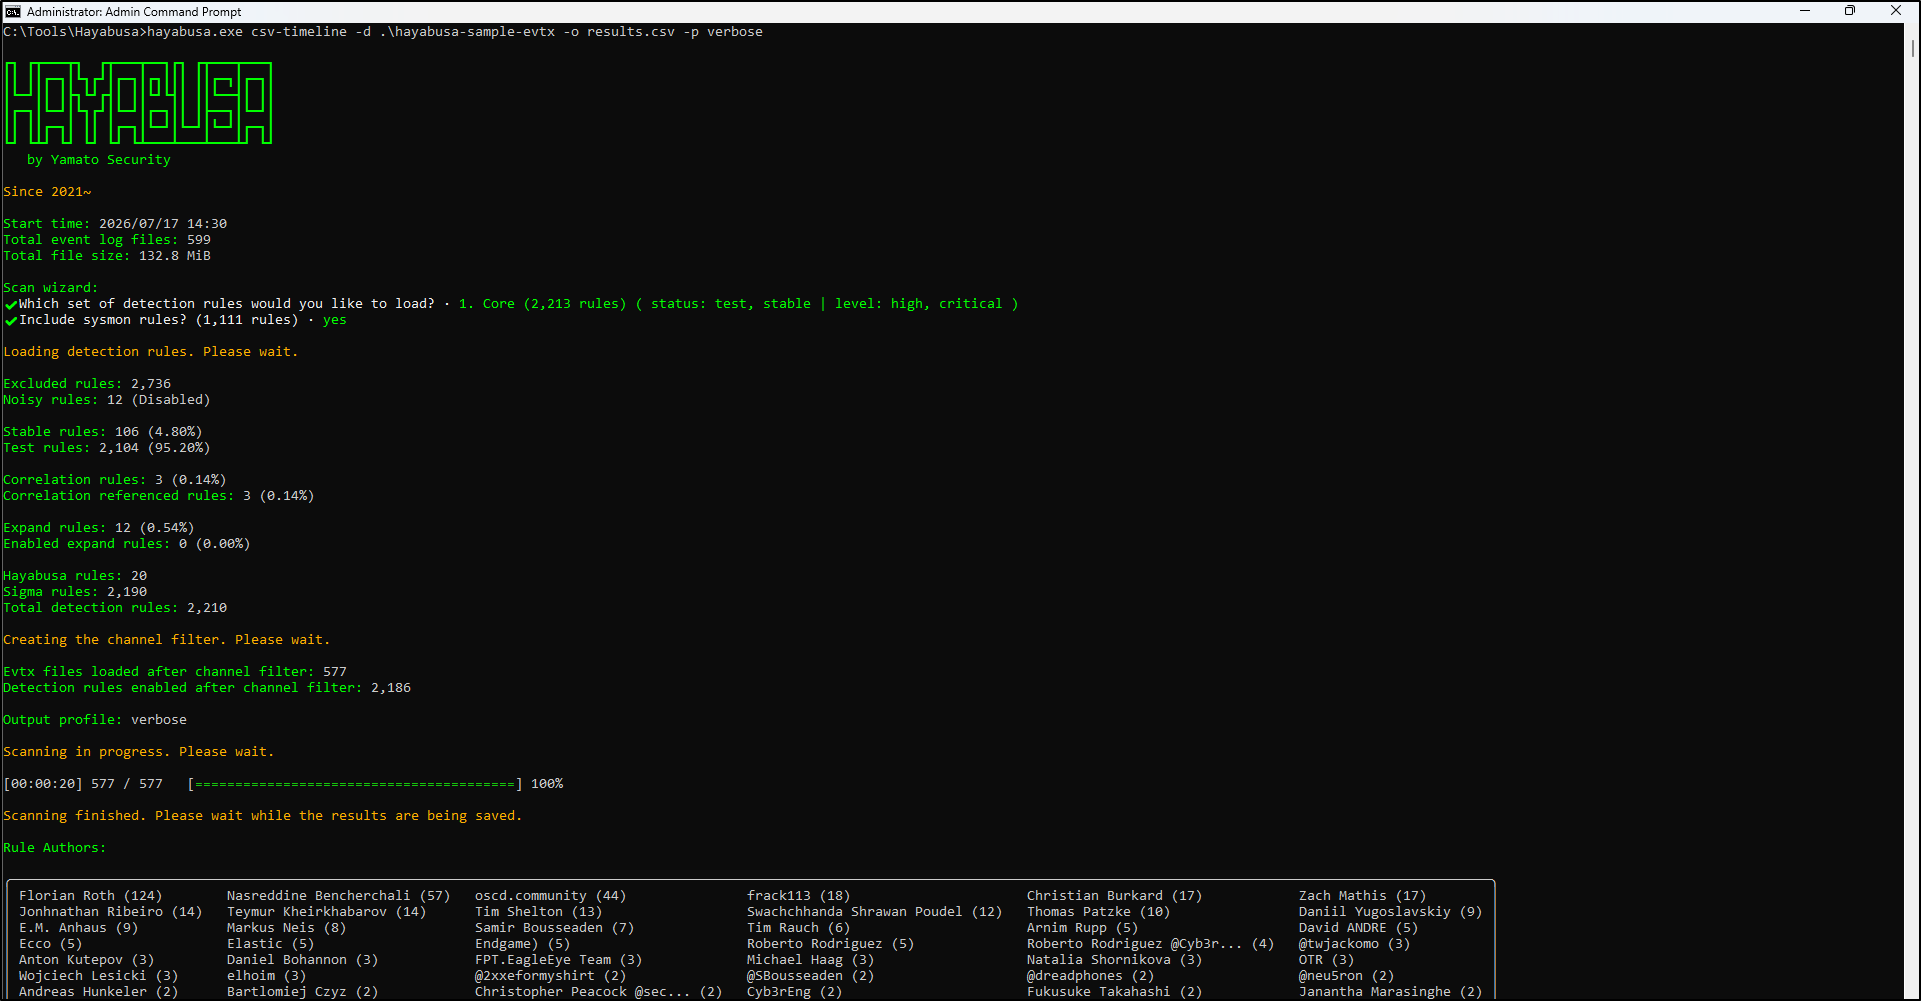
Focus on high and critical rules with test or stable status. Useful for an initial pass, but medium and informational context may be absent.
Add medium-priority rules with test or stable status. Expect more results that need environmental context.
Also include experimental rules. Assess noise and false positives before applying this choice to a large case.
Including Sysmon rules only helps when relevant Sysmon events exist in the supplied evidence. It does not install Sysmon or create historical telemetry. Record every wizard choice, including any add-on choices shown by your version. See the official Scan Wizard reference.
Check the scan before trusting the output
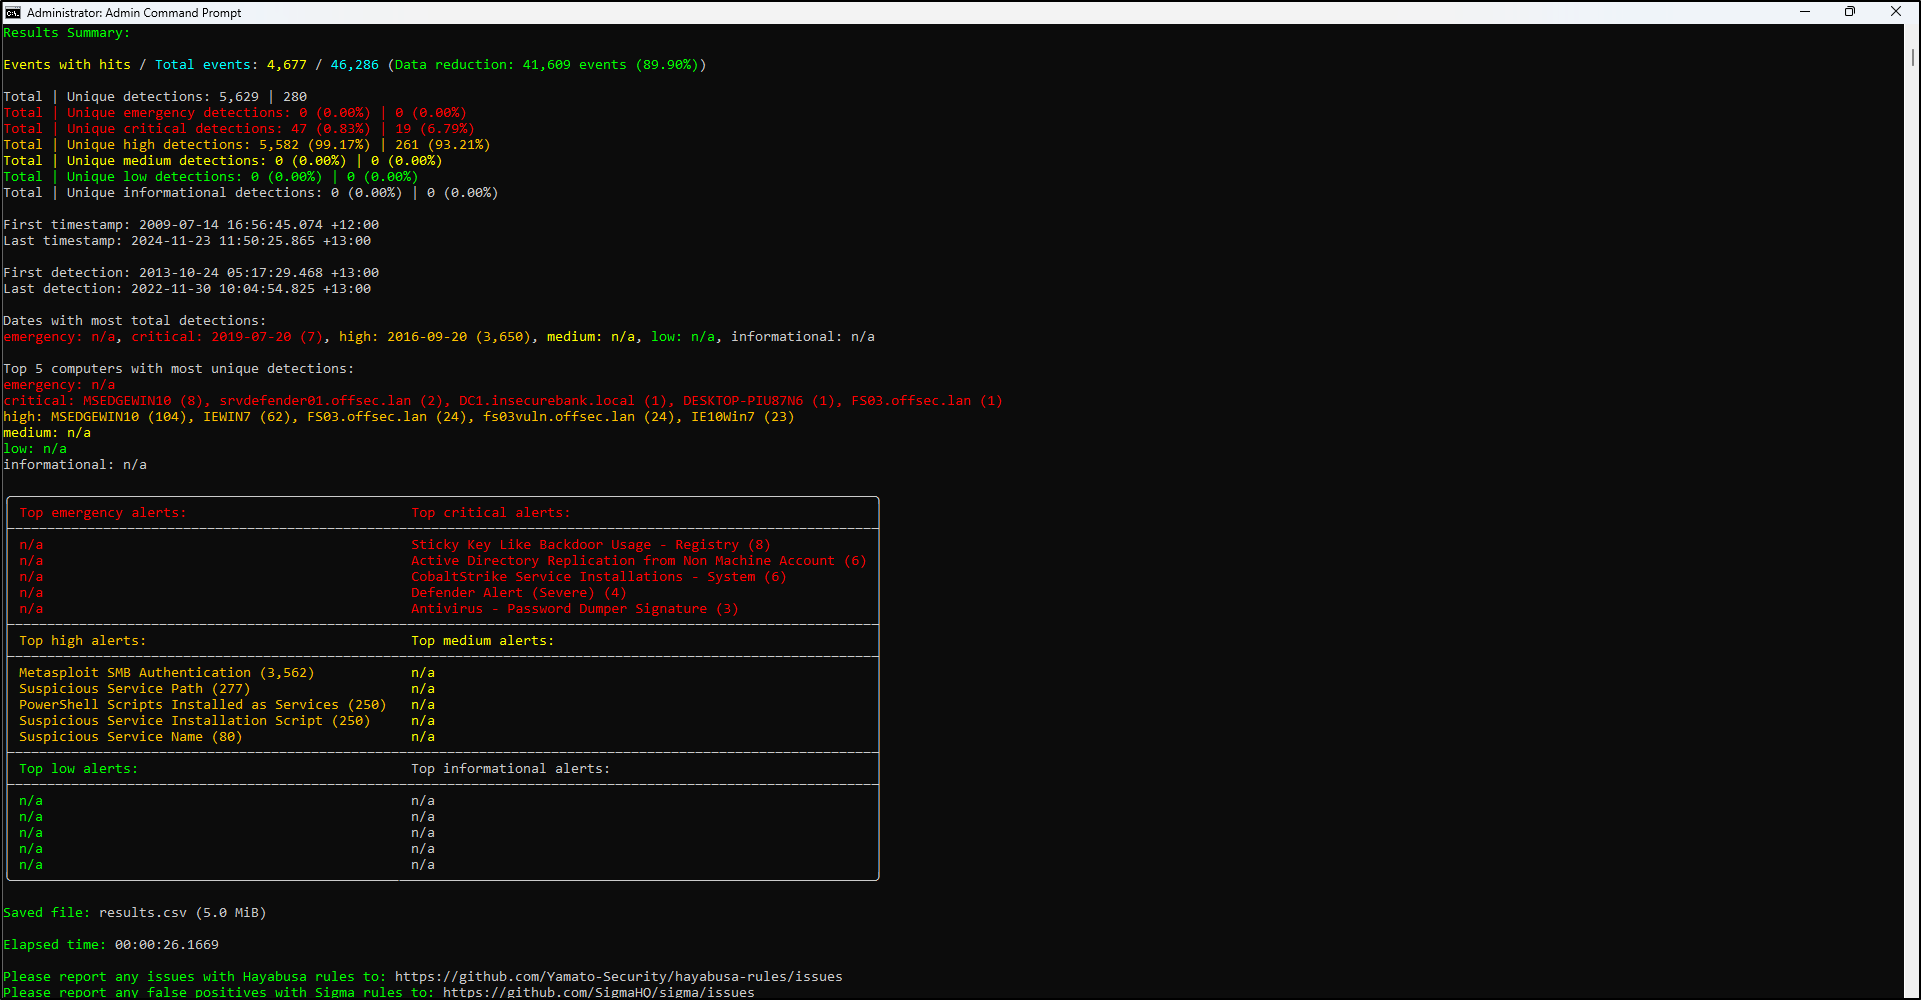
Check that the process finished, the intended files were read, and results.csv exists and contains rows. Review warnings and parsing errors. Save the terminal output or a transcript and any error logs. Your counts can differ from the screenshots because rules and sample repositories change.
What if the result is empty?
An empty result does not prove the computer was clean. Check these points:
- Did the scan finish? Read any warnings or errors. A failed scan is different from a completed scan with no matches.
- Did it read the right logs? Check the input path and file count. Confirm the folder contains the EVTX files you meant to scan.
- Could the rules see the activity? Check the available log channels and rule choices. Core leaves out medium-priority rules. Sysmon rules need actual Sysmon events.
- Did a filter hide the results? Check any computer and time filters, including filters in your CSV viewer.
If you try a broader scan, save it under a new filename and note which settings changed. Keep both results.
Optional: make a repeatable second pass
For a small working set, the following uses explicit rule-status and severity choices in place of the wizard. It is not identical to every wizard configuration, because add-on rules can differ:
hayabusa.exe dfir-timeline -d .\hayabusa-sample-evtx -o results-review.csv -p verbose --iso-8601 -s -w --min-level medium --exclude-status deprecated,unsupported,experimental
Keep both outputs and the exact command. Later, narrow a documented follow-up scan with options such as --include-computer and --timeline-start / --timeline-end from your installed help. Start with a broad enough view to avoid filtering away the evidence you need.
Continue to Review and report or try the interactive lab.