MemProcFS Setup & Usage
Set up MemProcFS, check the mounted drive, then follow one process and preserve its records. The screenshots show the recorded SUSA setup; your installed versions, paths, and PIDs may differ.
Accessing MemProcFS in SUSA
MemProcFS is a memory forensics tool that lets you mount a memory dump as a virtual file system, so you can explore it like a normal drive.
Download MemProcFS.
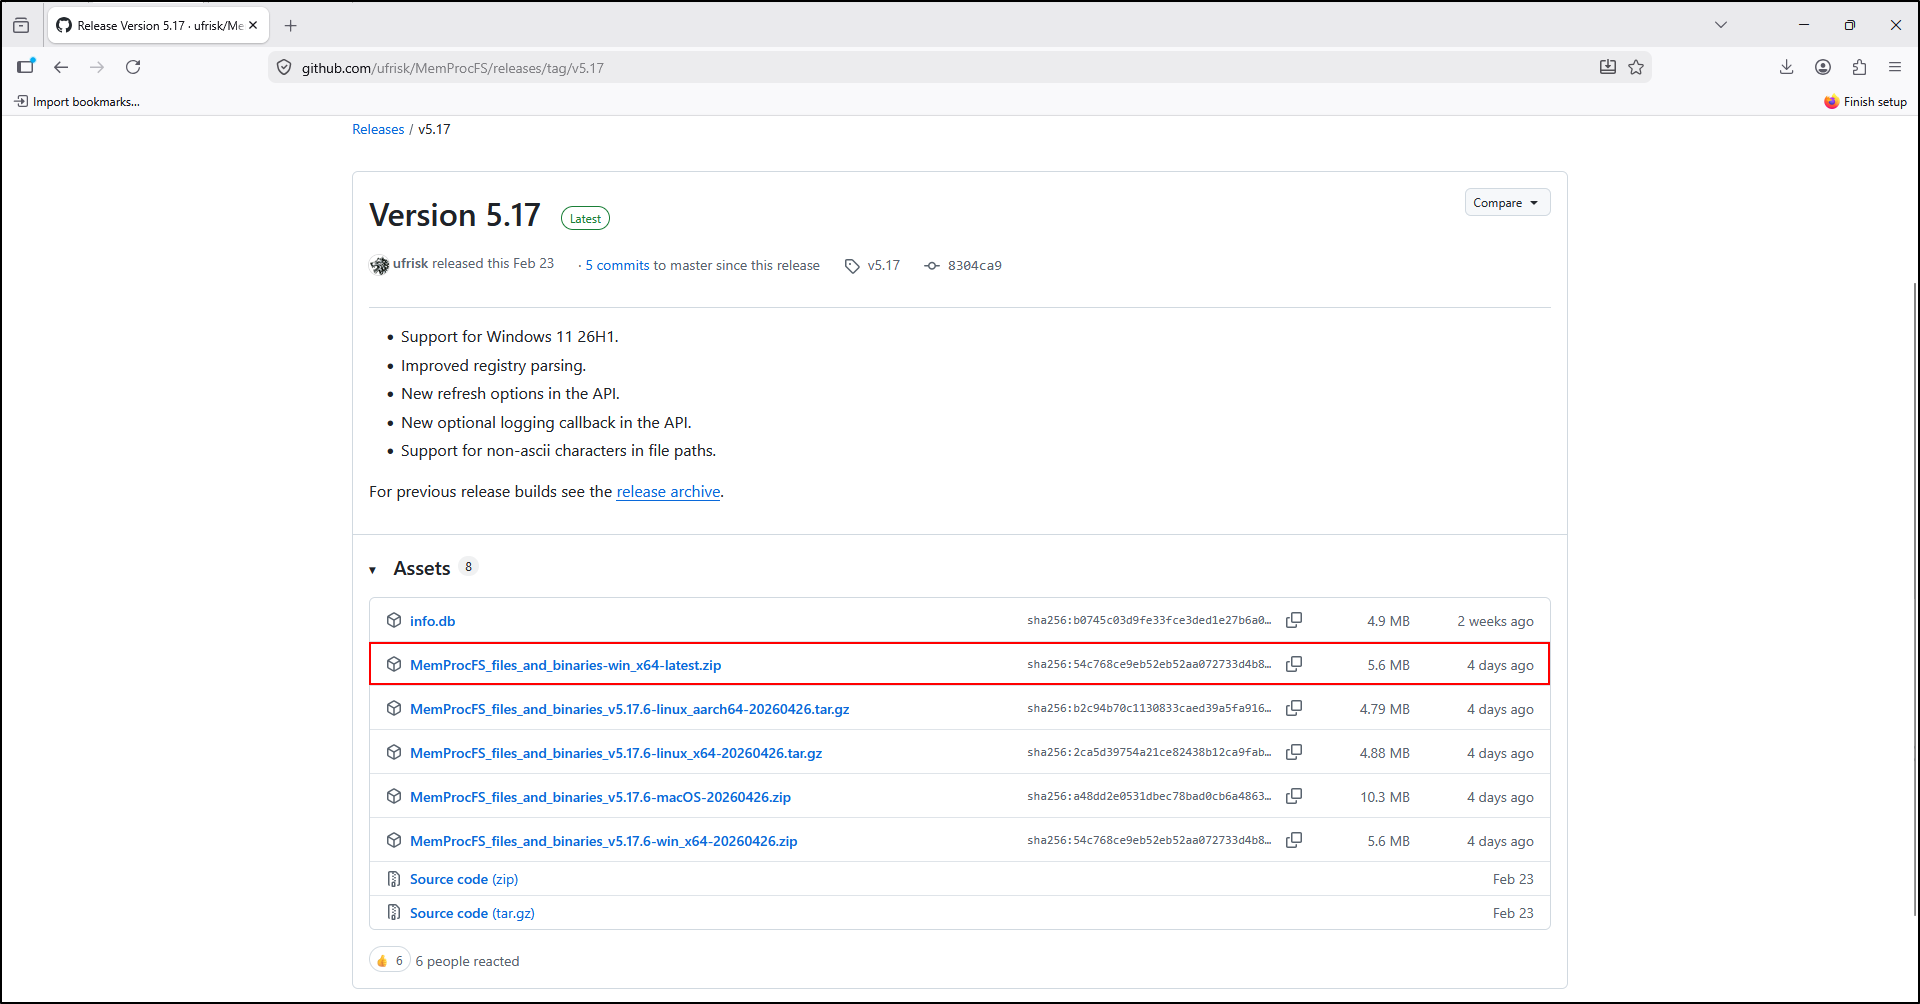
The release links and screenshots record the SUSA setup. Check the current MemProcFS releases for your installation and record the version you use. The sample PIDs and paths in screenshots may differ from your image.
Extract the downloaded zip file to C:\Tools\MemProcFS.
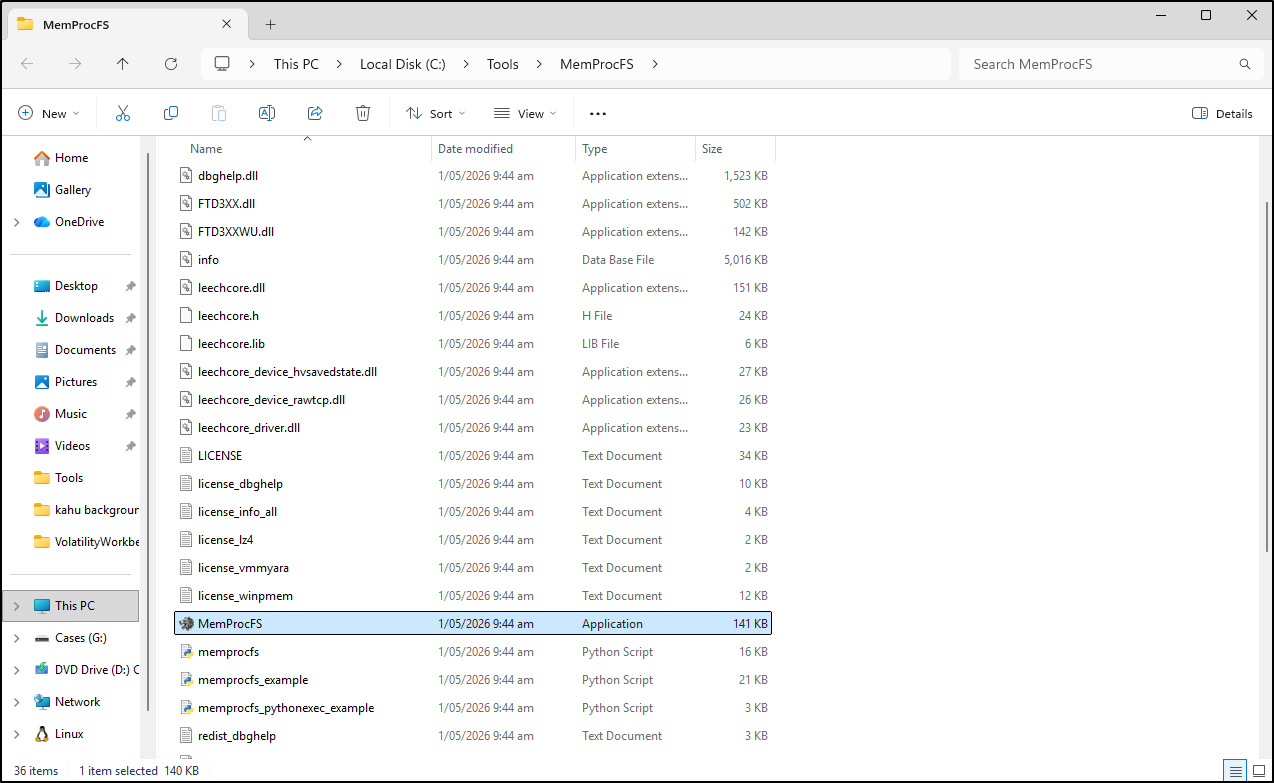
Adding MemProcFS to PATH environment variable
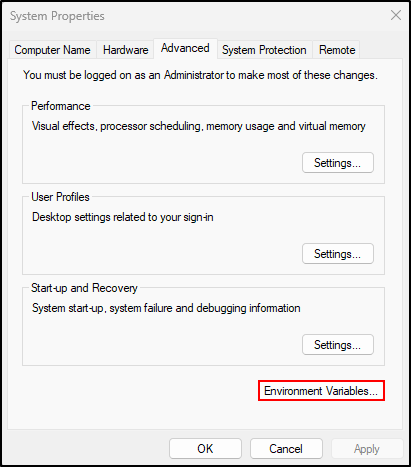
Open Environment Variables (Start → Environment Variables → Edit the system environment variables → Environment Variables).
Under User variables, select path and click Edit.
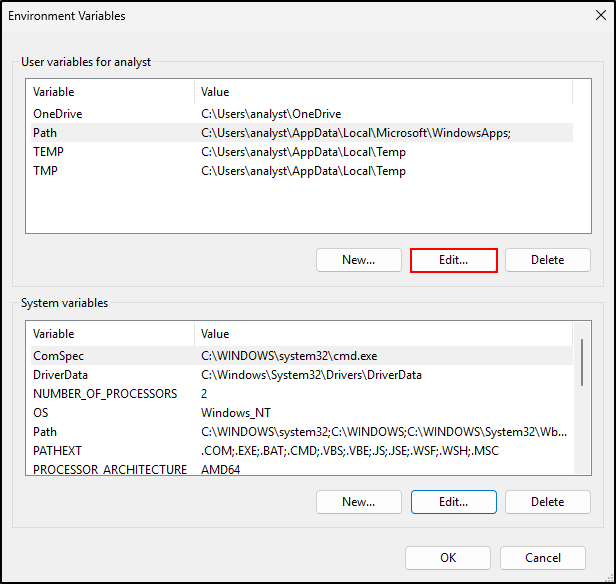
Click New and add (one entry per line):
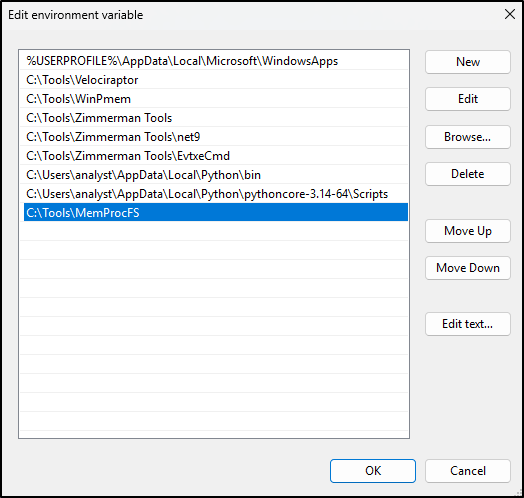
Click OK (then OK on other windows to save changes).
Testing MemProcFS
Open an administrator command prompt and run the following command:
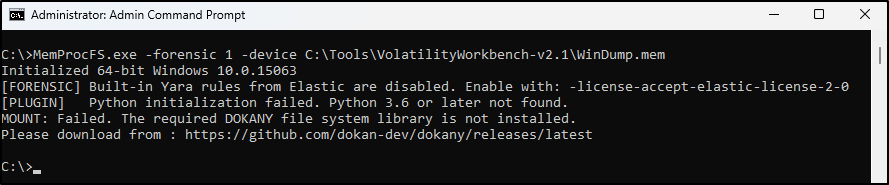
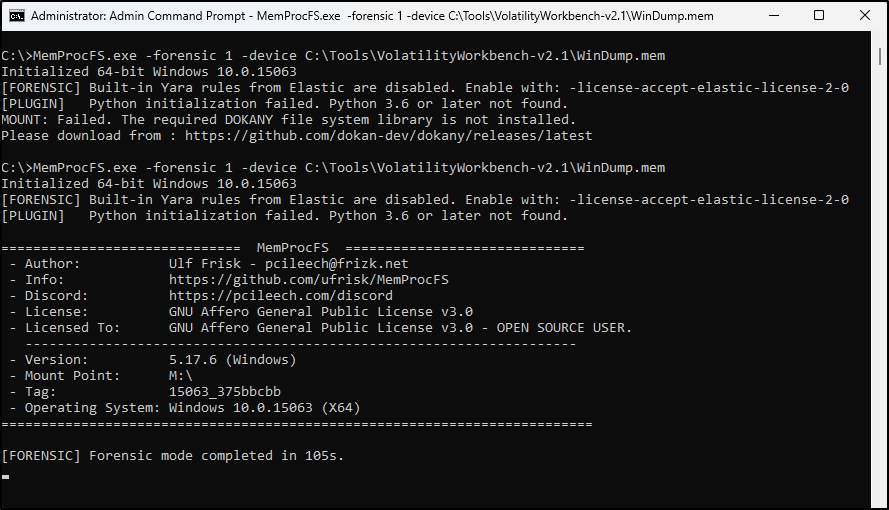
If you get the error The required DOKANY file system library is not installed, download Dokany (DokanSetup.exe).
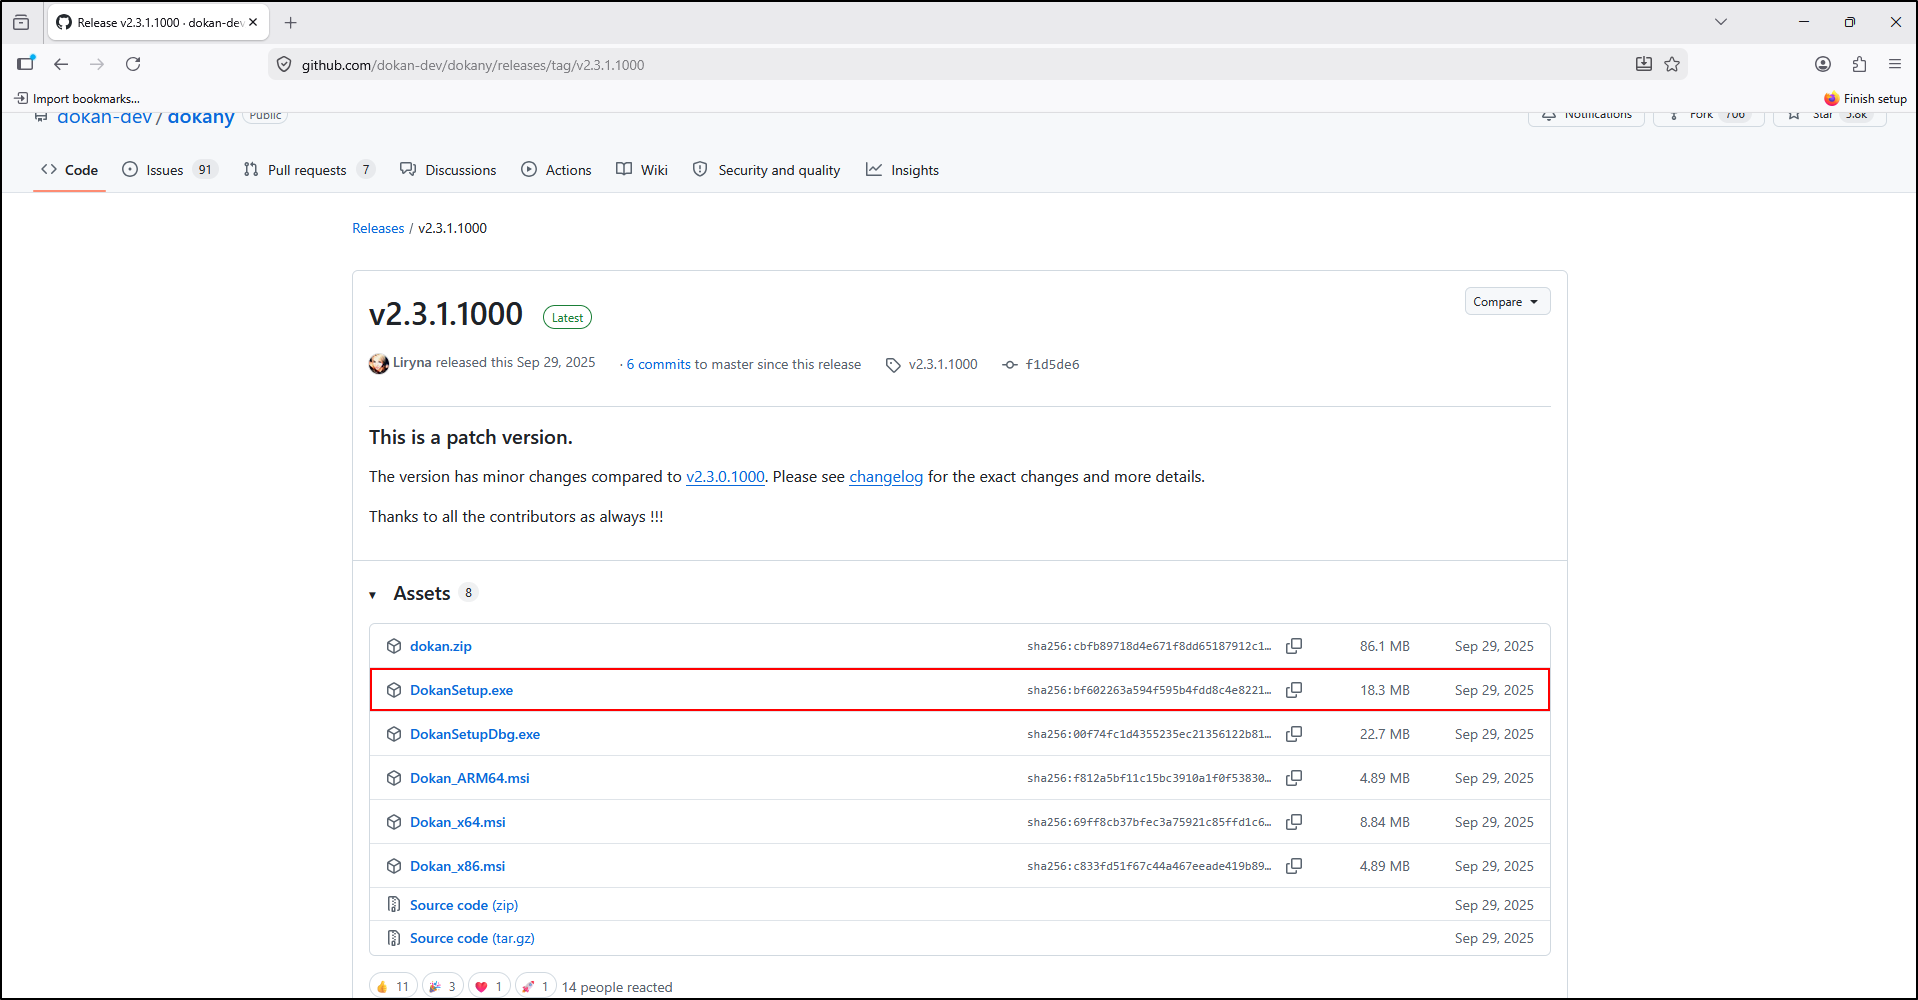
Open the downloaded executable to install the Dokan Library Bundle. Select the checkbox to accept the licence terms and conditions, then select Install.
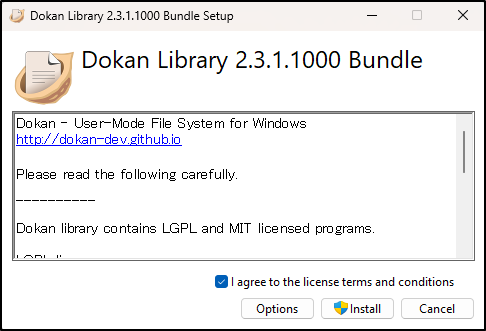
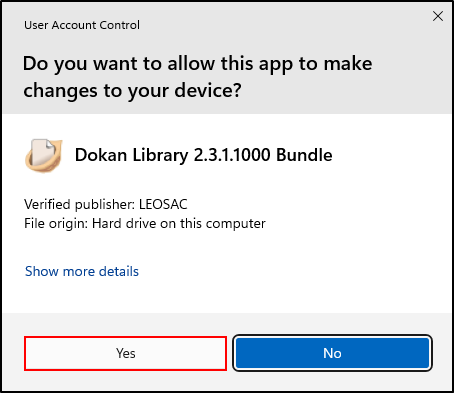
When prompted by the User Account Control, select Yes.
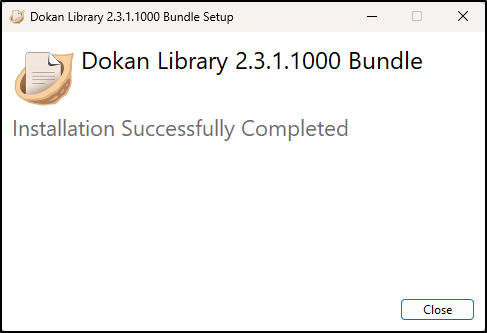
Once the install is complete, click Close.
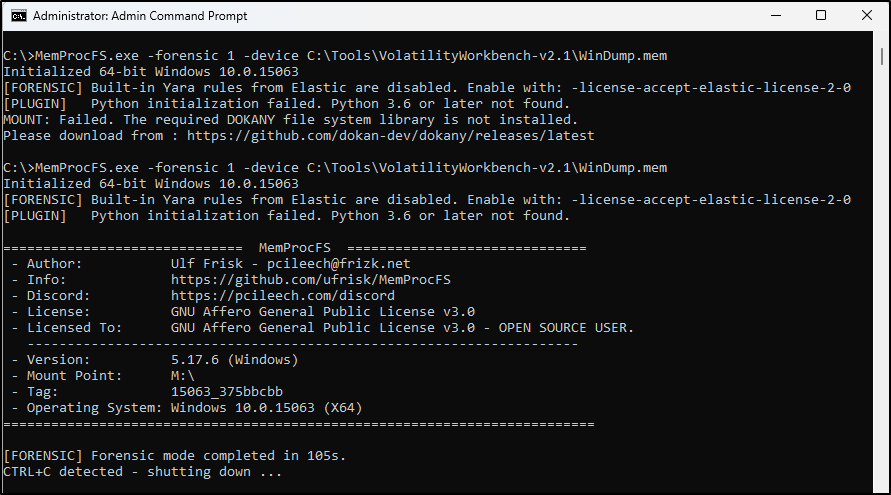
Run the MemProcFS command again. This should now run without an error. It may take some time. Once the process is complete, you will see Forensic mode completed at the bottom.
Explore the mounted image
Open Windows File Explorer and browse to the M drive. You should see a folder structure like the following:
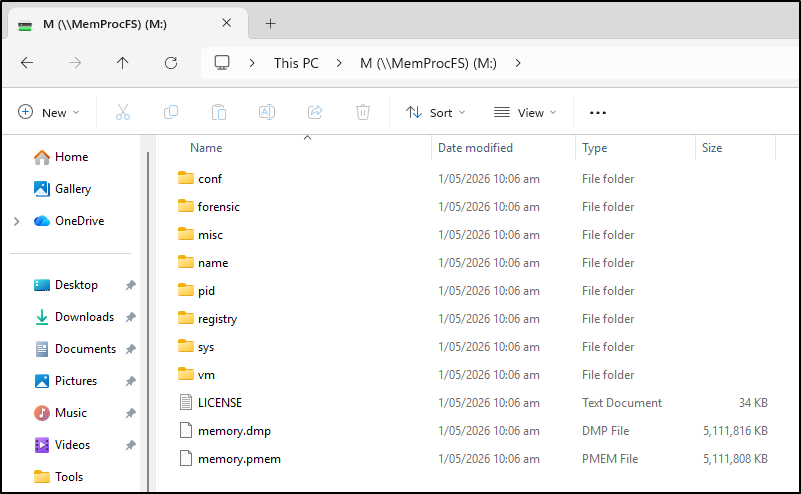
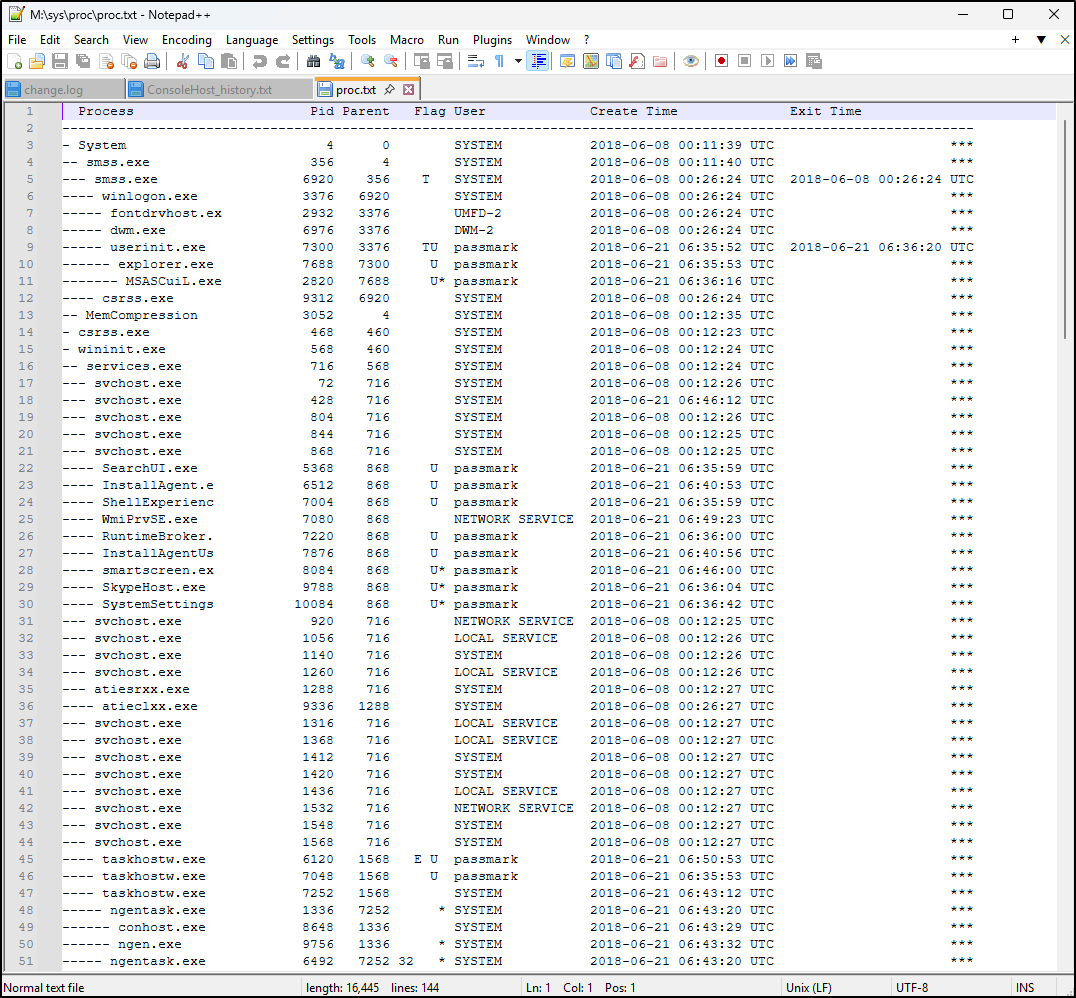
For a quick test, open and review M:\sys\proc\proc.txt to see processes.
MemProcFS packages process memory (code and data) into the minidump format to make it ready for debugging. Copy M:\name\CCC.exe-880\minidump\minidump.dmp to C:\Labs\memory folder.
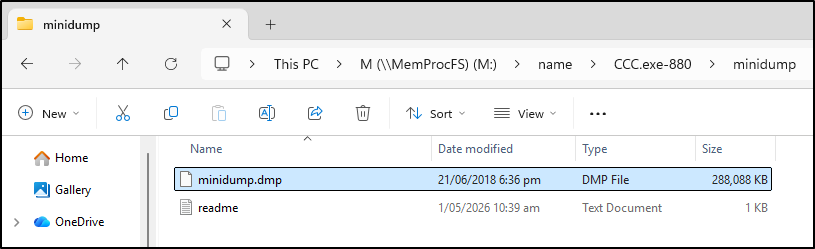
This will be later used for a test with another tool.
Close the mount
Copy the records you need to a case folder on a real disk and reopen those copies before stopping the mount.
To close MemProcFS or unmount M drive, in the administrator command prompt, type ctrl + C.
Follow one process
The screenshots get the drive mounted. Now use it to answer a small case question: what is this process, where did it run from, and what was it asked to do? Keep the MemProcFS Command Prompt open while you browse.
1. Start with the process tree
Open M:\sys\proc\proc.txt in Notepad++. Use Search > Find to look for a program name. Read the Pid, Parent, creation time, and any exit time. Two rows with the same name can be different processes. This tree can include terminated processes.
Need paths and commands beside the tree? Try proc-v.txt in the same folder. proc-time.txt arranges processes by creation time.
2. Read that PID's files
Open M:\pid\<PID>, replacing <PID> with a number in your table. The name and pid directories offer different routes to the same process records. Match the PID rather than relying only on a familiar filename.
Read the files below, then compare the parent number with a Pid in the process tree. Check the times: a reused PID or a missing parent can make the relationship uncertain.
| File inside a process folder | Why read it? |
|---|---|
name-long.txt and pid.txt |
Confirm which process you selected. |
win-path.txt |
Check the executable's recorded path. It may use a kernel device path rather than a drive letter. |
win-cmdline.txt |
Read its recorded launch command. This does not execute that command. |
ppid.txt and time-create.txt |
Follow the parent number and compare creation times. |
minidump\minidump.dmp, if present |
Preserve a reconstructed process dump for later debugging. This is different from the full memory image or the original executable. |
The process directory reference and process tree reference explain the available fields. A missing file or empty field is a limitation to record. It does not prove that the activity never occurred. A path outside a usual Windows directory is a lead to check, not a malware verdict.
Preserve the result before unmounting
Create a case folder on a real disk, for example C:\Cases\MemProcFS-01\exports. Copy the process tree and the chosen process's relevant text files there using File Explorer. Keep each PID's files in its own subfolder so two files named win-path.txt do not get mixed up. Reopen the copies in Notepad++ and record their original mounted paths in your case note.
For example, after creating the destination folder and substituting an actual PID from your image:
/-y asks before replacing an existing file. Use a new filename for a new run. Preserve the source image path and SHA-256, MemProcFS version, exact mount command, relevant messages, and the mapping from each mounted source to its saved copy.
Understand the mount command
The recorded command above uses the sample's original location. For a case, point -device at your identified working copy. This example chooses the mount letter explicitly:
| Part | Meaning |
|---|---|
-device "..." |
Select the input memory image. Quotes keep a path containing spaces together. |
-forensic 1 |
Run forensic processing with the analysis database held in memory. Allow it to finish. |
-mount M |
Use drive M. Check that the letter is free first; choose another letter if it is already in use. |
Review any first-run symbol or rule licence prompt before deciding. Your choice can affect what is available. The official command-line guide covers additional modes and logging options. This walkthrough uses a saved image, not live-memory acquisition.
If something does not look right
MemProcFS says the DOKANY library is missing
Install the Windows filesystem dependency before retrying the mount. The MemProcFS installation instructions specify Dokany version 2. Keep your installed versions with the case notes. The screenshots above show the installation sequence.
M: does not appear, or another device already uses it
Read the Command Prompt messages first. Confirm the image path exists and the tool is still running. If M is occupied, use an unused letter with -mount, then substitute it in every Explorer path. Do not disconnect another drive to make room.
The drive appears but processing is still running
Mounting and finishing forensic processing are different events. Leave the command window open and wait for the completion message before treating the results as ready for this lab. Symbol retrieval and large images can take time. Keep any warnings instead of assuming that completion means all memory was recovered.
The sample PID, process folder, or minidump is absent
The screenshots show a particular capture. Use a process that exists in your own image and record its PID. Read the text records first. A minidump may be unavailable for the chosen process; document that and keep the useful evidence you do have. Avoid copying the enormous virtual memory.vmem file as a substitute for this exercise.
My exported file disappeared after Ctrl+C
Check whether you opened the file from M rather than copying it to the case folder. A file listed in the mounted view is not yet a saved export. Remount the same working image, copy the required records to a real disk, and reopen those copies before stopping the mount again.
Practise the workflow
Use the Hands on labs to compare two same-name processes in a three-window browser exercise, or follow the Kansa-style Full Lab with a real training image. Bring back one finding, its supporting records, a limitation, and one next check.