Create a Super Timeline
Follow the evidence into a Super Timeline.
Move from identified inputs to checked storage and a review CSV. Use the source records to test a short sequence, then hand over a finding another analyst can verify.
- Input
- Body file + artefacts
- Process
- Parse, import and check
- Output
- Storage, CSV and finding
Bring the checked body file from MFTECmd or TSK together with other artefacts from the same training host. Finish with windows-triage.plaso, a complete windows-triage.csv, processing records and one finding another analyst can verify.
Alternative input: TSK fls can create out.bodyfile from an E01 volume image. Use that instead of mft.body when following that route. Both are body files; the TSK timeline CSV remains a review output. Other artefacts must come from the same identified host, with any collection-time differences recorded.
Follow the workflow in order. Each stage explains its input, output and checks alongside the demonstration screenshots. If the distro is not ready, complete Set up Plaso first. Collection, mounting and optional filtering are explained in place below.
Prepare and verify Plaso
Use the Plaso WSL distro prepared in Set up Plaso. Record the installed tool versions, source host and source timezone. The examples below use a Windows training collection, the checked body file from MFTECmd or TSK, and separate writable analyst storage. Keep the original evidence unchanged.
Installation and file-transfer instructions are now on Set up Plaso.
Identify and prepare your inputs
Input: a verified mft.body from MFTECmd, or out.bodyfile from TSK fls, and the same host's collected artefacts. Keep the input hashes, acquisition/collection records and tool commands. A matching hash checks that representation's integrity; it does not prove completeness.
Path map: Windows G:\timeline is WSL /mnt/g/timeline. The example collection mounts as Windows E: and is visible as /mnt/e/C/; its inner C directory represents the source C: volume. Confirm your actual layout before substituting paths. E: here is not the target VM's original E: destination.
Output: a fresh, writable analyst output location outside the collection. The original demonstration uses G:\timeline; the Full Lab uses a new subfolder to avoid reusing an existing storage file.
In the Plaso WSL distro, inspect the body file before processing. Compare its hash with the saved export hash and check the source path:
For the TSK fls route, substitute out.bodyfile consistently. Keep the chosen body file unchanged.
Create a Virtual Disk Image of Windows VM using KAPE
Collection context: SANS Triage selects artefacts. The resulting VHDX is a container for that selection, not an image of every sector of the source disk. Preserve the collection log and verify a working copy before mounting. The assigned drive letter can differ. Prefer mounting the working VHDX read-only using your approved forensic workflow; for Windows, Mount-DiskImage -ImagePath "G:\actual-collection.vhdx" -Access ReadOnly is an example after substituting the actual full path. If it is already mounted, check its access mode before proceeding.
Transfer KAPE to the target Windows VM and run gkape.
Select C drive as the Target source and E drive as the Target destination. Uncheck Flush.
Select SANS Triage and VHDX as the Container. Set Base name as cdrive. Click Execute.
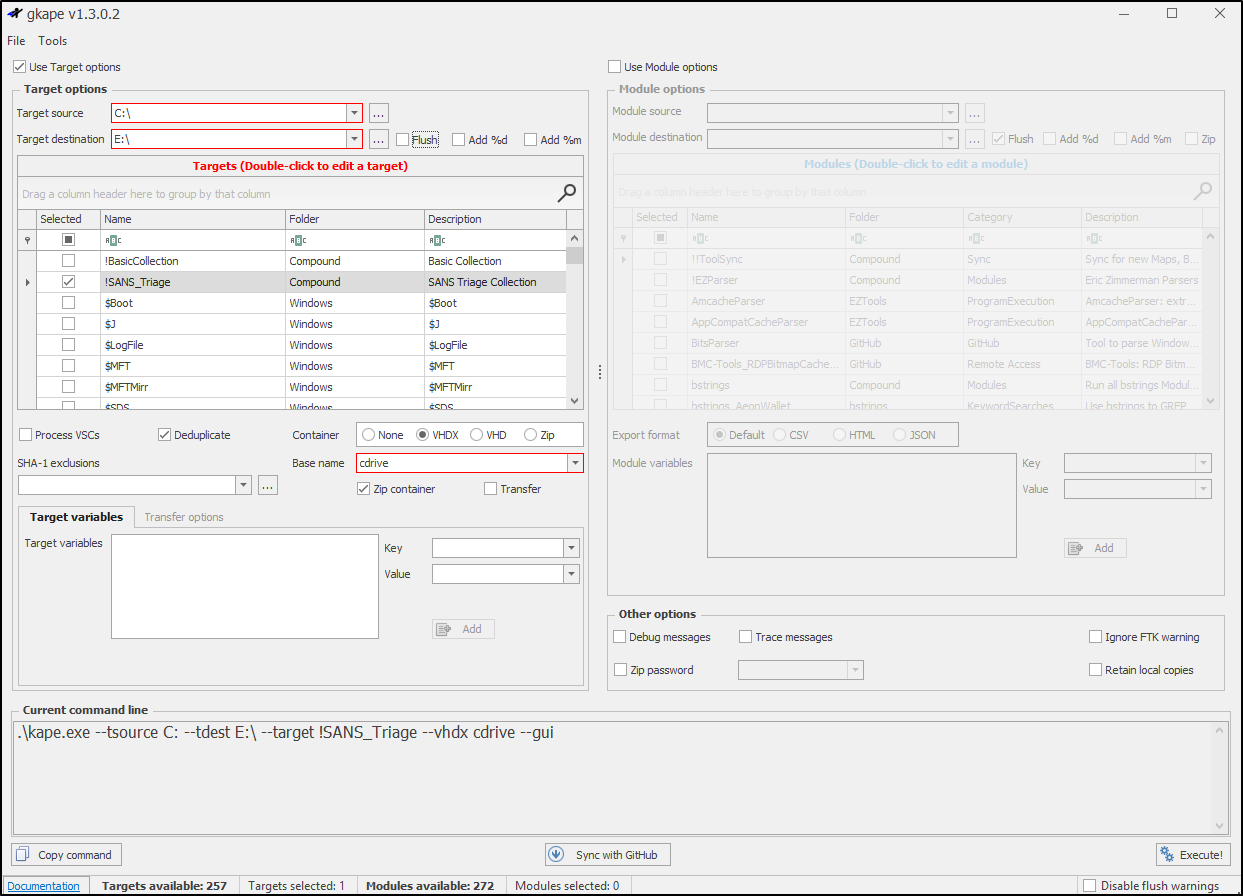
Figure 6. Select the SANS Triage target and VHDX container in KAPE.
This process may take some time. After completion, it will create a compressed folder in E drive containing the virtual disk image. Copy this to the DFIR VM’s G drive and unzip it.
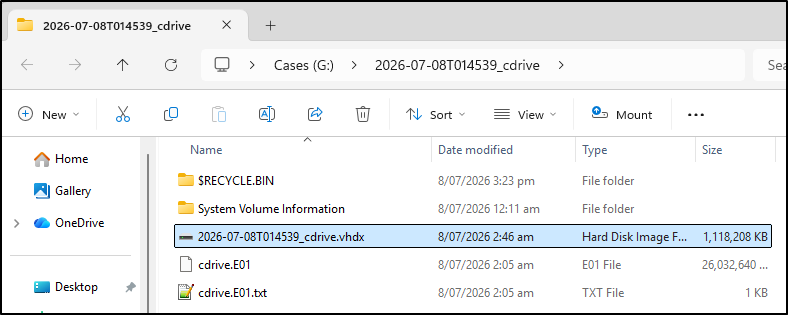
Figure 7. Preserve and transfer the resulting collection container.
Double clicking the VHDX will mount it on the DFIR VM as an E drive.
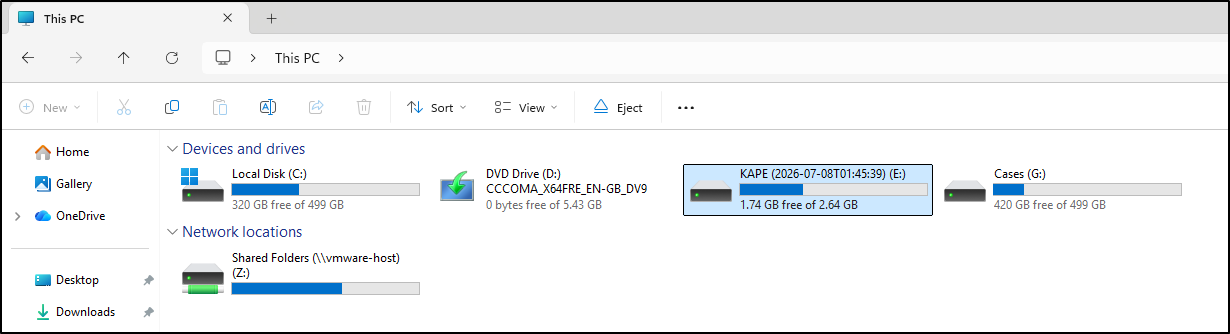
Figure 8. The example working collection is mounted as E:; verify your actual letter and access mode.
Look for: the body file and the collection belong to the intended host/volume, their collection times are documented, and you can distinguish original evidence, working copies and analysis output. Stop on unexplained identity or hash mismatches.
Make the collection accessible
Run in: the Plaso WSL terminal. Check: the expected collection directory is visible; listing drives alone does not establish which evidence they contain.
For demonstration purposes, I have created a Windows 11 VM and simulated user activity by installing Sysmon and Firefox. I have copied the virtual disk file to my DFIR VM.
log2timeline.py scans forensic evidence, extracts timestamped events from supported artefacts, and stores them in a Plaso database for later analysis.
Open terminal and from the dropdown menu, select Plaso-latest.
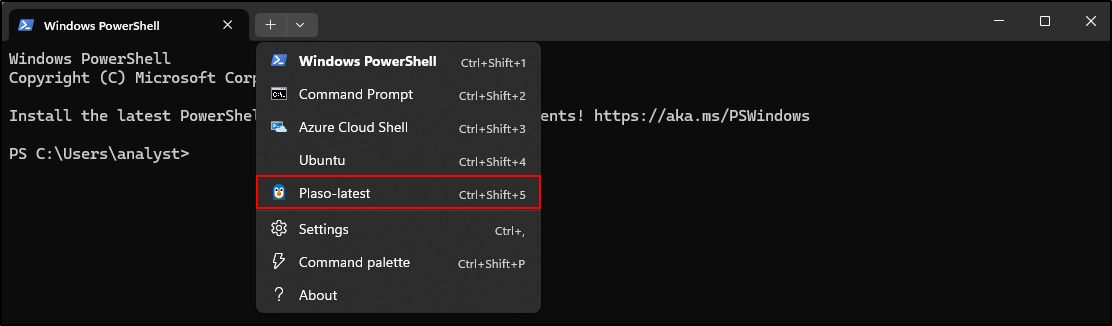
Figure 9. Open the Plaso terminal for processing.
Run the following command to verify that the mounted virtual disk image (E drive) can be seen from Plaso.
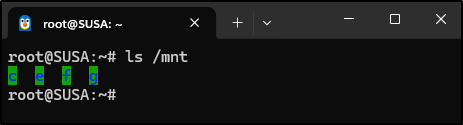
Figure 10. Check which Windows drives are visible in WSL.
Manually Mounting a Windows Drive
In some cases, the Plaso terminal may not automatically mount all Windows drives. This can occur with removable media, mounted forensic images, or virtual volumes. If the required drive is not present under /mnt, it can be mounted manually using the drvfs filesystem.
Check which drives are currently mounted:
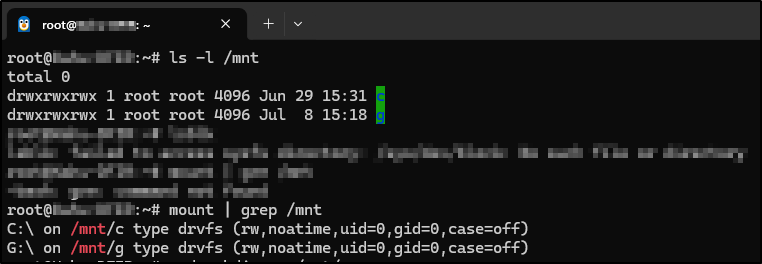
Figure 11. Inspect the existing WSL mount points.
If the required drive (for example, E:) is missing, create a mount point and mount it manually:
Verify that the drive has been mounted successfully:
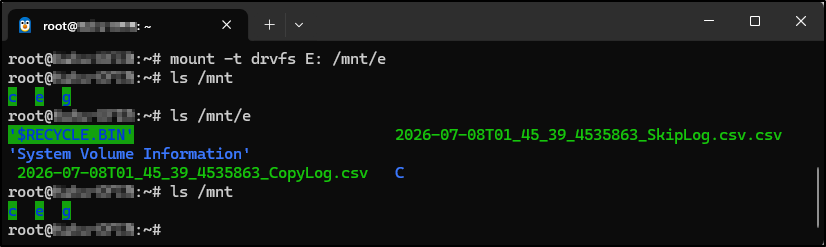
Figure 12. Verify access after mounting the example Windows drive.
The drive can then be accessed using its Linux path (for example, /mnt/e) when running log2timeline.py.
Look for: the collected host's expected folders under /mnt/e/C/. Record the real mount and input paths in your notes. Use read-only access to the working collection and write outputs to analyst storage.
Parse the collected artefacts
Input: /mnt/e/C/. Output: /mnt/g/timeline/windows-triage.plaso. Use a fresh storage filename for a new case/run; add the body file to this same storage only in the body-file import stage. Do not repeat successful imports just to retry an export.
We begin by parsing the contents of the mounted VHDX image using log2timeline. In the commands below, we specify the known time zone of the Windows host (UTC) and the preferred parsers. We are using the "win7" preset minus the "filestat" parser. We then run log2timeline.py a second time to add in the body file created by MFTECmd in the previous exercise. TSK mactime produced a separate chronological CSV; that CSV is not the input to this import.
log2timeline.py --timezone 'UTC' --parsers 'win7,!filestat' --storage-file /mnt/g/timeline/windows-triage.plaso /mnt/e/C/
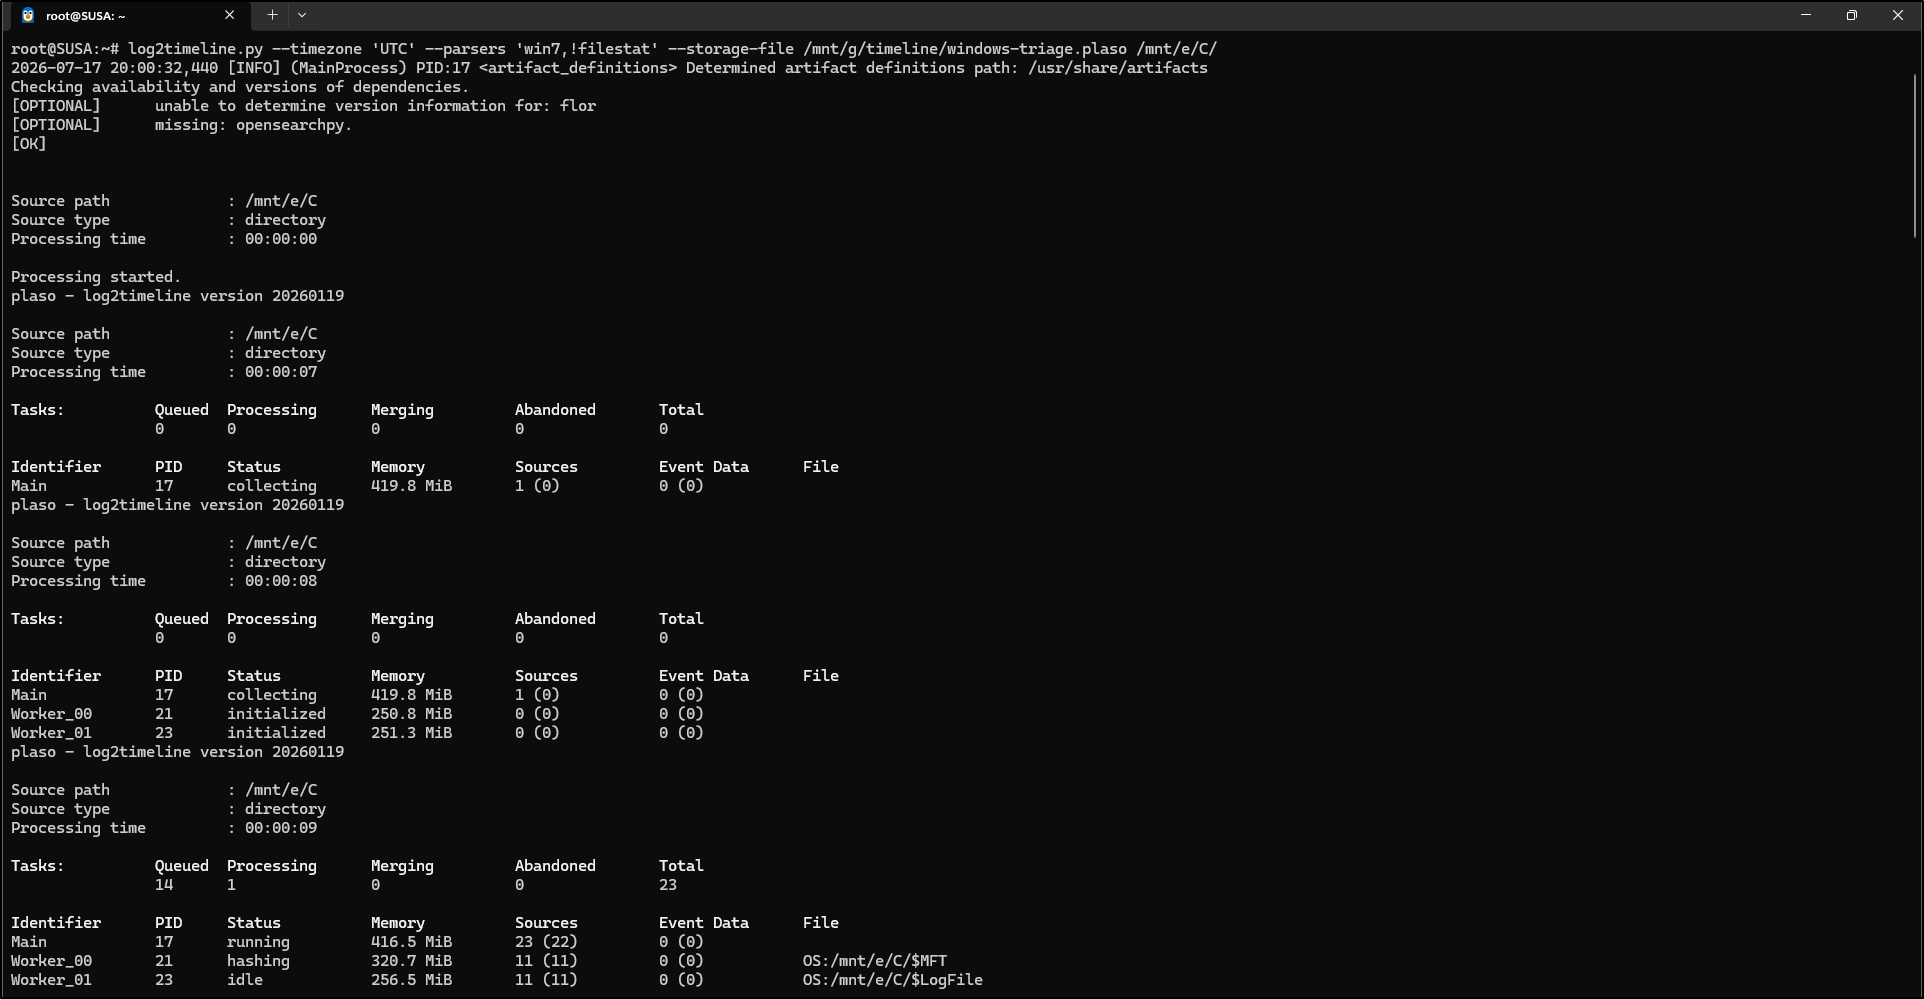
Figure 13. Start the collected-artefact parsing stage.
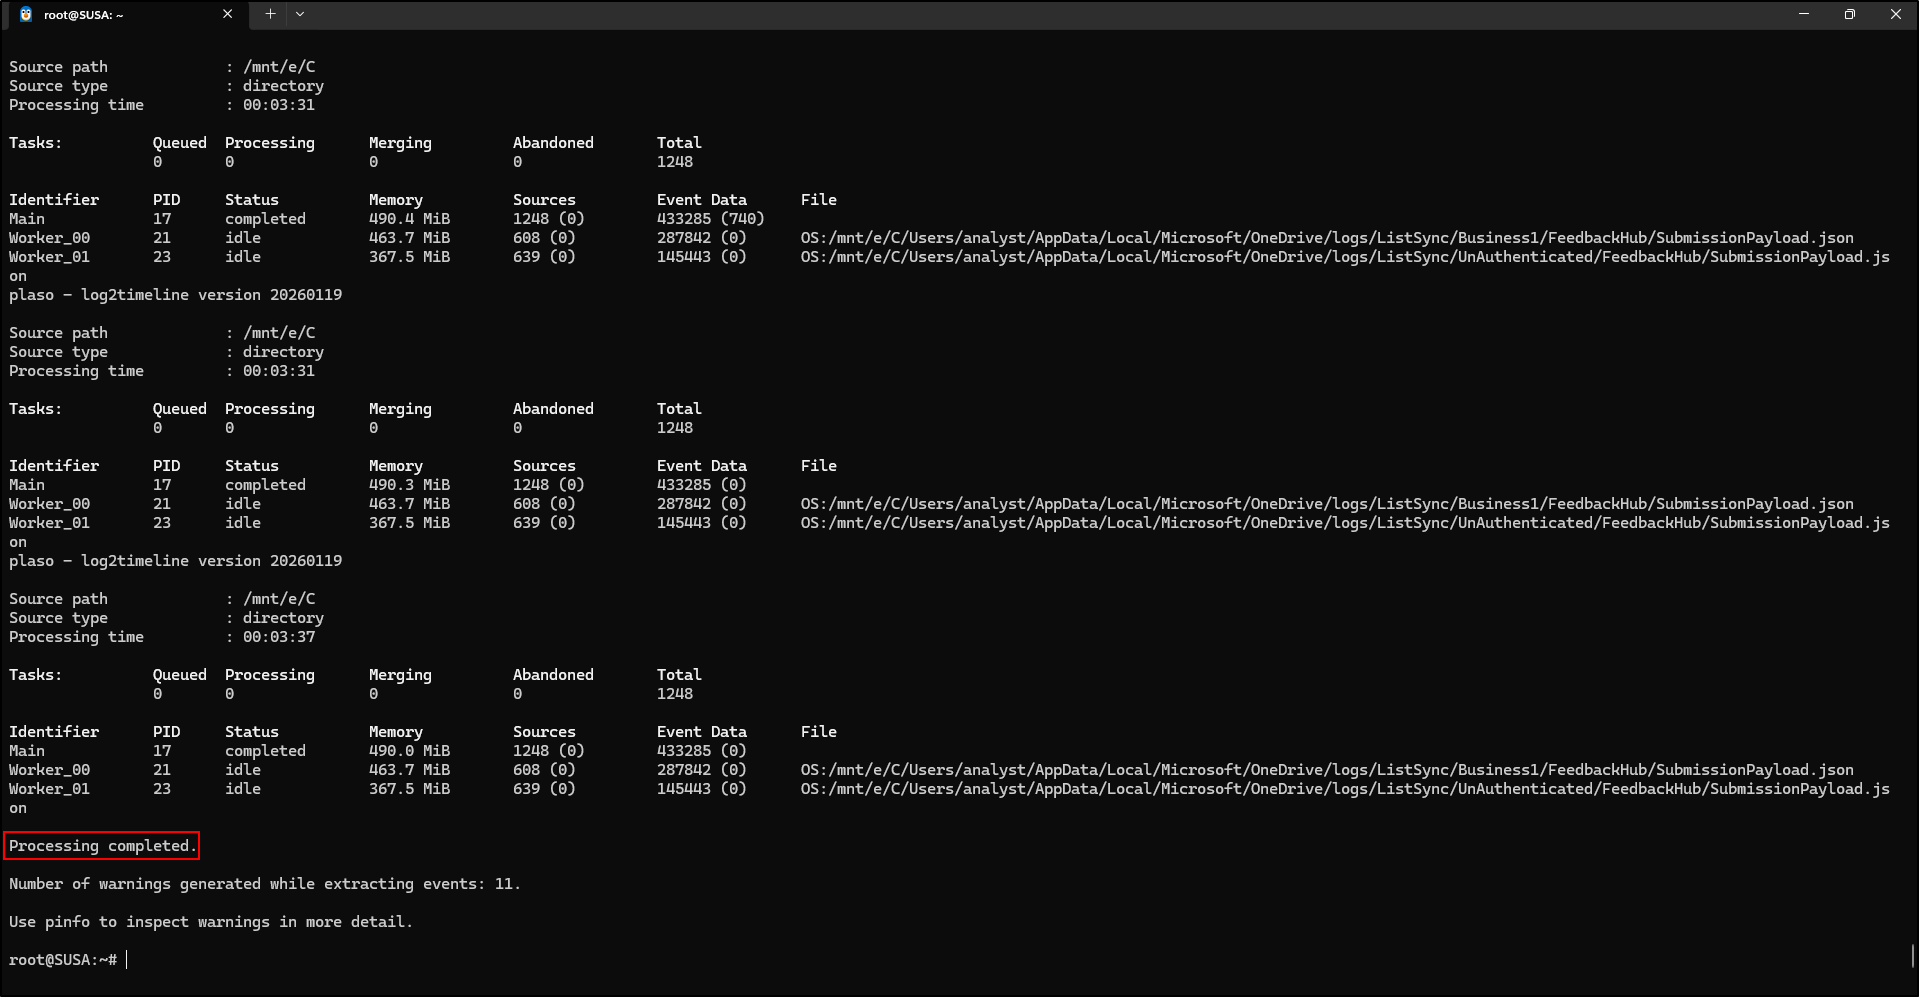
Figure 14. Inspect the original parsing progress and status.
Why this parser choice? win7 is a named Windows parser preset, not a requirement that the source run Windows 7. Verify it with log2timeline.py --parsers list. !filestat excludes file-stat timestamps from the mounted collection; the original source filesystem times will come from your chosen body file. This does not eliminate every possible overlap between artefacts.
Look for: processing completes for the intended source. Keep warnings and logs (the installed --logfile option can save processing messages). A large event count is not proof that every expected source was collected or parsed.
Add the chosen body file
Primary route / retain all body-file rows: run ONE import in the Plaso WSL terminal, using the same storage created above. TSK's timeline CSV is for review; it is not this import's input.
MFTECmd body-file route
log2timeline.py --parsers 'mactime' --storage-file /mnt/g/timeline/windows-triage.plaso /mnt/g/timeline/mft.body
Alternative TSK fls body-file route
log2timeline.py --parsers 'mactime' --storage-file /mnt/g/timeline/windows-triage.plaso /mnt/g/timeline/out.bodyfile
Look for: the selected file is the one you checked, the body-file processing completes and you retain its command/messages. Plaso's mactime preset selects the bodyfile parser; the TSK executable with the same name has a different role. Choose one body-file export so overlapping MFT/fls metadata is not imported by default.
Optional: create a filtered body-file derivative
Use this route instead of the unfiltered import above if you need a documented filtered derivative. Do not import both derivatives into the same storage. Keep the original body file and filter list, document exclusions and choose a separate run for comparisons. The screenshots below show the filtered route; filtering is optional for the workflow.
This process may take some time to complete. The original demonstration below creates a filtered derivative, windows-mft-final.body, using the keyword_filter.txt prepared in the TSK exercise. Keep mft.body unchanged, retain the filter list, and record exclusions. Filtering is optional: to retain all body-file rows, skip the grep/sed steps and use /mnt/g/timeline/mft.body as the later import input.
Excluding filestat avoids adding the mounted collection's file-stat timestamps through that parser; it does not guarantee that all other parsers produce non-overlapping events. Inspect the parser sources when comparing records. The source timezone in the example is UTC; substitute the known source timezone for artefacts that require it, and record the UTC output choice separately.
grep -a -v -i -f /mnt/g/timeline/keyword_filter.txt /mnt/g/timeline/mft.body > /mnt/g/timeline/windows-mft-final.body
The original demonstration also changes path separators on the filtered derivative for display. This is optional and is not required for the body-file import. Keep the unmodified original. To reproduce the demonstrated presentation:

Figure 15. Original optional filtered body-file presentation; keep the unmodified body file.
We are now ready to import the final file system timeline data into log2timeline:
log2timeline.py --parsers 'mactime' --storage-file /mnt/g/timeline/windows-triage.plaso /mnt/g/timeline/windows-mft-final.body
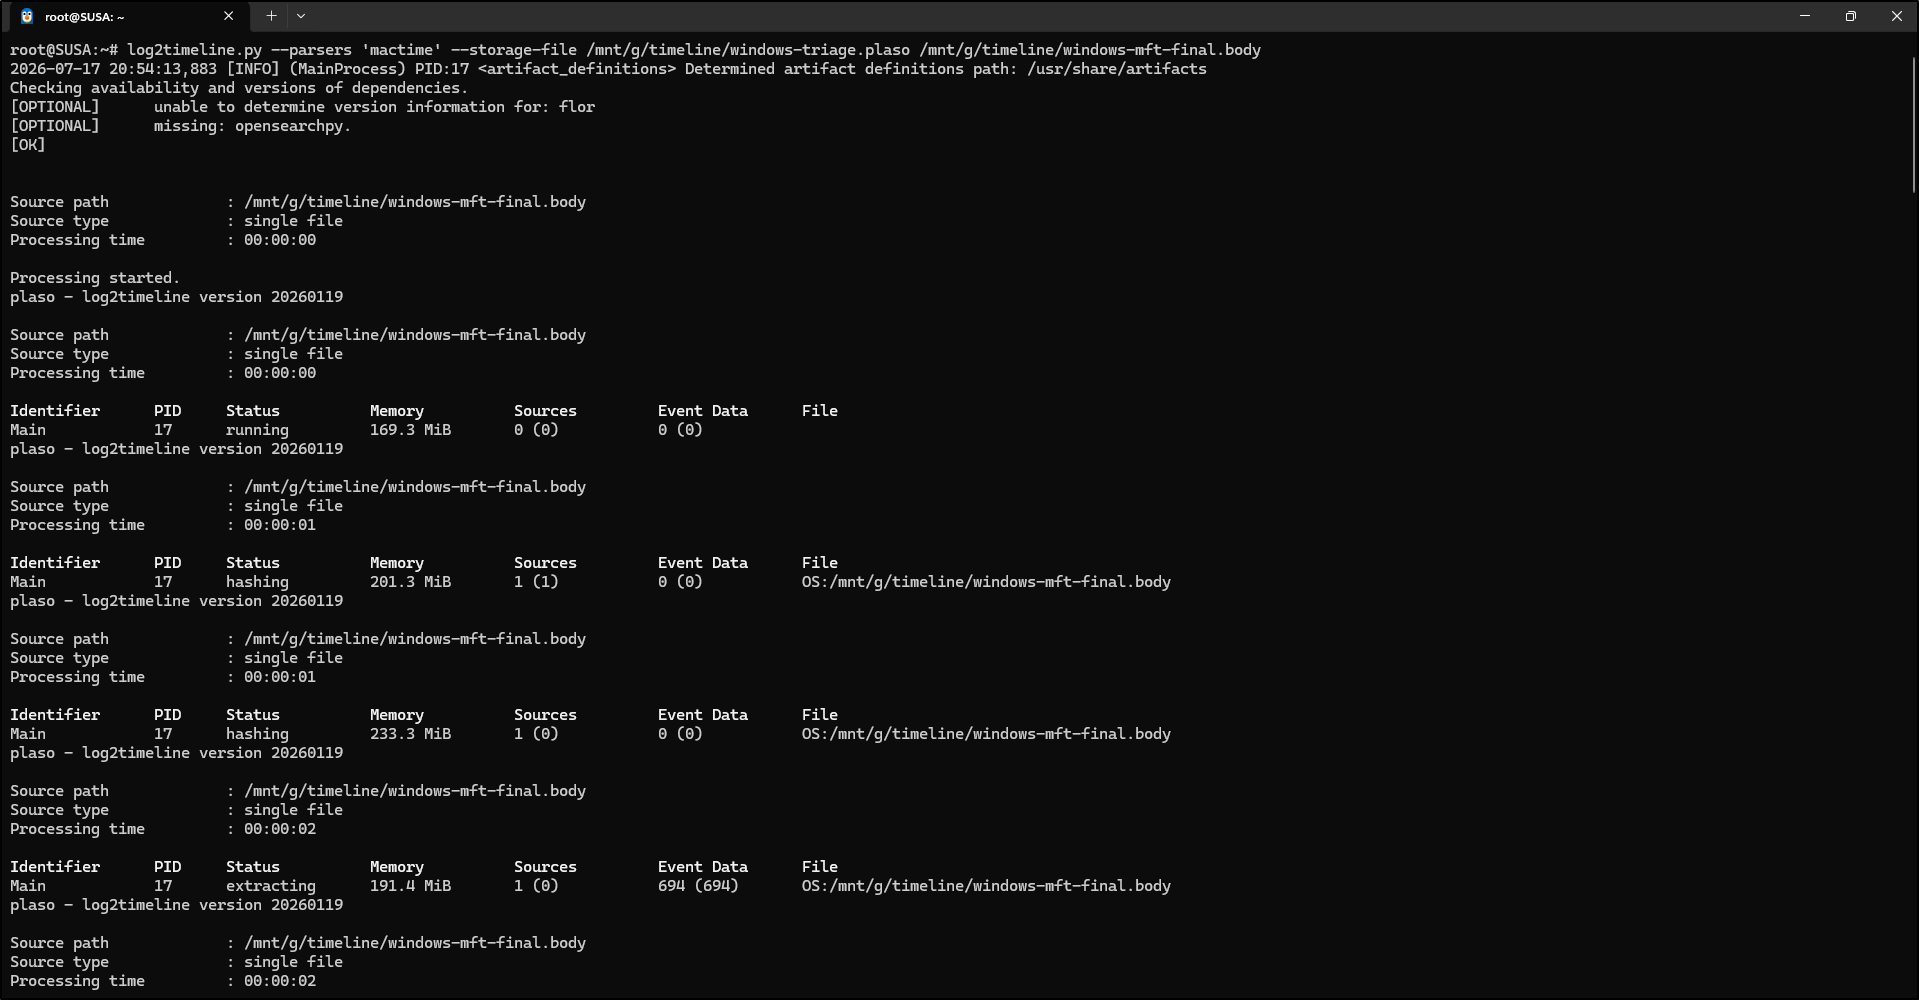
Figure 16. Import the original example derivative using the body-file parser preset.
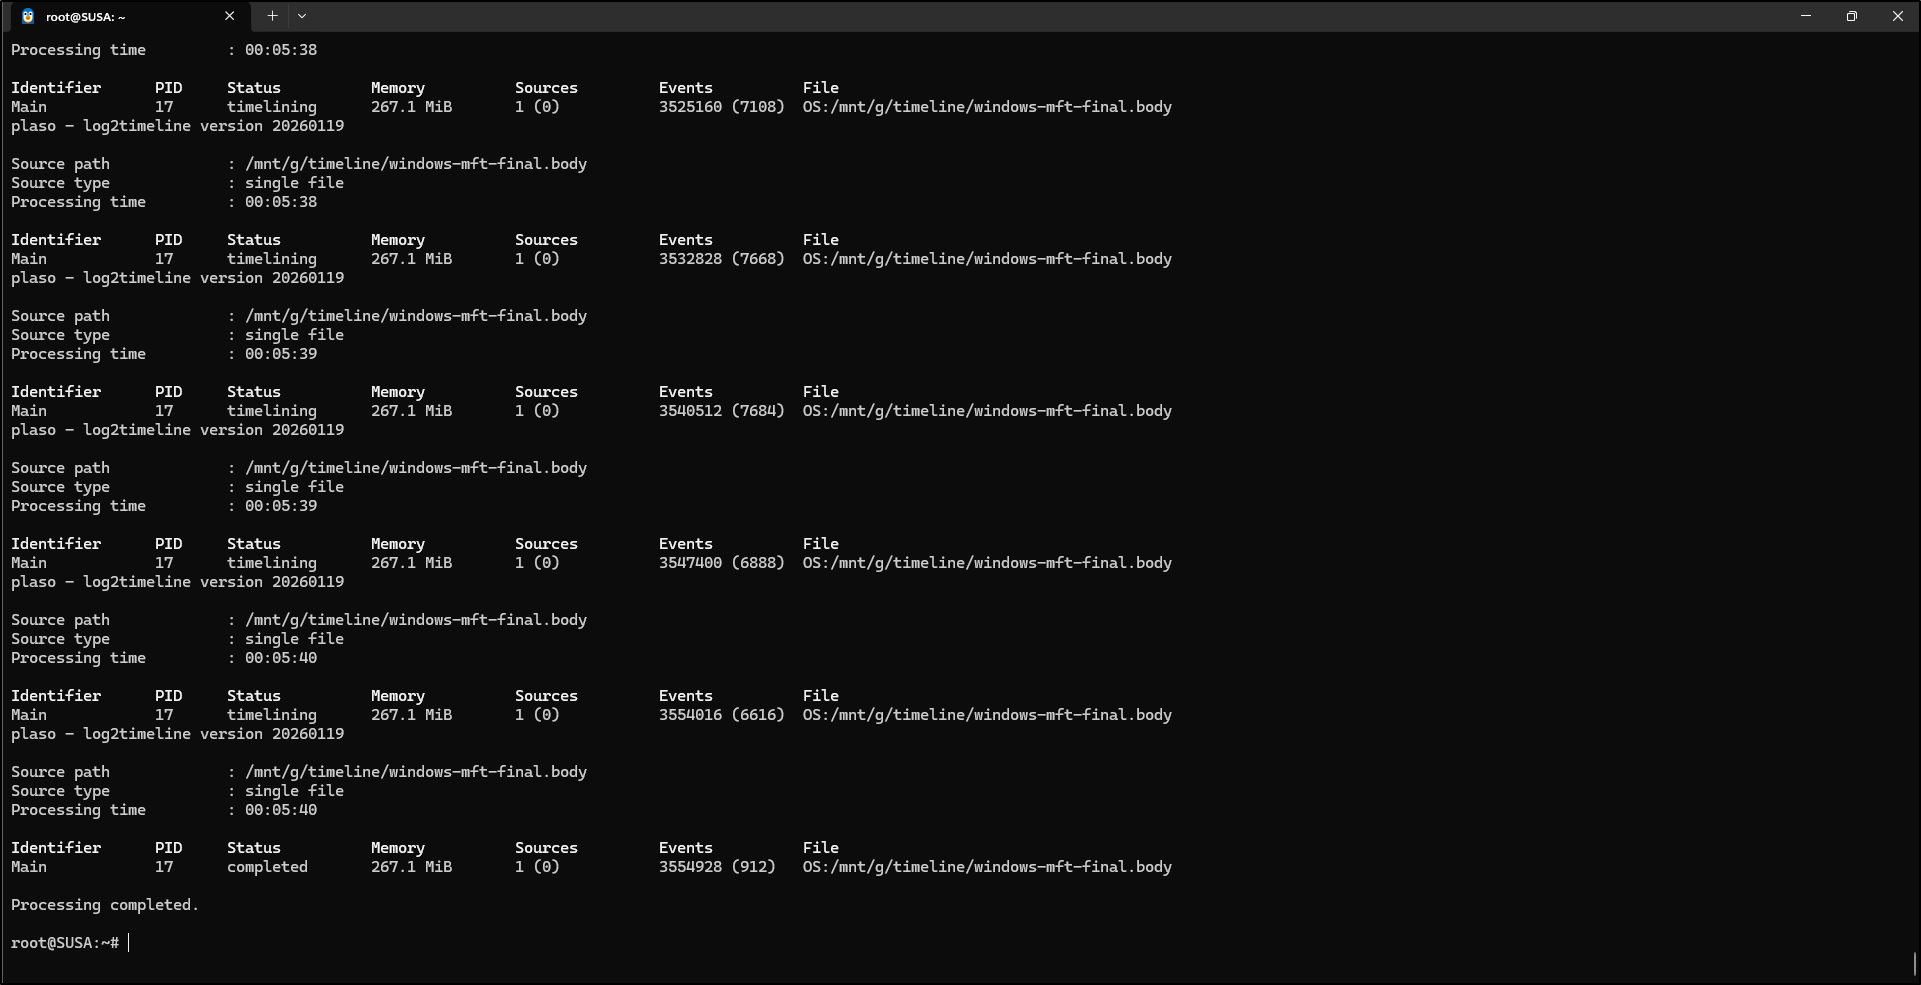
Figure 17. Inspect completion of the original body-file import; counts depend on the evidence.
Inspect processing results and coverage
Run in Plaso WSL: inspect the storage before exporting. Save the report alongside the processing logs.
pinfo.py -v /mnt/g/timeline/windows-triage.plaso > /mnt/g/timeline/plaso-info.txt
less /mnt/g/timeline/plaso-info.txt
Press q to leave less. Inspect the recorded sessions/commands, processed sources, parser event types and warnings. Expect the chosen body file and the collected artefact types your case needs. If an expected browser or event-log source is absent, check collection scope, parser selection and warnings; do not invent a record to fill the gap. Retain the installed-version output even when its wording differs from the screenshots.
Look for: traceable sessions for the intended imports, relevant event types and understood warnings. Processing a single body file alone produces filesystem-derived events; it does not add browser or Windows event-log evidence.
Export the Super Timeline CSV
Input: the checked .plaso storage. Output: a complete review CSV. Export using psort.py; renaming the storage to .csv does not convert it.
After the log2timeline commands are complete, we have a Plaso database file with artifacts ready to export. To get the data exported into a CSV or other format for timeline review, we use psort.py. Run the following command to export the data to CSV:
psort.py --output-time-zone 'UTC' -o l2tcsv -w /mnt/g/timeline/windows-triage.csv /mnt/g/timeline/windows-triage.plaso
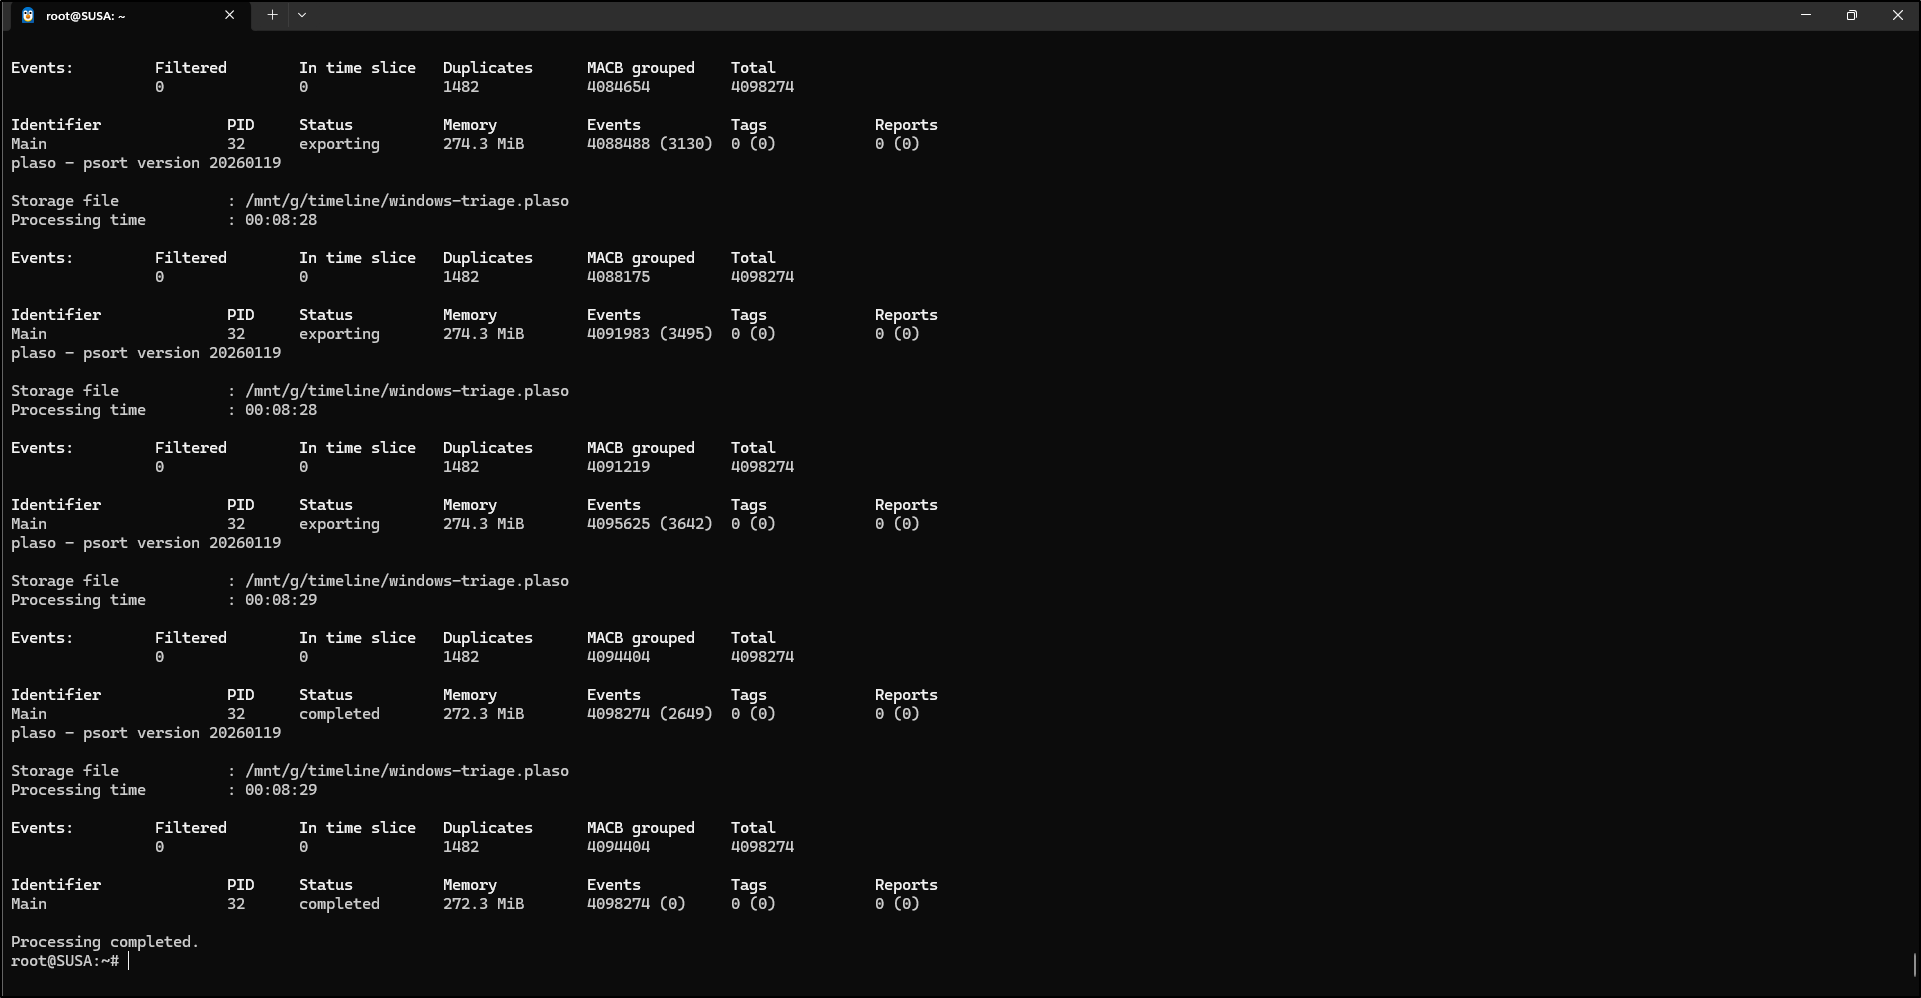
Figure 18. Export the Plaso storage to a timeline CSV using psort.
Look for: successful export and retained export messages. l2tcsv selects a fixed CSV schema; check psort.py -o list in your installation. Record source timezone separately from the chosen UTC display. Exported row counts can differ from stored event counts because of filtering and duplicate handling; record those settings and retain the storage.
Investigate and hand off
Verify the Super Timeline
Confirm that the CSV was created:
Optionally verify that it contains records:
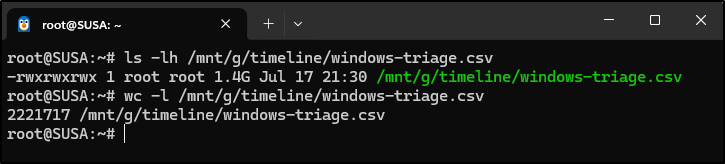
Figure 19. Check the resulting CSV file and line count; these checks do not establish source coverage.
Then return to Windows and browse to:
Open windows-triage.csv using Timeline Explorer.
Note: Large timelines may take several minutes to load. Timeline Explorer may appear unresponsive while importing and indexing the CSV.
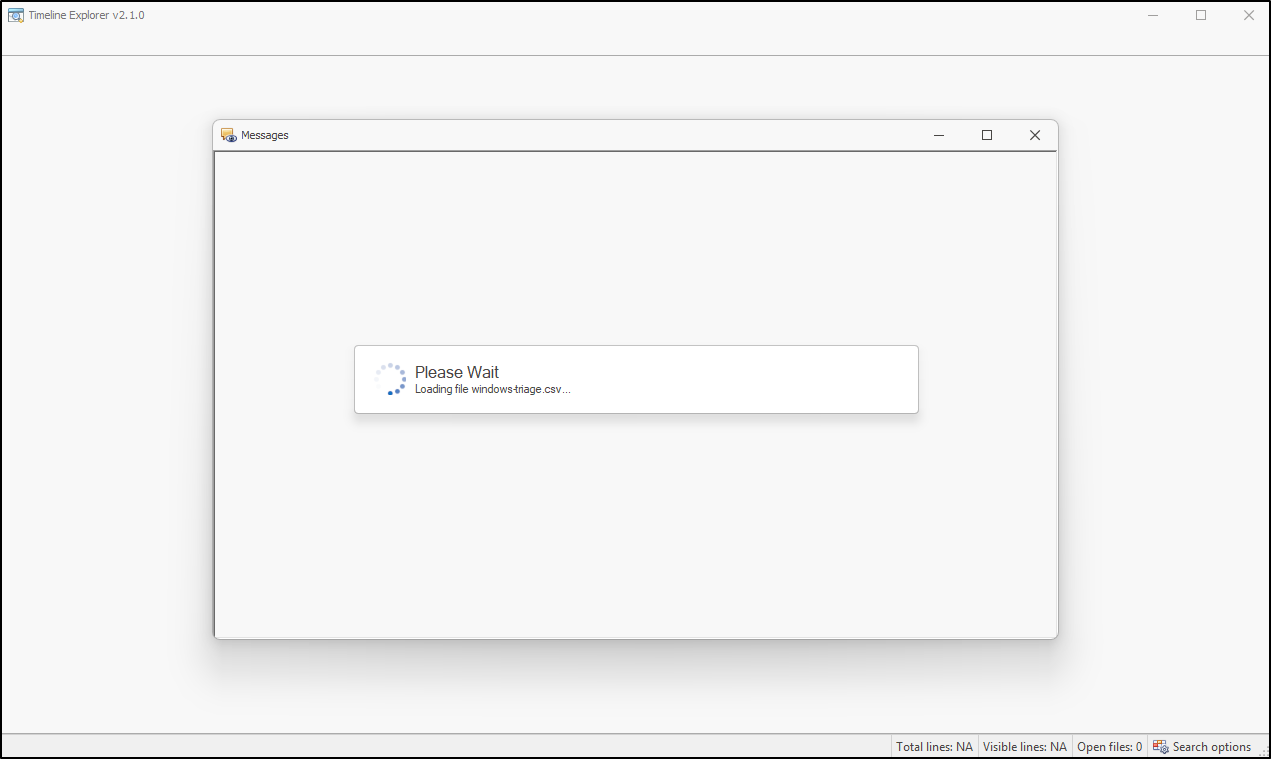
Figure 20. Allow Timeline Explorer to load and index the CSV.
Once loaded, check for the following records where the corresponding artefacts were collected and parsed. Missing expected sources require checking collection scope and parser messages:
- timestamps in UTC;
- Windows Event Log records;
- file system and MFT events;
- records from other artifacts collected by KAPE; and
- sortable fields such as
date,time,source,sourcetype,type, anddescription.
Use Timeline Explorer’s column filters and keyword search to narrow the timeline according to the case. For example, filter by time range, username, executable, IP address, Event ID, or suspected indicator.
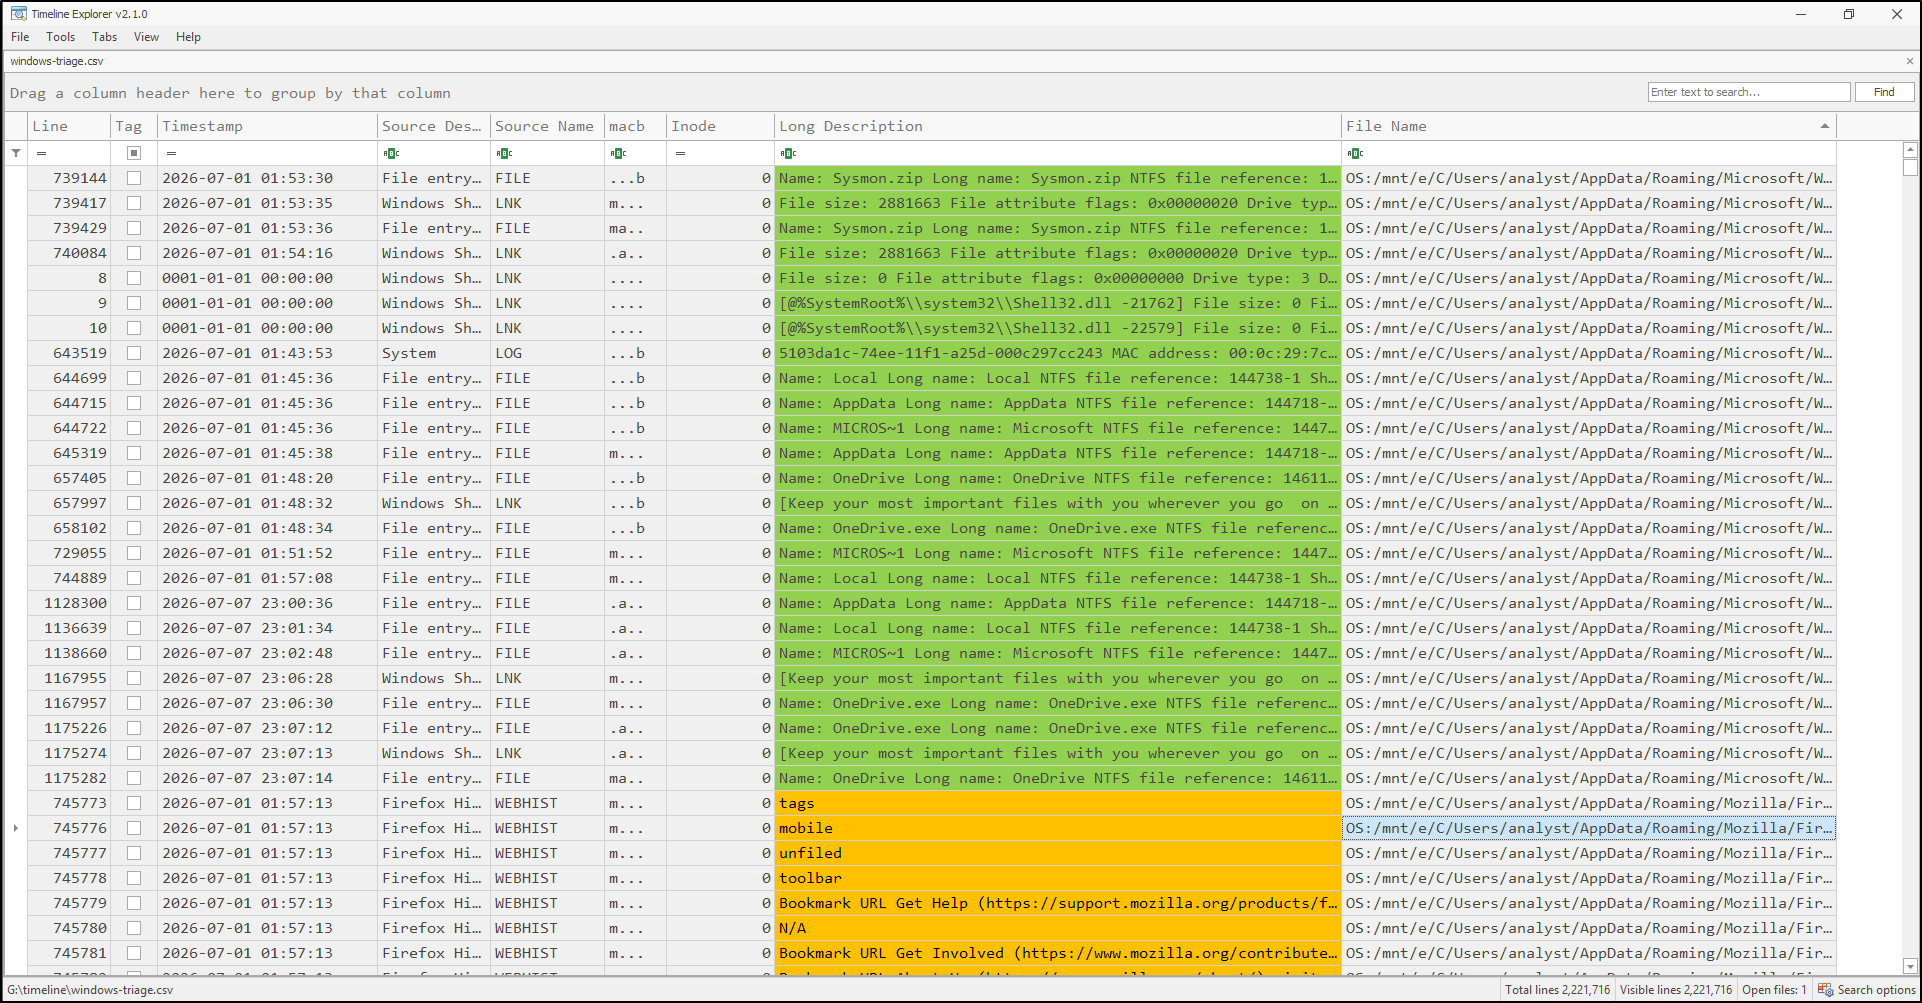
Figure 21. Review the exported source records with documented filters.
Explain a short sequence
Start with one known path or action from your training case. Use a short time window, then inspect separate records from at least two available artefact types. Record their times, source identifiers and what each event actually means. A browser download record and a filesystem creation timestamp can support a sequence; timestamp proximity alone does not prove execution, intent or causation. If only one source is available, report that coverage limit.
You can start a literal filename search in Plaso WSL before opening the complete CSV in Timeline Explorer:
Use your actual known filename. Keep each matching row's full path and source; a match alone does not establish execution. The Interactive Lab rehearses these same commands in a simulated Plaso WSL terminal.
Save the original unfiltered export; record review filters separately. Keep source host/volume, collection times, input/output hashes, versions, commands, logs, the pinfo report and your finding. Preserve the source artefacts so another analyst can inspect the records behind the timeline.
Finish line: a checked storage file and complete CSV, plus an observation, a limitation and one useful next check. Practise this in Hands on Labs.
Troubleshooting and references
| Symptom | Check |
|---|---|
| Input missing | Confirm the Windows/WSL drive mapping and the actual collected-host directory; do not substitute a file on name alone. |
| Unexpected timestamps | Separate source timezone, UTC export, timestamp type and clock accuracy. |
| Missing event types | Check collection coverage, installed parser presets and processing warnings with pinfo. |
| Counts differ | Inspect export filters and duplicate handling; repeated imports can also cause overlaps. |
| Storage already exists | Establish whether you are adding the intended second input or starting a new run; keep runs separate. |
| Large CSV loads slowly | Keep the full export, wait for loading/indexing and use a documented review copy if necessary. |
References: log2timeline, parser presets, pinfo, psort, Windows image mounting, and SMB signing and guest access.