Detect a Beacon
Prepare 1768.py and examine a saved file. The original screenshots stay beside their instructions. They show failed sanity checks and a run with no configuration displayed; they do not show a confirmed Beacon. The labs add a verified decoding example using inert training data.
Prepare 1768.py
Download the script and reference file
Download 1768.py and 1768.json from Didier Stevens' repository. Use Download raw file to save each file, rather than saving the GitHub web page.
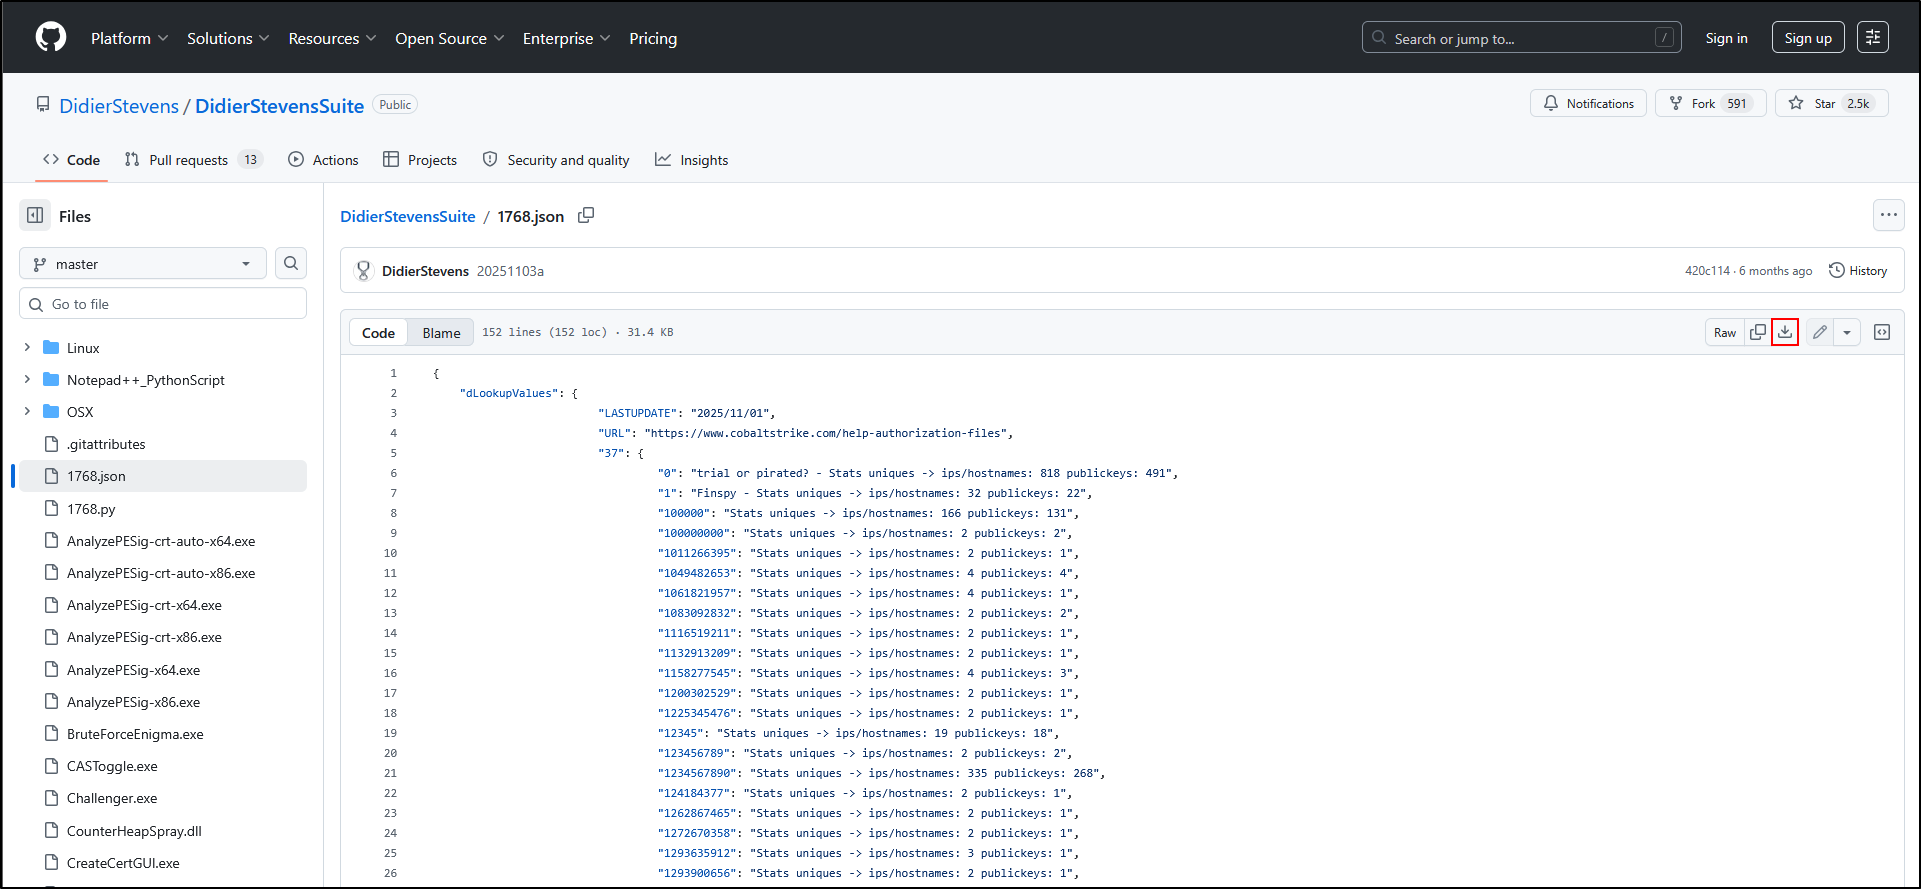
Keep 1768.json with the script. It enriches some decoded fields with reference information.
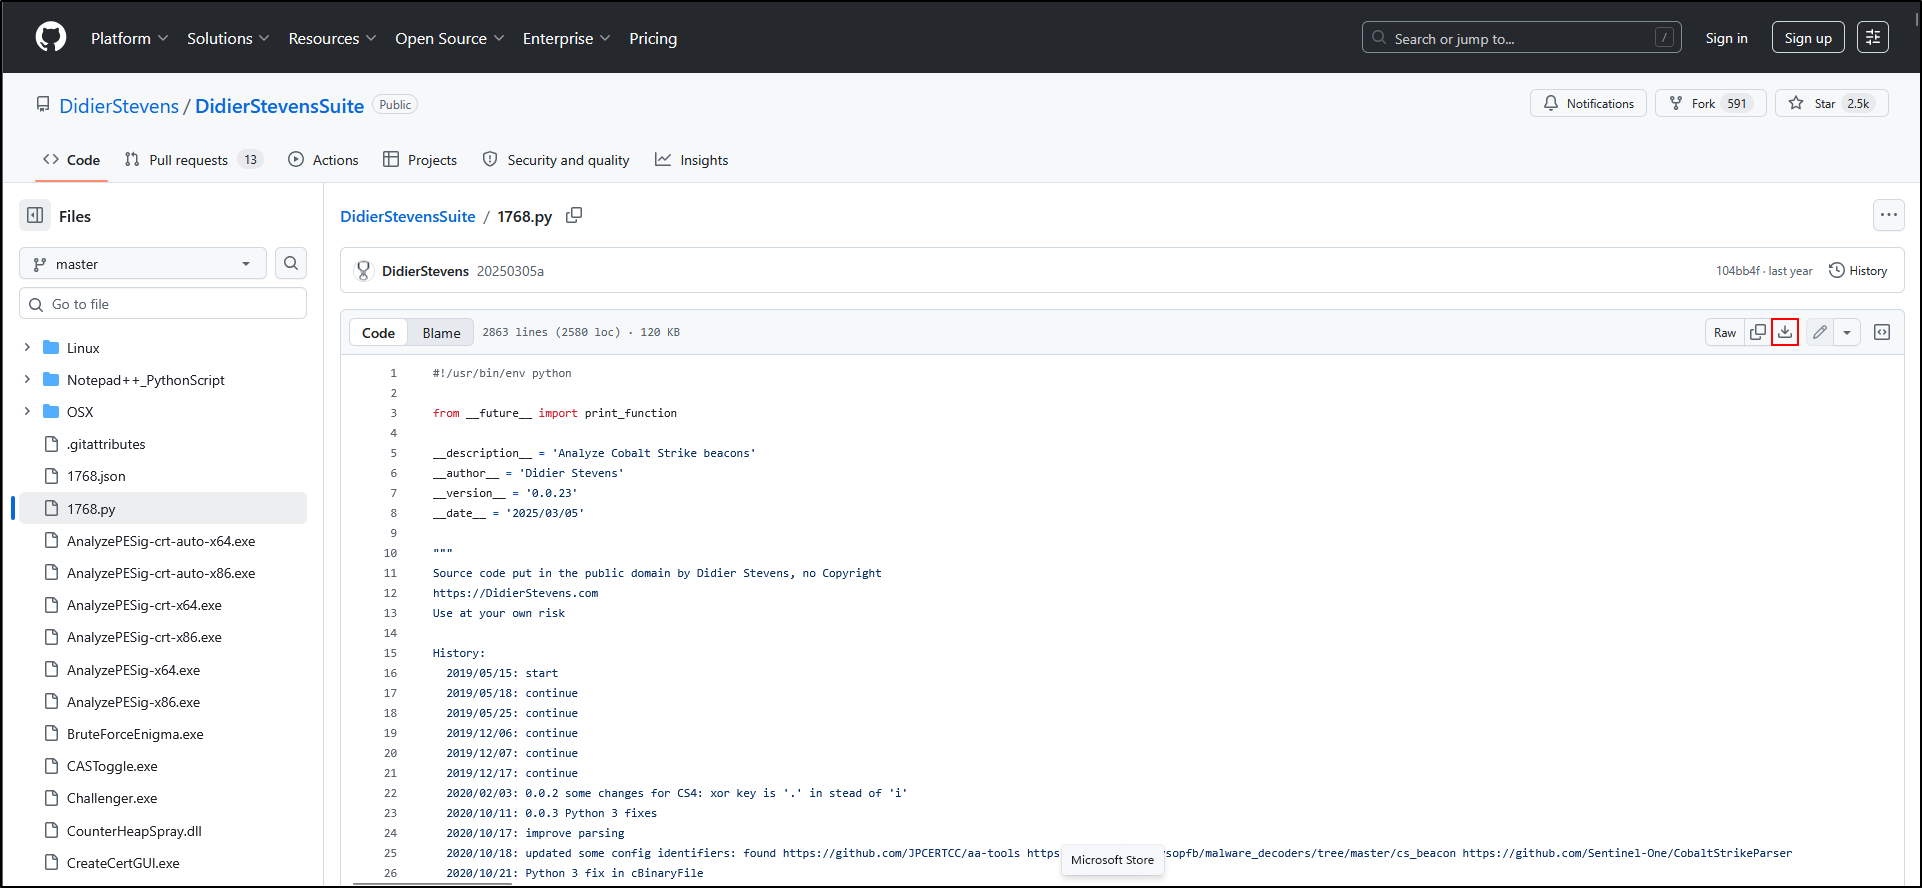
The saved filename should be 1768.py, without an extra .txt or .html extension.
Place both files in C:\Tools\1768.
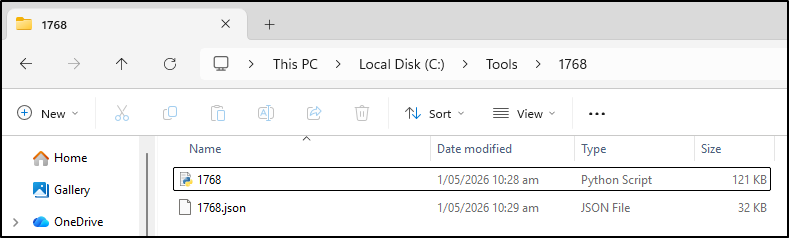
Check that both files are present before continuing.
Check Python and dependencies
Open a normal Command Prompt in your analysis VM. Administrator access is not required just to read training files in folders you can access. Run these commands one at a time:
Look for: a Python 3 version and the 1768.py help text. Record the tool version with python C:\Tools\1768\1768.py --version. Use python -m pip to install packages for the interpreter used by your commands. If python is not recognised, resolve the Python installation before continuing.
For minidump analysis, also install its reader:
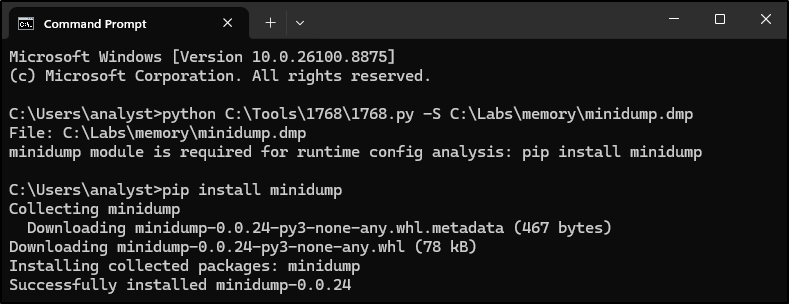
The original screenshot uses pip install minidump. The command above explicitly selects the Python interpreter used for analysis.
Optional: update pip if installation requires it
A pip upgrade notice alone does not mean analysis failed. If an installation error requires newer pip, run:
The original command used C:\Users\analyst\AppData\Local\Python\pythoncore-3.14-64\python.exe -m pip install --upgrade pip. That location is specific to that workstation; use your VM's interpreter.
Optional: add the folder to PATH
The commands here use the full script path, so you can skip this step. PATH is Windows' list of folders to search for commands. Adding the folder can make other launch methods more convenient, but does not install Python or its modules.
Open Start → Environment Variables → Edit the system environment variables → Environment Variables.
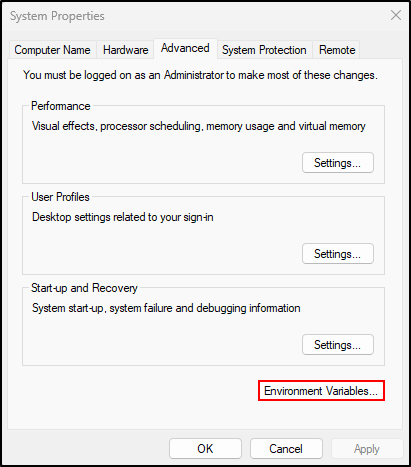
Use User variables for your own account; changing the system PATH is not needed.
Under User variables, select Path, then Edit.
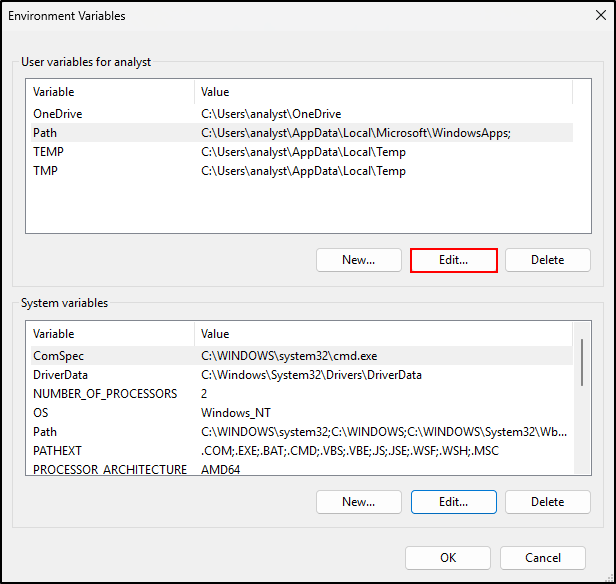
Click New and add one entry:
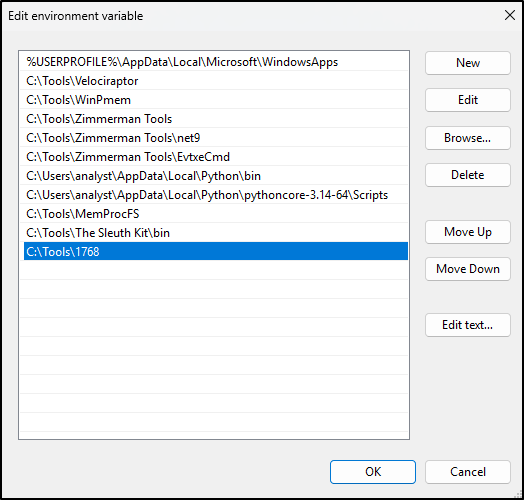
Click OK to save each window. Open a new Command Prompt after changing PATH. Continue to use the full paths below for reproducible commands.
Identify the input file
Keep the original evidence and analyse a working copy. Create C:\Labs\memory if needed. The original workflow moved two memory samples from C:\Tools\VolatilityWorkbench-v2.1 into this folder. Copy them instead to retain the source copies. Your folder contents depend on the samples you prepared.
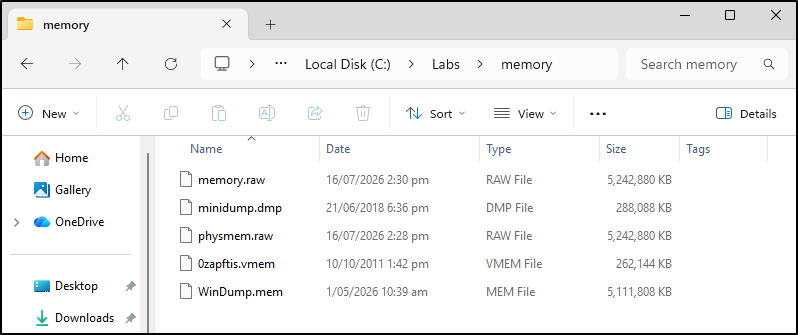
Use C:\Labs\memory throughout. The earlier text used C:\Lab\memory; the screenshot and commands use Labs.
Understand the CCC.exe example
The original example names an extracted process minidump for CCC.exe as minidump.dmp. That filename is not evidence of Cobalt Strike. Record the dump's source image or host, process ID, export method, capture time and why the process was selected. Do not assume that any file called minidump.dmp is the evidence shown here.
See Volatility and Workbench for the wider memory workflow. Copying or renaming a full .mem, .raw or .vmem image does not turn it into a process minidump. Without the example dump, use the supplied inert lab files. The screenshots are a worked example, not a promised result for every sample.
Look for: the intended file and its SHA-256 hash. A hash identifies the bytes you analysed; it does not establish whether they are malicious.
Run a baseline scan
Start with the normal search and retain the complete output:
Look for: the File: line, configuration fields, a sanity-check result and any errors. No configuration may be displayed. Resolve errors before treating a blank result as completed analysis.
Expand the search and check candidates
Try additional XOR keys
The original command uses -x to try all 256 single-byte XOR keys rather than the two standard keys. XOR is a simple way of encoding bytes. A wider search can produce accidental matches.
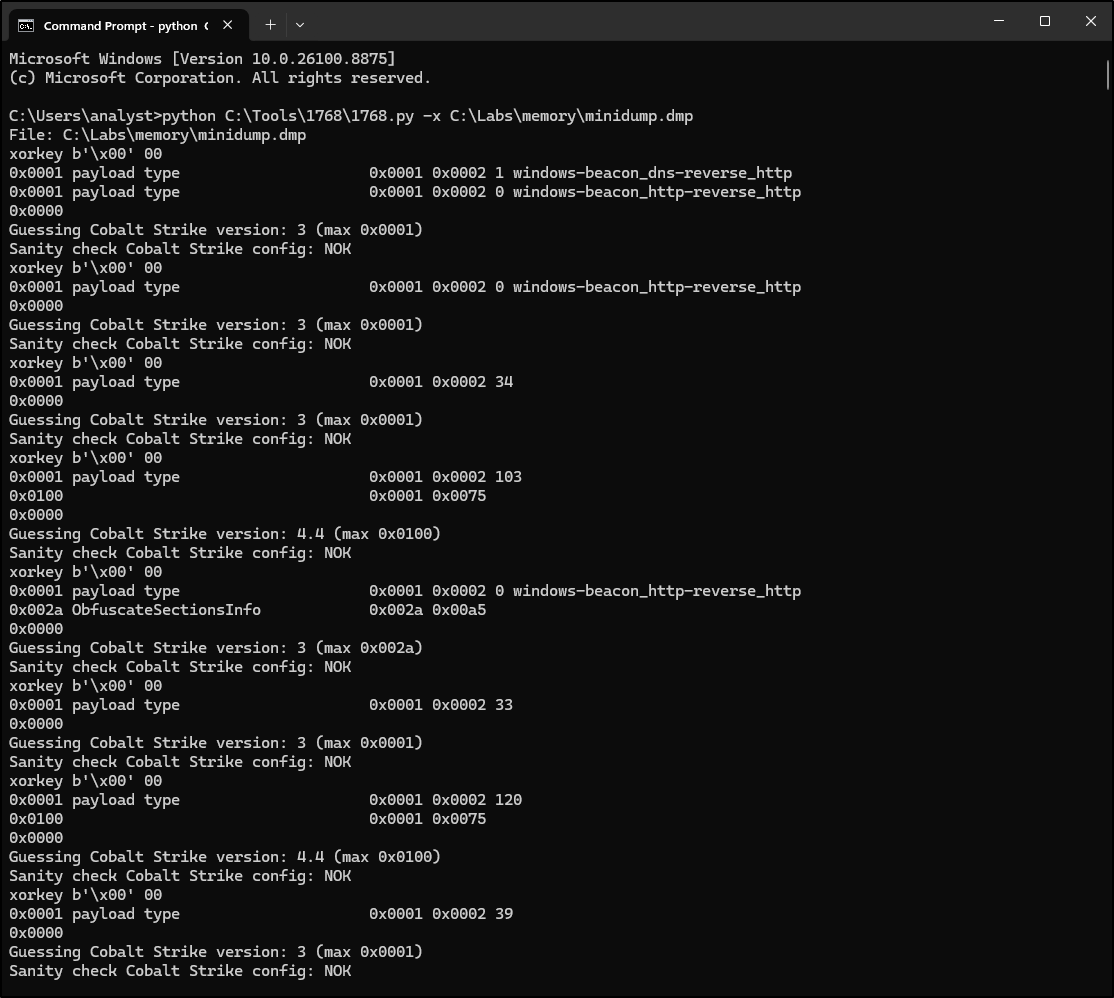
Look at NOK, not just the printed payload name. These candidates failed the tool's sanity check and do not confirm a Beacon.
Compare the same search with filtering
Add -S while keeping -x, so only filtering changes:
Look for: candidates that remain. -S excludes configurations that fail limited plausibility checks. Surviving candidates still need validation; rejected data is not automatically harmless.
The original guide also ran this command, using the normal key search with filtering:
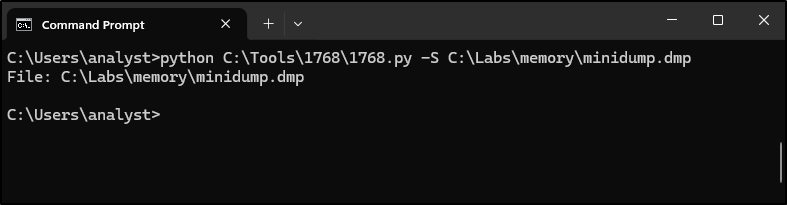
No configuration is displayed in this run. Because it omits -x, this is not a comparison of filtering alone against the expanded scan. It does not establish that the host is clean.
Interpret a useful configuration
Start with a few fields rather than every line:
| Field | Plain meaning | Next evidence to check |
|---|---|---|
payload type |
Configured communication method, such as HTTPS. | Process behaviour and network records. |
port |
Configured destination port. | Firewall or endpoint connection records. |
server,get-uri |
Configured server and web request path. | DNS and proxy records for the host and time. |
sleeptime |
Configured delay in milliseconds. | Network timing patterns; actual timing may vary. |
The Full Lab supplies an inert decoding example. It also shows why OK is limited: the tool checks a recognised payload type and a public-key prefix. Synthetic bytes can pass without containing a working Beacon.
Save a defensible finding
Keep the input hash, source context, tool version, exact commands, full output and errors. Separate observations from interpretation.
Example for these screenshots: The expanded search displayed candidates marked NOK. The normal search with sanity filtering displayed no configuration. These runs do not confirm a Beacon. Review the process context and available network evidence; do not conclude that the host is clean.
Try the labs to practise decoding, filtering and writing a handoff.
Tool references
- Didier Stevens: Cobalt Strike tools and downloads
- 1768.py source and embedded manual, also available with
python C:\Tools\1768\1768.py -m.