Maldump: Set Up & Export
Choose one installation route, identify the Windows source, then save the records and recovered bytes in their own case folder.
The screenshots illustrate Maldump 0.5.0 and Timeline Explorer v2.1.0.0. Check the version and help of your installed tools.
Before you begin
A place to work
Use a disposable Windows analysis VM with administrator access. Install the tools here, away from the original incident endpoint.
A known source
You need a Windows volume containing recoverable quarantine entries. The Full Lab explains how to prepare a training source.
A place to save
Keep output in a new case folder separate from original evidence. Keep exported content isolated and do not execute it.
Accessing Maldump in SUSA
Maldump lists and extracts antivirus quarantine files from a live Windows system or a mounted Windows volume. It can also export quarantine metadata to CSV. It does not dump process memory.
Choose an installation method
The upstream project offers release binaries and a pip installation. The PDM steps below are an alternative for working from the source repository, not a prerequisite for every installation. Check the upstream README for the requirements of your chosen version.
Release binaries: recommended first
Download a Windows release from the official project releases. Verify its source, record the release and file hash, and extract to C:\Tools\maldump. Run maldump.exe --help from that folder. To use maldump from a case folder, make the verified tool available on your VM's PATH, or replace maldump in each example with its full executable path.
Choose one route. The upstream project recommends binaries for users. PDM and C++ Build Tools are not prerequisites for every installation.
Install Maldump with pip
Open an administrator Command Prompt and run the following command to install Maldump:
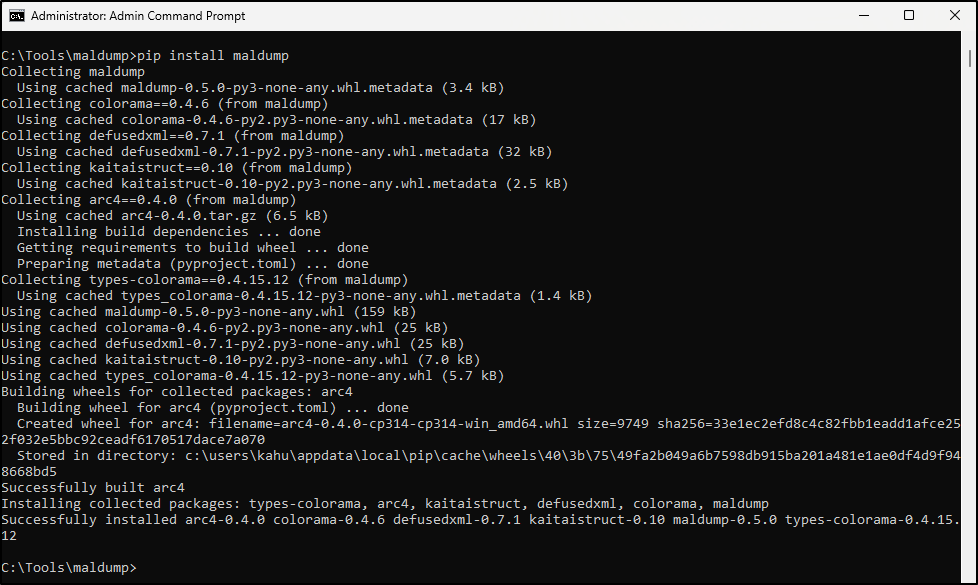
What to notice: screenshot 07 shows Maldump and its dependencies installing successfully. If a dependency reports a missing C++ compiler, follow the Build Tools steps below, then retry this route. Confirm which Python interpreter and Scripts folder you are using.
Source checkout with PDM
Choose this alternative when working from source. Use pdm run python -m maldump wherever this guide says maldump, from the repository folder.
Install PDM (source checkout)
PDM is a modern Python package and dependency manager supporting the latest PEP standards.
Use a disposable analysis environment
This command downloads and immediately executes an internet hosted installation script. Run it only in an authorised, disposable build or analysis VM, never on original evidence or a production endpoint. Review the script at the official PDM project before execution, take a VM snapshot and record the installed version.
Open an administrator PowerShell prompt and run the following command:
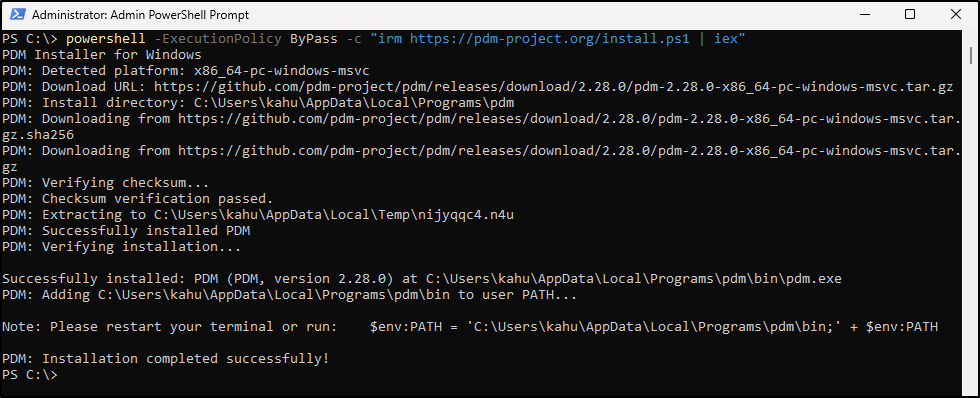
What to notice: screenshot 01 ends with the PDM version and a request to refresh the terminal environment. Reopen the terminal if pdm is not yet found.
Install Maldump from source
Alternatively, navigate to C:\Tools and run the following commands to install Maldump:
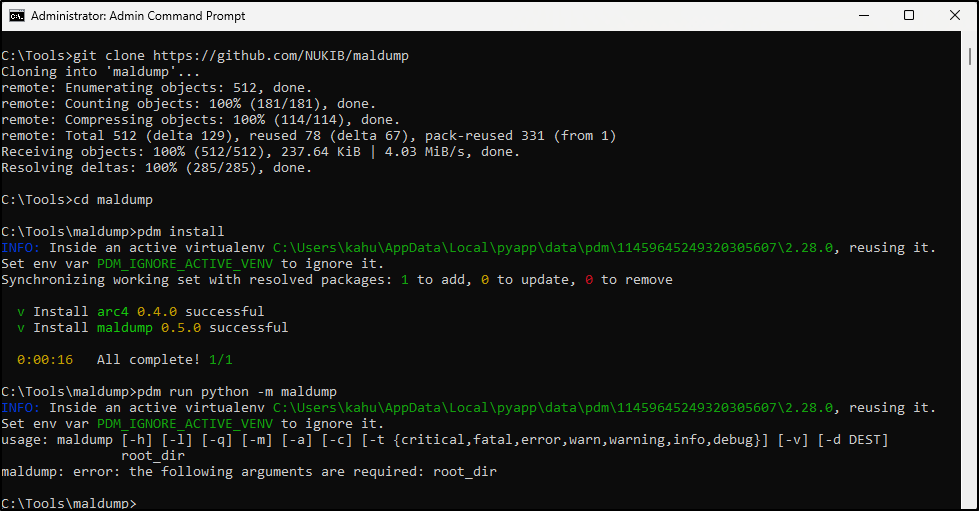
What to notice: screenshot 08 shows installation completing, followed by a missing root_dir argument. Maldump loaded, but that last command did not identify a Windows source and did not complete a scan.
Once your training Windows volume is mounted as F:, the complete listing command is:
Install Visual Studio Build Tools for C++
These original steps apply when a Python dependency needs compilation and reports a missing compiler. Complete them on the disposable analysis VM, then return to your chosen installation route.
Download Visual Studio Build Tools for C++.
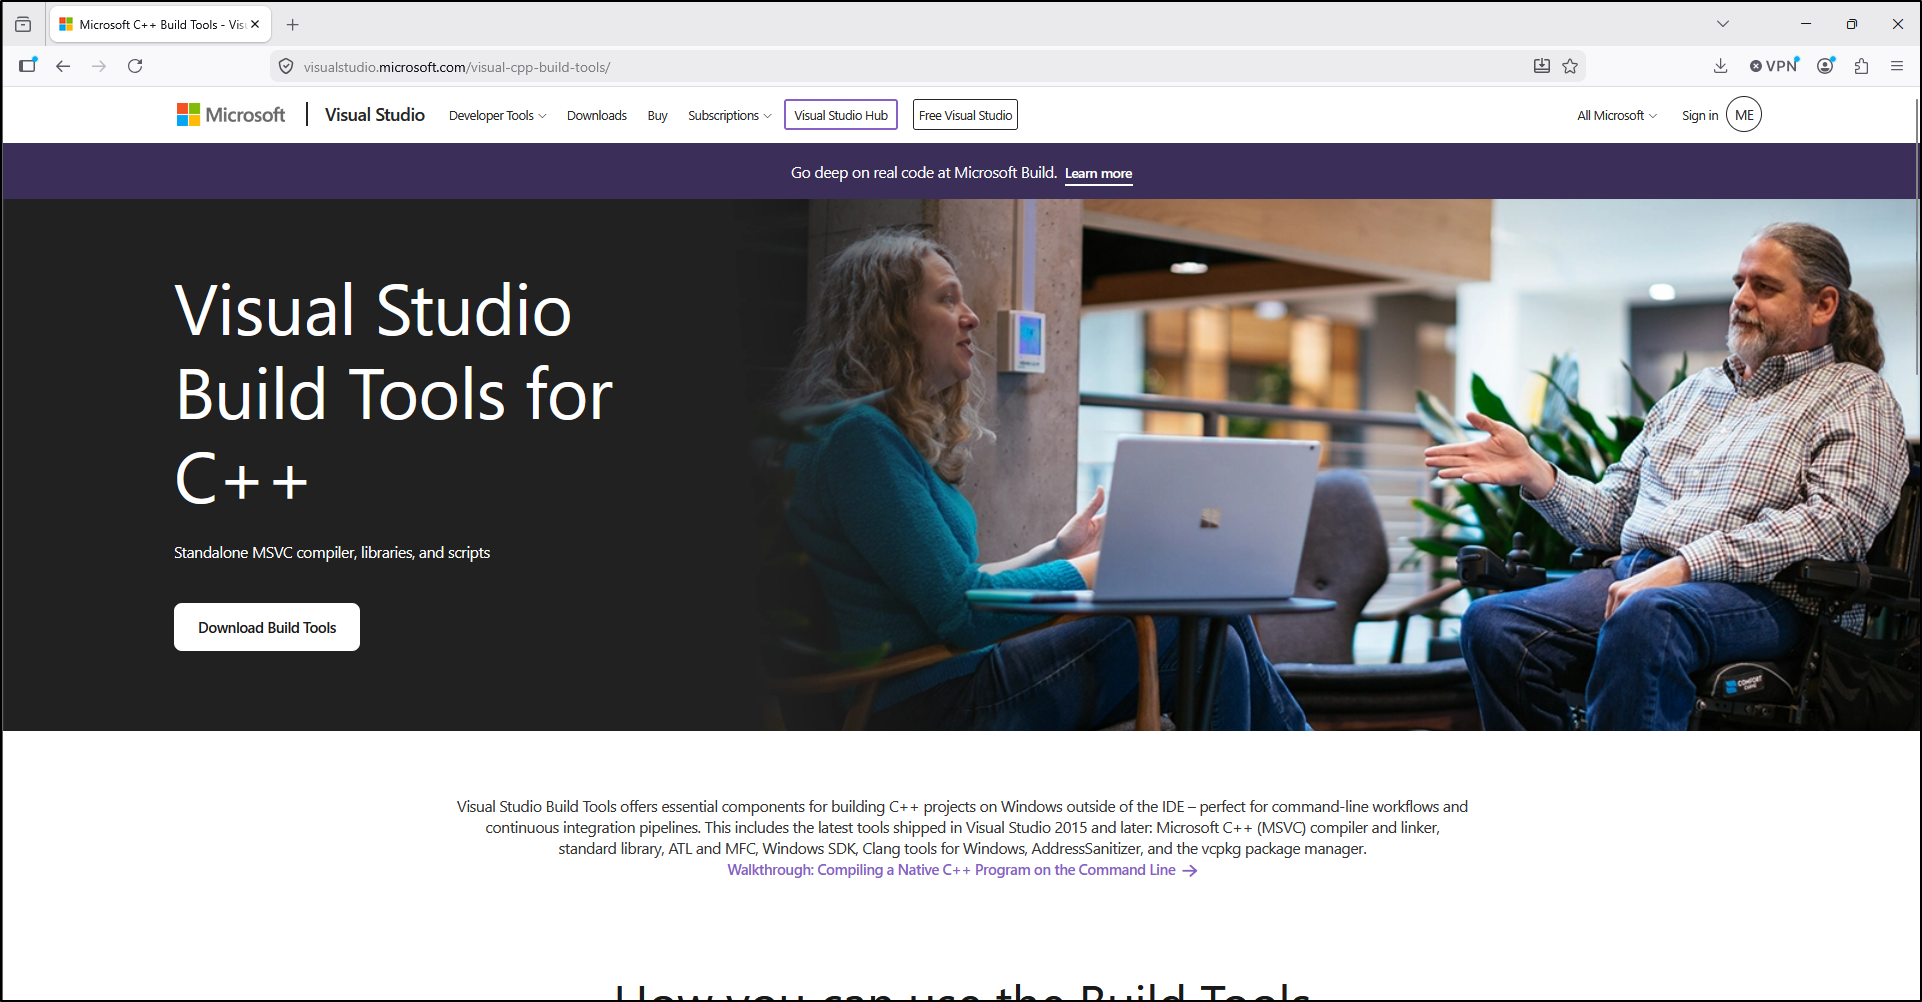
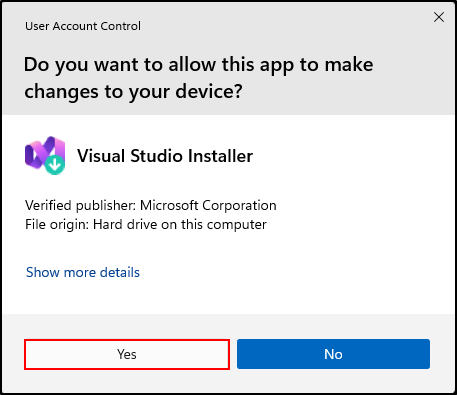
Open the downloaded executable and click Yes to install.
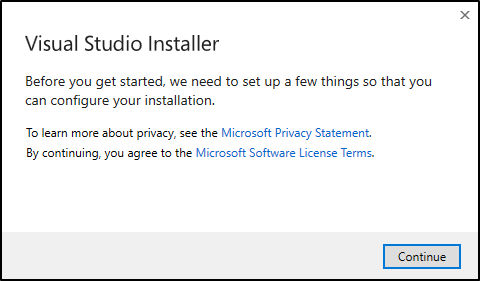
Click Continue.
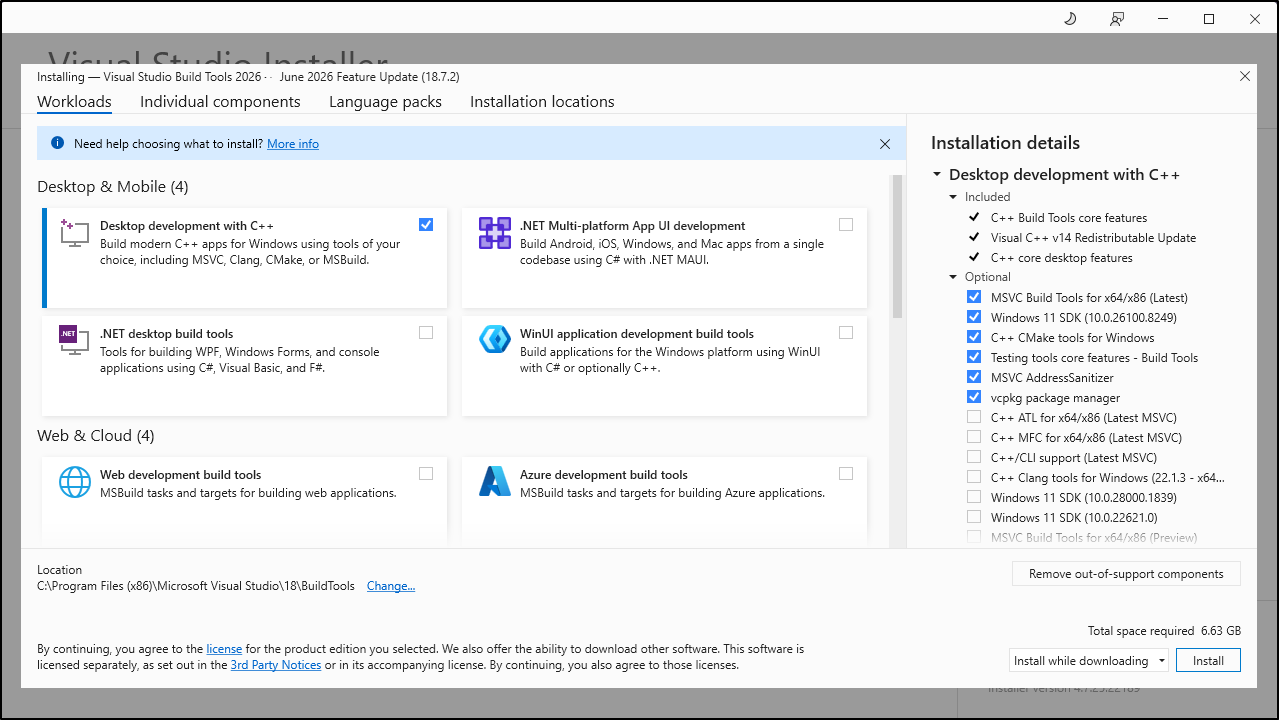
Select Desktop development with C++ and click Install.
Once the installation is complete, click OK and restart Windows.
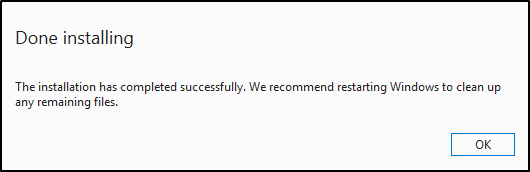
What to notice: screenshots 02-06 show the C++ workload and installation completion. Component names may differ on your VM.
Verify installation
In Administrator: Command Prompt, check the version and available options:
Look for: a version and help naming root_dir, --list, --meta, --quar, and --dest. Record the tool source, version, and launcher. For PDM, use its full prefix with --version or --help from the checkout.
Choose the source and output
Source: C:\ in the original examples means the Windows volume inside that training VM. For an acquired Windows volume mounted as F:, use F:\. Select the Windows installation root, not the archive file, a RAM image, or an individual executable. For an image, use a verified working copy mounted read only.
Output: --meta creates quarantine.csv; --quar creates quarantine.tar. Without --dest, version 0.5.0 resolves the destination from the command's starting working directory. The source drive does not select the output folder.
Create a new folder on the analysis VM. If it already exists, choose another name before running:
Run the original examples below from this folder so the default exports stay together. For PDM, remain in the repository and add --dest C:\Cases\Maldump-Walkthrough to each export. Export filenames are fixed; a fresh case folder protects earlier results.
Testing Maldump
The original sequence uses C:\ inside a prepared training VM. It lists first, exports files, then saves metadata. The Full Lab provides a mounted-volume exercise with explicit destinations.
List quarantine files located on disk C
Dump quarantine files from disk C into archive quarantine.tar
Export quarantine metadata from disk C into quarantine.csv
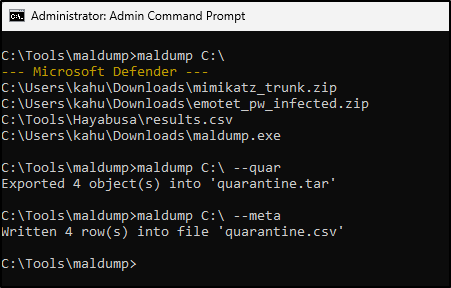
What to notice in screenshot 09: listing prints original recorded paths; --quar reports archive objects; --meta reports CSV rows. The four entries belong to the author's environment. They are not a required result or a malware collection you need to recreate.
The quarantine.csv file can be opened in Timeline Explorer and it contains quarantine metadata.
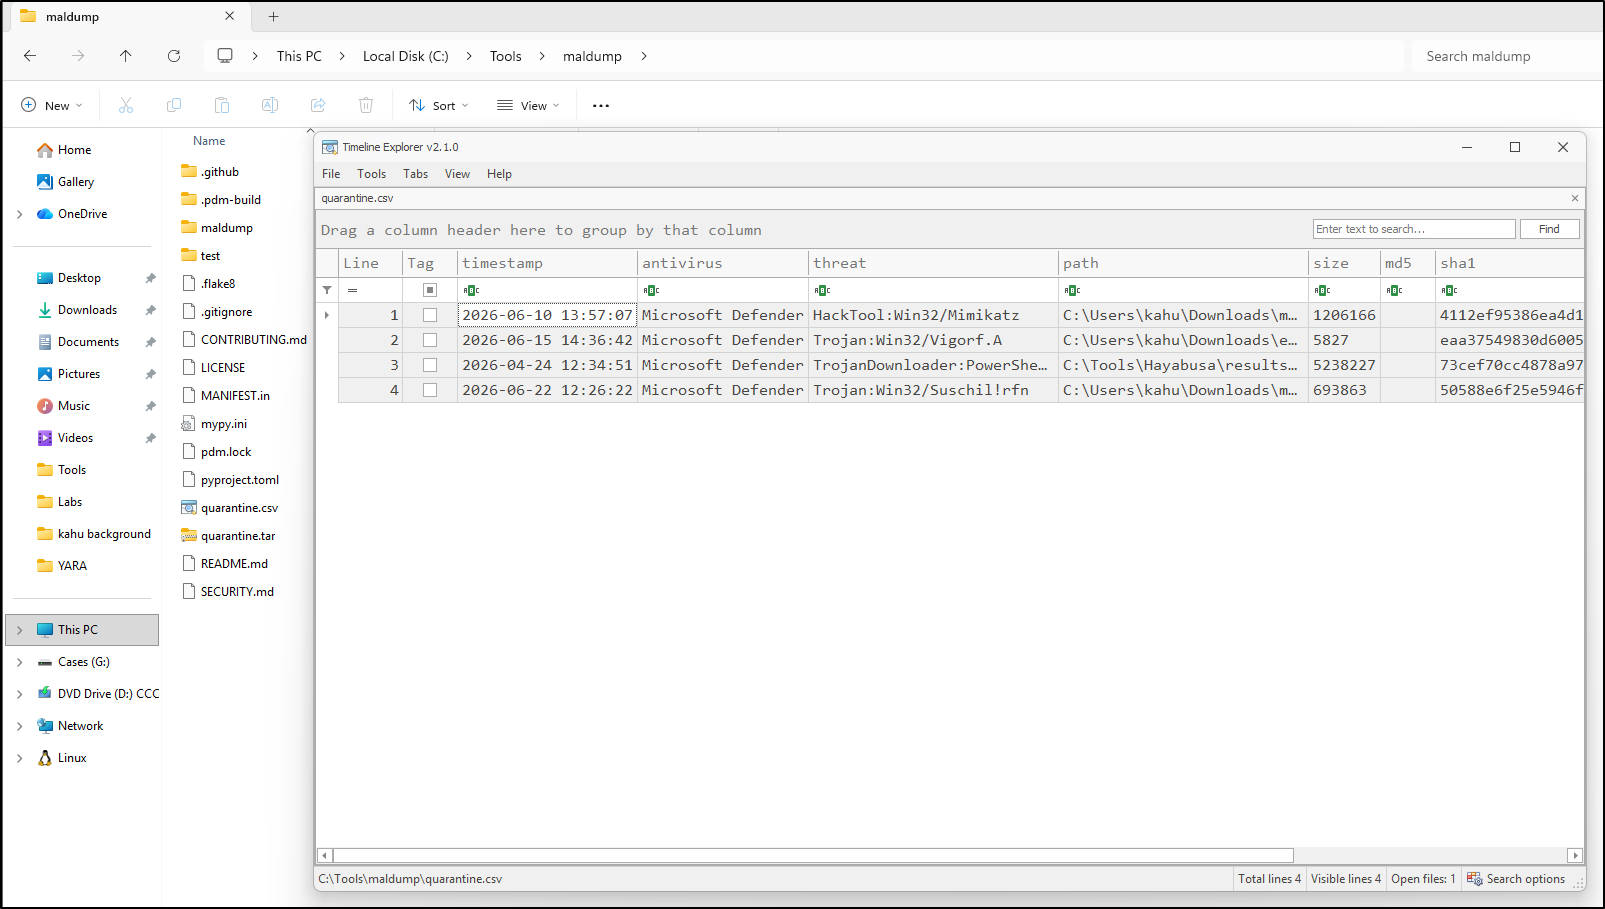
What to notice in screenshot 10: Timeline Explorer opens the exported CSV. A blank field is missing information, not a zero or a clean result. Keep the original CSV when filtering or tagging a working copy.
Read the metadata in Timeline Explorer
- 1Open your saved CSVIn Timeline Explorer, choose File › Open and select
quarantine.csv. - 2Follow one recorded pathUse Find or a column filter to locate the file you are investigating. Keep the complete CSV as your original export.
- 3Read the context and hashesCheck the fields below. Scroll horizontally to see the full hash values; missing fields remain gaps to record.
| Field | What to check |
|---|---|
timestamp |
What time does this product record, and in which zone? It is not automatically execution time. |
antivirus, threat |
Which product supplied the record, and which detection label did it attach? Treat the label as a lead. |
path, size |
Which original path and available size are recorded? The original file may no longer exist at that path. |
md5, sha1, sha256 |
Which fields are populated? Compare only the same algorithm with a hash of recovered bytes. |
Check the clock context. Upstream describes UTC timestamps except Kaspersky for Windows Server, which uses local time. Record your product's time interpretation rather than assuming every timestamp represents the same event or zone.
Verify the recovered files
quarantine.tar holds recovered content; it does not restore applications to their original paths. Version 0.5.0 names archive members with the antivirus product and an MD5-based name rather than the original filename. List the archive before extracting into a fresh, isolated working directory:
The Full Lab provides extraction and hash comparison steps. In some 0.5.0 exports md5 is blank; use a populated SHA-1 or SHA-256 field and compute that same algorithm on recovered bytes to establish the link. Preserve the original archive and CSV.
Troubleshooting
| What you see | What to check |
|---|---|
root_dir is required |
Supply the Windows source root after the launcher; see screenshot 08. |
maldump is not recognised |
Check PATH, use the executable's full path, or use the PDM prefix from its checkout. |
| Compiler/dependency error | Check the Python environment and the conditional C++ steps above. |
| No files found / no CSV created | Check source, product support, access, known entries, and errors. Empty output cannot establish that nothing was ever quarantined. |
| CSV rows and archive objects differ | Keep both results and times. Live stores change; parsing gaps and missing content require review. |
| Antivirus quarantines the export again | Keep the error and ask the instructor to check the prepared analysis environment. Do not disable protection to force a result. |
| Missing hash | Record the gap and compare a populated algorithm with recovered bytes; do not invent a match. |