Create a triage body file
Turn the collected MFT into a checked body file.
Follow the KAPE and MFTECmd steps beside their screenshots. Keep the original collection and verify the body file before continuing to the connected timeline tools.
- Work in
- Windows / PowerShell
- Export
- mft.body
- Keep
- Hashes and source notes
Follow the KAPE and MFTECmd demonstration below to turn a collected $MFT into mft.body. Before starting, review the output files and evidence limitations.
Before you begin
Use authorised training evidence. Confirm the source host and volume, keep the original collection, and write derived outputs to analyst storage. The example uses source volume C:, working input C:\Users\analyst\Downloads\$MFT, and output directory G:\timeline. Adjust the paths to your VM. Run each command in the shell named beside it.
Collect $MFT with KAPE
With Container: None, KAPE collects selected artefacts into a directory; this is a triage collection rather than a full disk image. The original screenshots below show the collection, transfer, export, and inspection sequence.
On the authorised target Windows VM, transfer KAPE and run gkape.exe.
Select C drive as the Target source and E drive as the Target destination. Uncheck Flush. Select SANS_Triage and None for the Container. Click Execute.
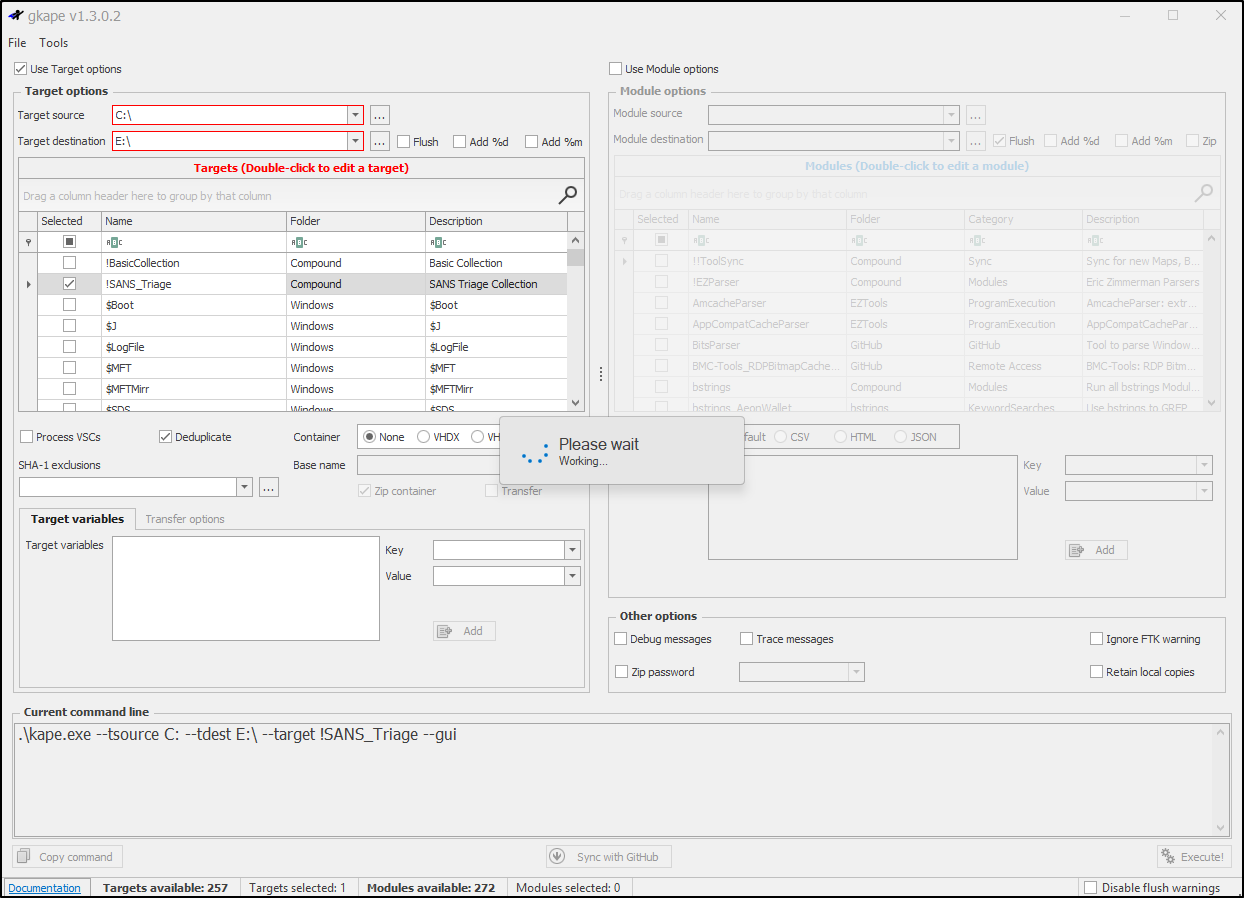
Figure 1. KAPE target settings: source C, destination E, SANS_Triage, container None.
A terminal opens and displays KAPE's processing progress.
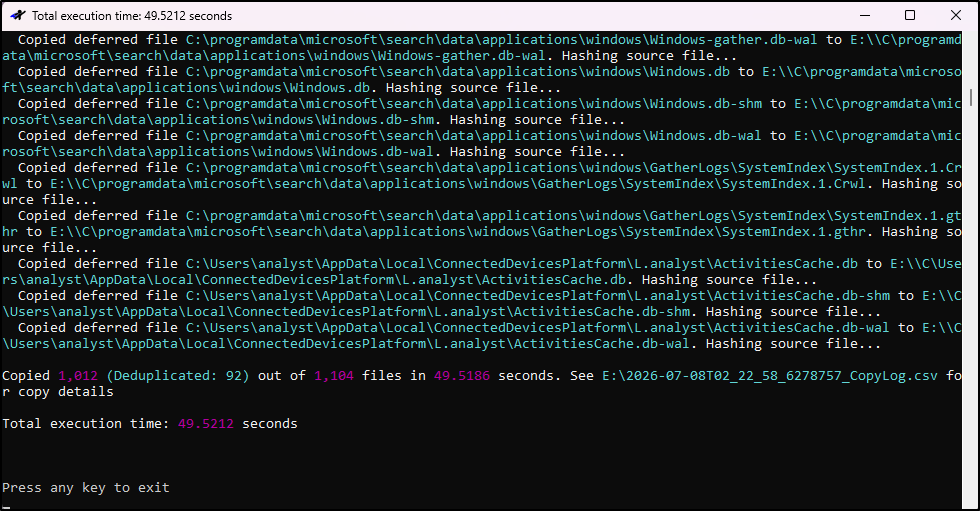
Figure 2. KAPE console showing triage collection progress.
Once triage is complete, copy $MFT to the DFIR VM. This example uses a host shared folder named share to transfer files between the Windows and DFIR VMs. Record the source, collection time and hash before analysing the copy.
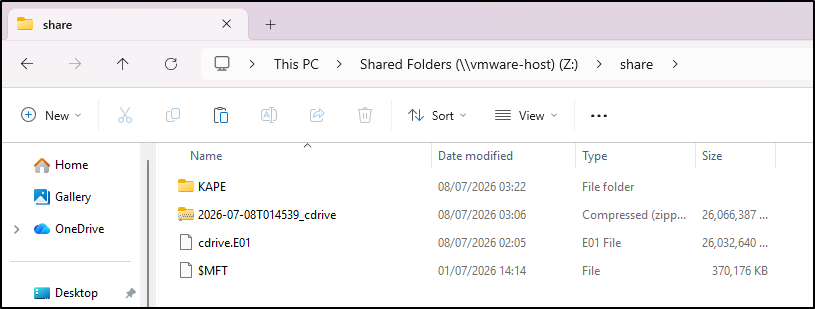
Figure 3. Collected $MFT transferred through the shared folder to the DFIR VM.
Collection checkpoint
Confirm that KAPE completed and that the collected $MFT belongs to the intended host and volume. Locate it in the collection before copying it. If a verified collection is already supplied, start with that working copy.
Prepare the working copy
Copy $MFT from share folder to the Downloads folder.
Use a dedicated case folder for real investigations; Downloads is retained here to match the original demonstration. Keep the original collection unchanged. In Windows Command Prompt, record the input SHA-256 hash, check the installed tool's help/version banner, and create the output folder if it does not exist:
If the folder already exists, choose a new empty output folder and use it in the following commands. Save the hash and tool version in your case notes. Compare the copy's hash with the collected source. Use a fresh output directory if earlier outputs already exist.
Create a triage timeline body file with MFTECmd
Open an administrator Command Prompt and run the following command to create triage timeline bodyfile:
MFTECmd.exe -f "C:\Users\analyst\Downloads\$MFT" --body "G:\timeline" --bodyf mft.body --blf --bdl C
The example runs in Command Prompt, where $MFT is a literal filename. In PowerShell, use single quotes around paths containing $MFT to avoid variable expansion. Parsing an accessible copied file does not normally require elevation; acquiring protected live artefacts may.
| Option | Meaning in this demonstration |
|---|---|
-f |
Working copy of the collected $MFT |
--body |
Output directory, not the body-file name |
--bodyf mft.body |
Name of the body file inside that directory |
--blf |
Use LF line endings for the following Linux/WSL tools |
--bdl C |
Original source volume letter; it does not select the analyst output drive |
Original command and screenshots
The original demonstration used --bdl C:. The current author's usage guidance specifies the letter alone, so the runnable command above uses --bdl C. The original screenshots are retained unchanged. Check the help for the version installed in your VM.
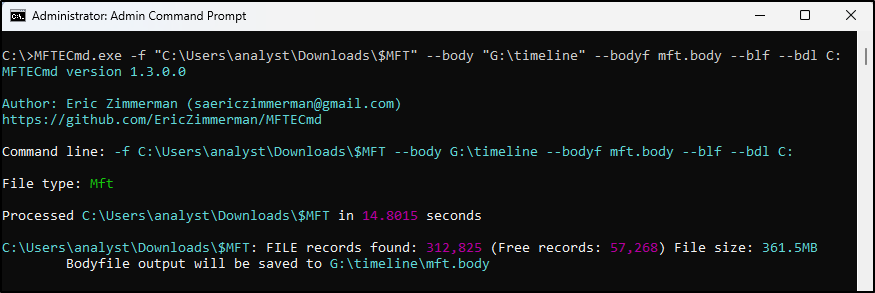
Figure 4. Original MFTECmd body-file command in Windows Command Prompt.
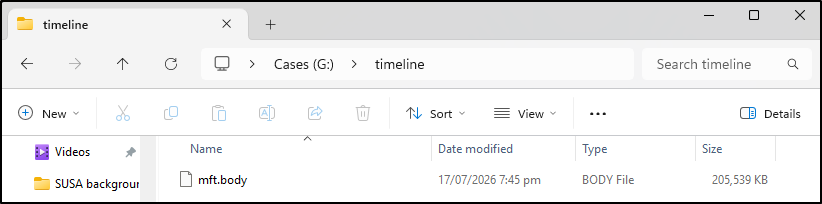
Figure 5. mft.body shown in File Explorer after the export.
This body file will later be used to produce a timeline.
Verify the body file
Do not treat a created filename as proof of a successful parse. Inspect MFTECmd's completion messages, record warnings/errors, and confirm that the output is non-empty. In PowerShell, inspect its size and first few rows:
Get-Item -LiteralPath 'G:\timeline\mft.body' | Select-Object FullName, Length
Get-Content -LiteralPath 'G:\timeline\mft.body' -TotalCount 3
Get-FileHash -LiteralPath 'G:\timeline\mft.body' -Algorithm SHA256
Expect pipe-separated metadata and numeric timestamp fields, rather than a chronological CSV header. Check a known training path and the source-volume prefix. Record the body-file hash and retain the parser messages with the command. Hashes establish identity between copies, not the correctness of parsed timestamps.
Body-file checkpoint
You have a non-empty G:\timeline\mft.body, reviewed parser messages, a recorded input/output hash, and the exact command. Keep this unfiltered file for both TSK and Plaso. CSV metadata export below is optional.
Optional: output MFT metadata to CSV format
This supporting export helps you inspect detailed MFT fields in Timeline Explorer. It is separate from the body-file workflow and does not replace mft.body.
Run the following command to output MFT metadata to CSV format:
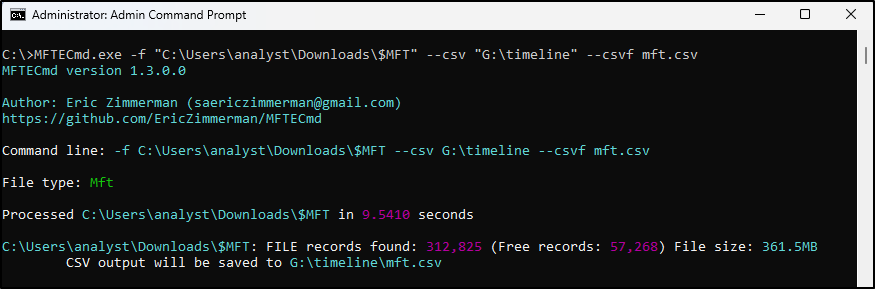
Figure 6. MFTECmd command for the optional MFT metadata CSV export.
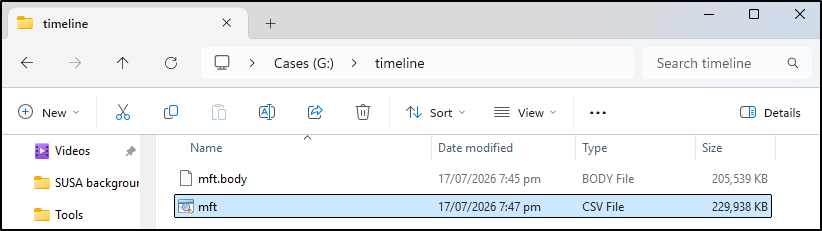
Figure 7. MFTECmd console output from the metadata CSV export.
The mft.csv can be opened in Timeline Explorer.
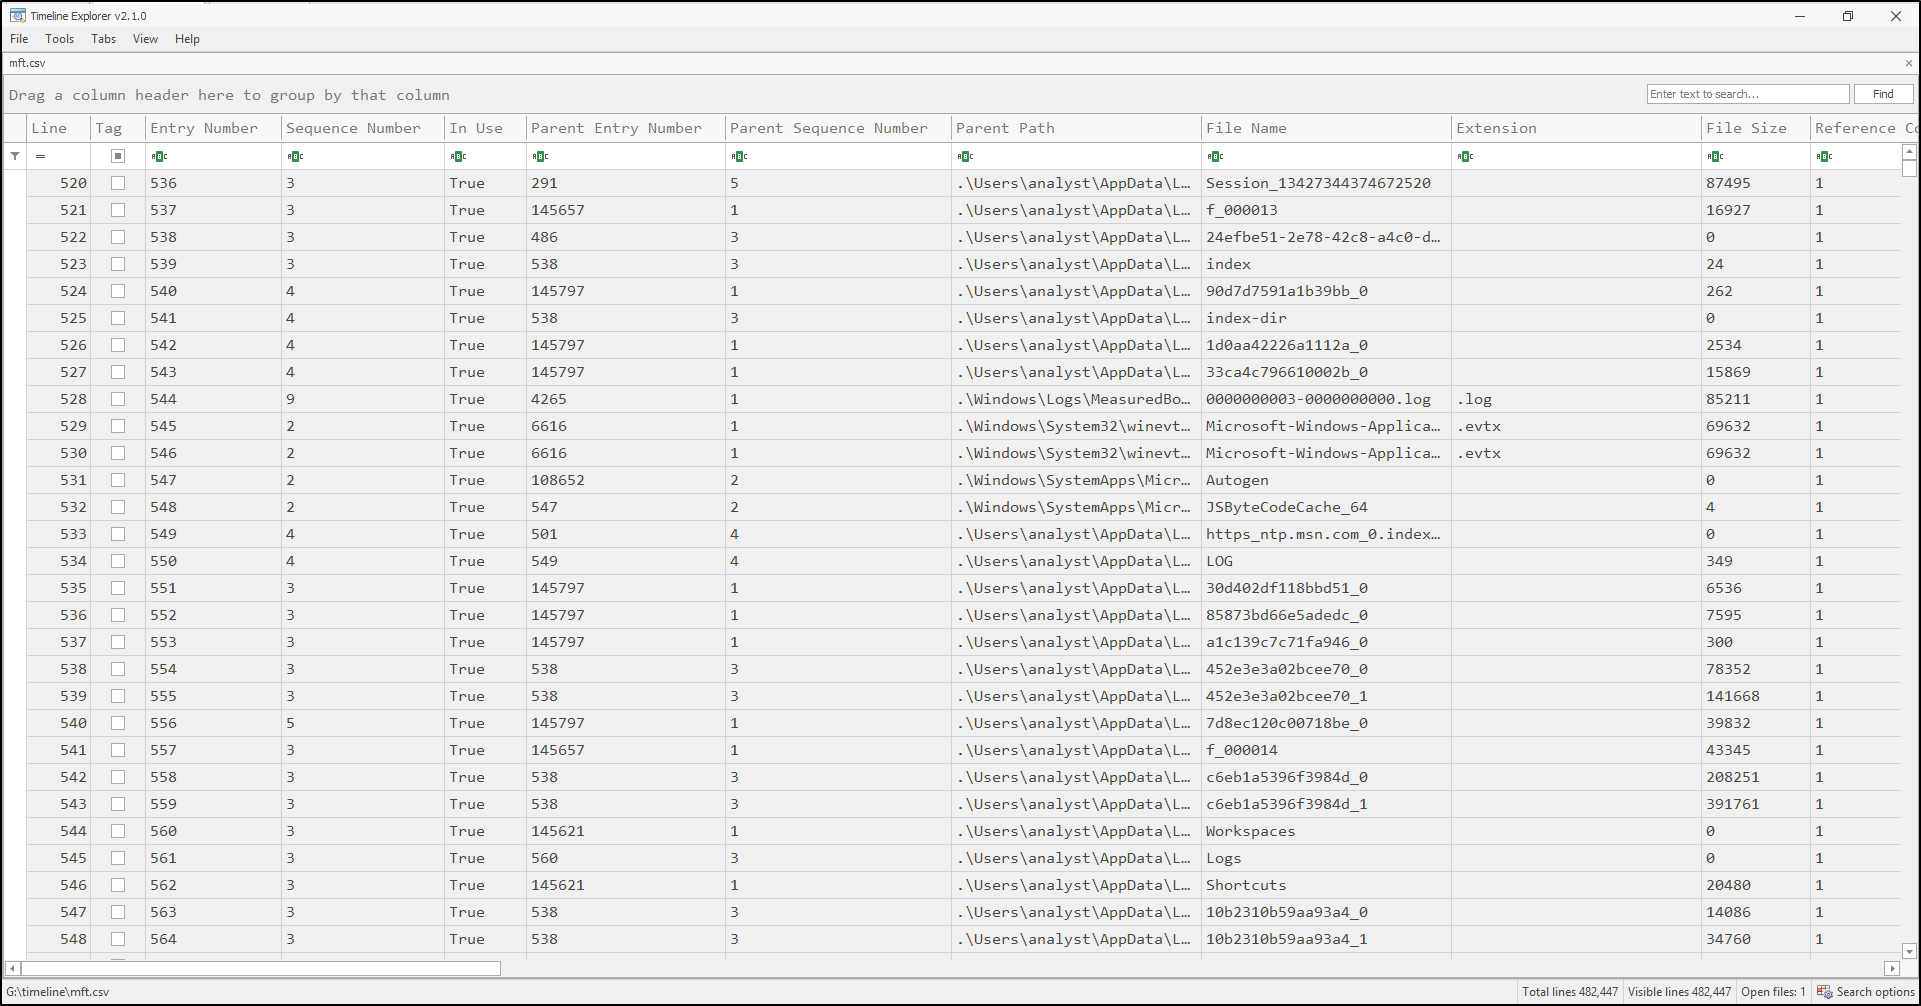
Figure 8. MFT metadata CSV opened in Timeline Explorer.
Continue with TSK and Plaso
The workflow shares one body file: mft.body feeds both TSK and Plaso. The TSK CSV is a review output; Plaso imports the body file rather than that CSV. A Super Timeline combines timestamped events from multiple artefact types into one chronological view. Its coverage depends on collection scope and successful parsing.
Alternative source route: TSK fls can create out.bodyfile from an E01 volume image. It is a separate route to a body file. Choose one export for processing; keep source identity and collection context with it.
- TSK: continue at Parse the bodyfile using mactime. Use
/mnt/g/timeline/mft.bodyto producefilesystem-timeline.csv. The earlierflsdemonstration is an alternative source of a body file; it is not required when you already havemft.body. - Plaso: follow Create the Super Timeline, using the same host's collected artefacts. Its
mactimepreset selects thebodyfileparser to import a body file; do not substitutemft.csvorfilesystem-timeline.csv. Keep any filtered body file as a documented derivative alongside the original.
In your handoff, include the host/volume, collection context, input and body-file hashes, MFTECmd version, exact command, output path, warnings, and time basis used for later display. G:\timeline and /mnt/g/timeline refer to the same analyst storage from Windows and WSL.
Troubleshooting
| Symptom | Check |
|---|---|
| MFTECmd is not recognised | Locate the executable and run it by its full path, or use the documented Eric Zimmerman tools setup. |
| Input cannot be found | Confirm the copied $MFT path; use the correct shell quoting and compare the input hash. |
| Output is empty or parsing failed | Check the source is a collected binary $MFT, inspect warnings, and confirm output permissions and free space. |
| Paths show the wrong volume | Use the original source letter for --bdl, not the drive holding your working copy. |
| WSL cannot find the body file | Confirm the Windows output exists and that drive G: is mounted at /mnt/g. |
| Commands differ from a screenshot | Record your installed version and follow its help; retain the original screenshot as demonstration context. |