Create a file system timeline
Build a timeline you can trace back to its source.
Use the named Windows and WSL terminals at each step. The screenshots follow the image route; the MFTECmd continuation lets you start with an existing checked body file.
- Windows
- fls reads the image
- WSL
- mactime creates the CSV
- Finish with
- A source-backed finding
Follow the original screenshot walkthrough: image a training C: volume, export out.bodyfile with fls, then convert that body file with mactime. The MFTECmd continuation is an explicitly separate input route.
Use evidence from the same host and source volume, with recorded collection context. out.bodyfile and mft.body are separate exports; do not assume identical coverage or import both by default. The file system timeline CSV is for review. Keep the chosen body file for the Plaso handoff.
Install and verify TSK
The original demonstration uses Windows TSK for fls and WSL TSK for mactime. The two installations serve those named shells; they are not two acquisition stages.
Install TSK on WSL
Open a WSL terminal and install TSK:
When asked whether you want to continue, type Y.
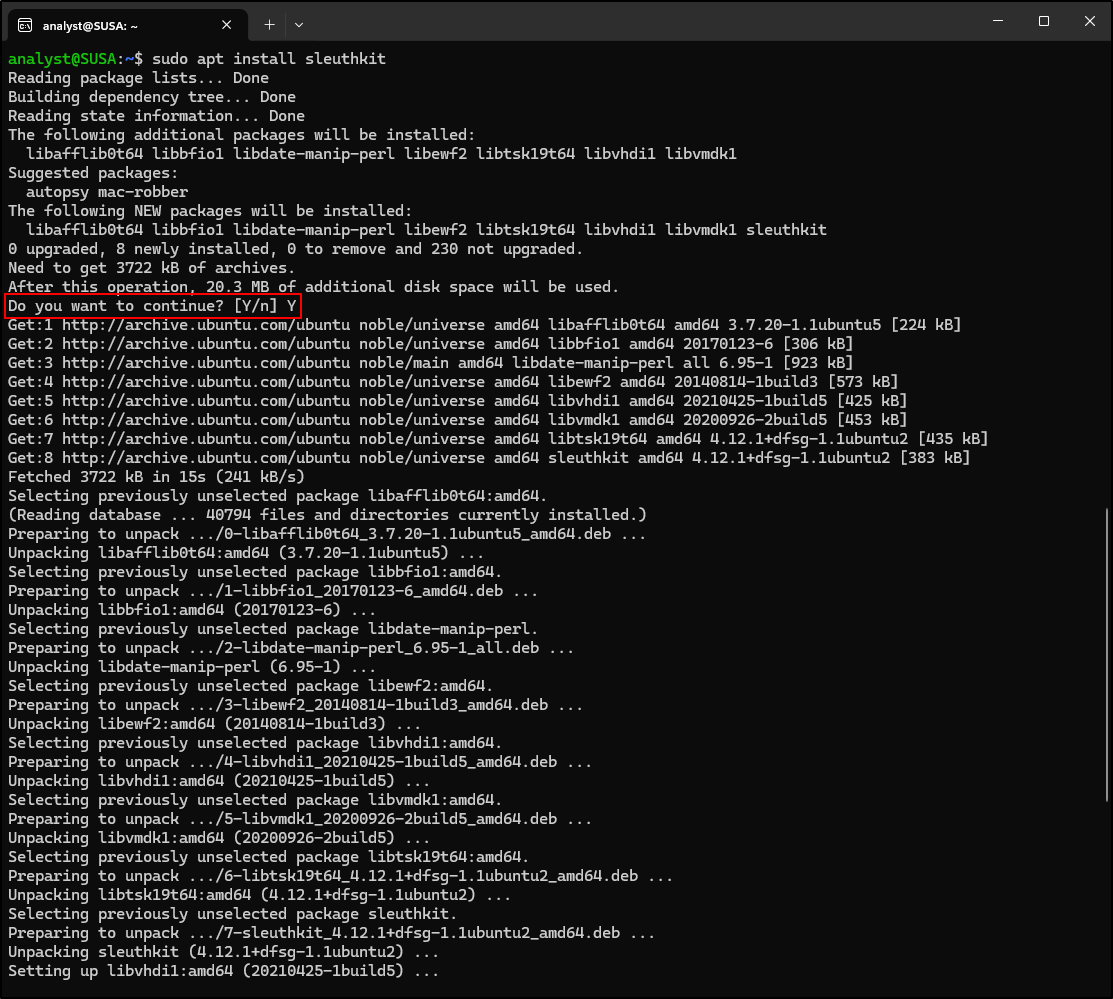
Figure 1. Installing TSK in WSL.
Verify TSK has been installed successfully by typing mactime and fls:
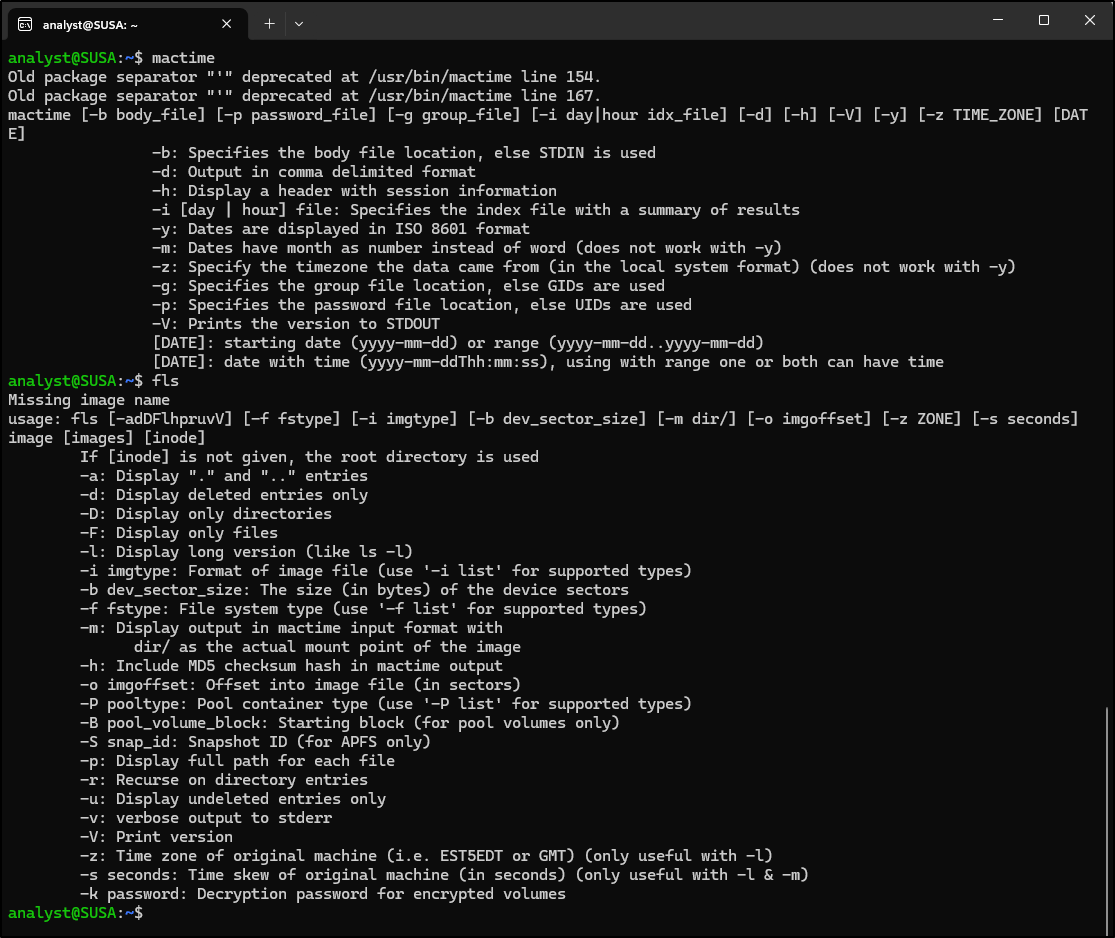
Figure 2. Checking the TSK commands in WSL.
Install TSK on Windows
Download TSK from here.
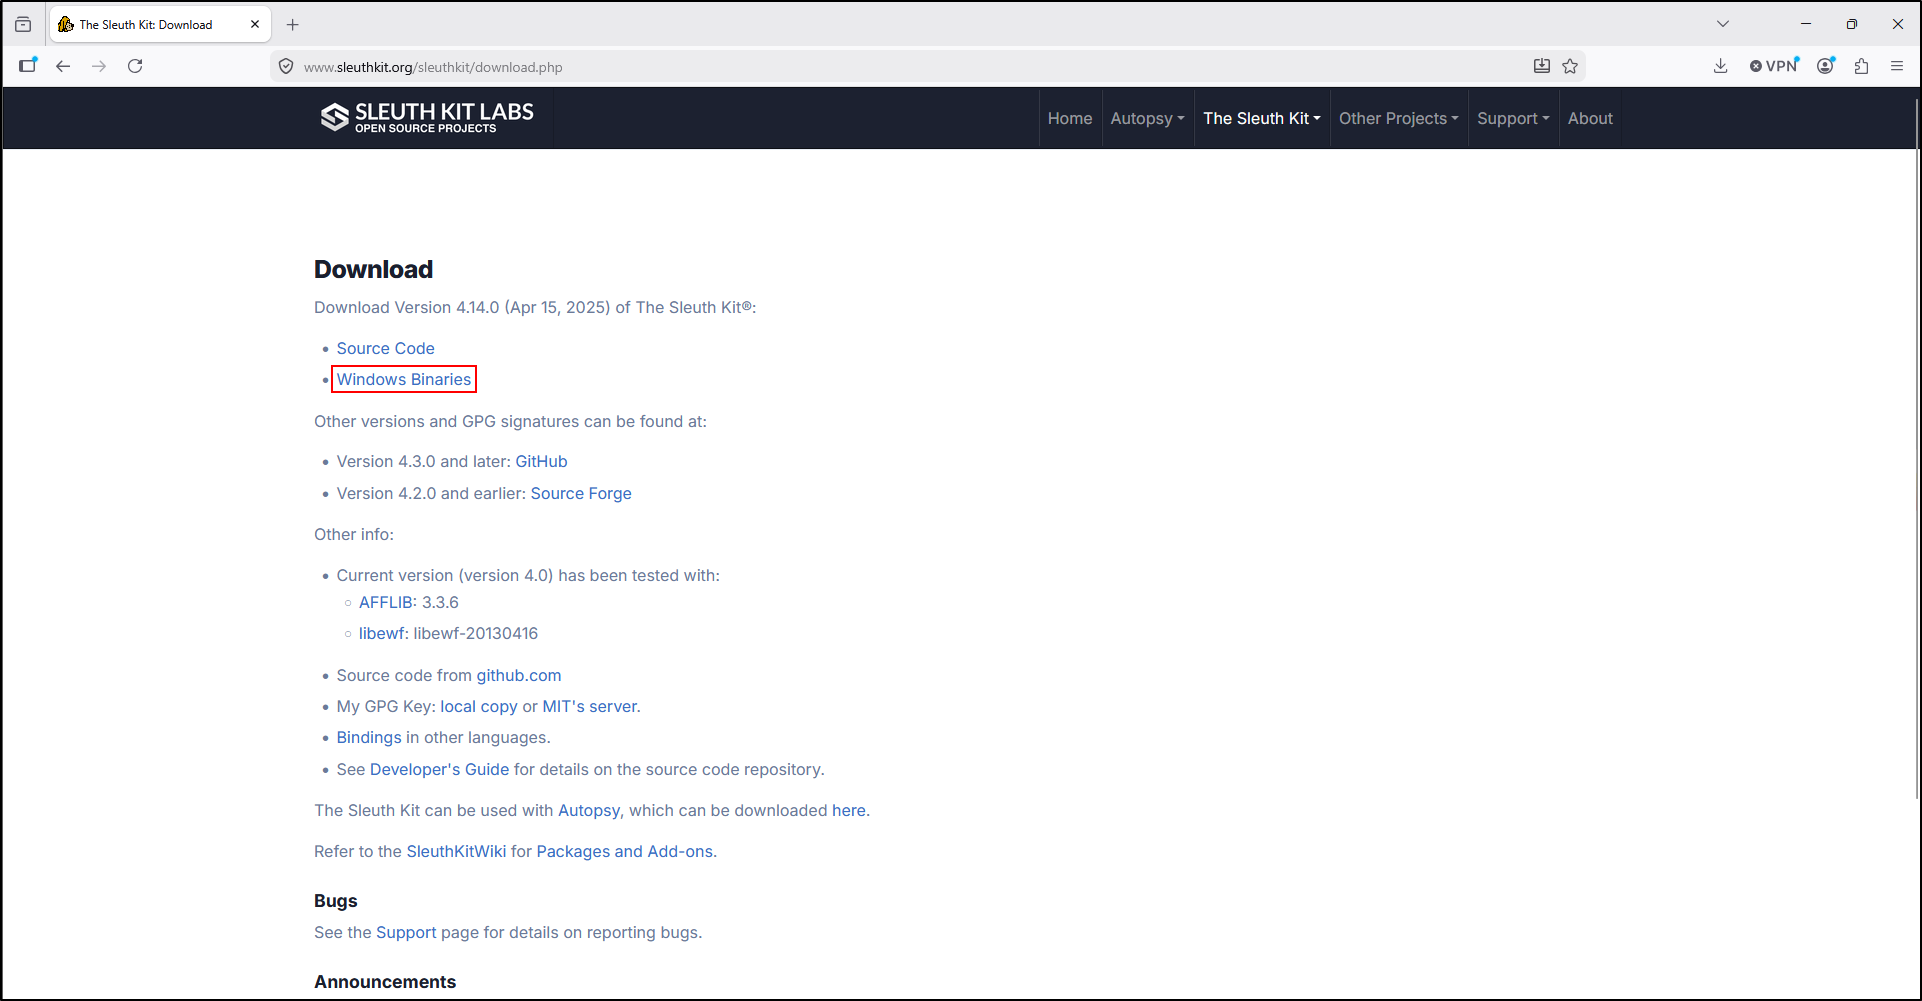
Figure 3. Downloading the Windows TSK archive.
Extract the contents of the ZIP archive to the C:\Tools\The Sleuth Kit directory.
Adding TSK to PATH environment variable
Open Environment Variables (Start → Environment Variables → Edit the system environment variables → Environment Variables).
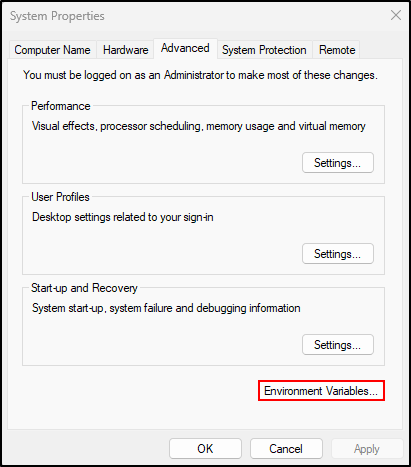
Figure 4. Opening Windows environment variables.
Under User variables, select path and click Edit.
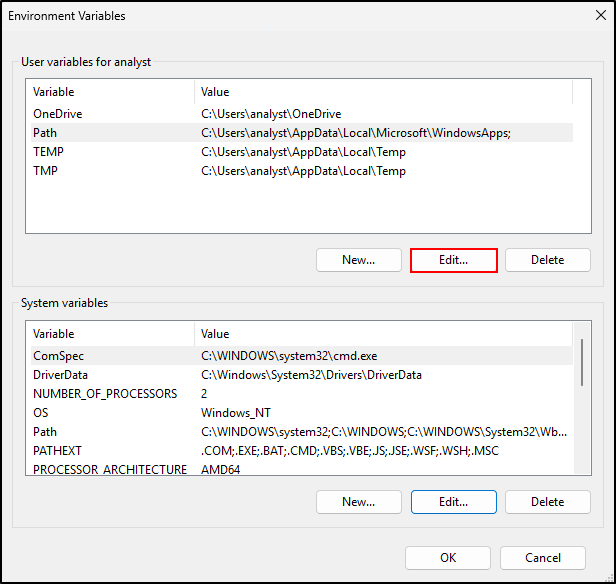
Figure 5. Editing the user PATH.
Click New and add (one entry per line):
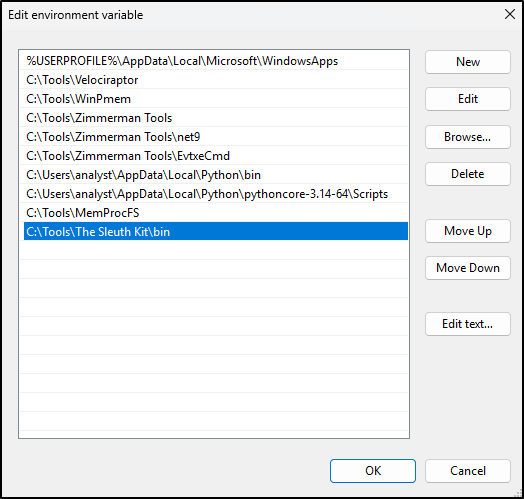
Figure 6. Adding the TSK bin directory.
Click OK (then OK on other windows to save changes).
Create a Disk Image of a Windows VM using FTK Imager
The primary route starts with an image of the source C: volume. Already have a verified MFTECmd body file? Skip acquisition and fls, then use Continue from MFTECmd.
Install and run FTK Imager on a Windows VM.
Select File → Create Disk Image → Logical Drive.
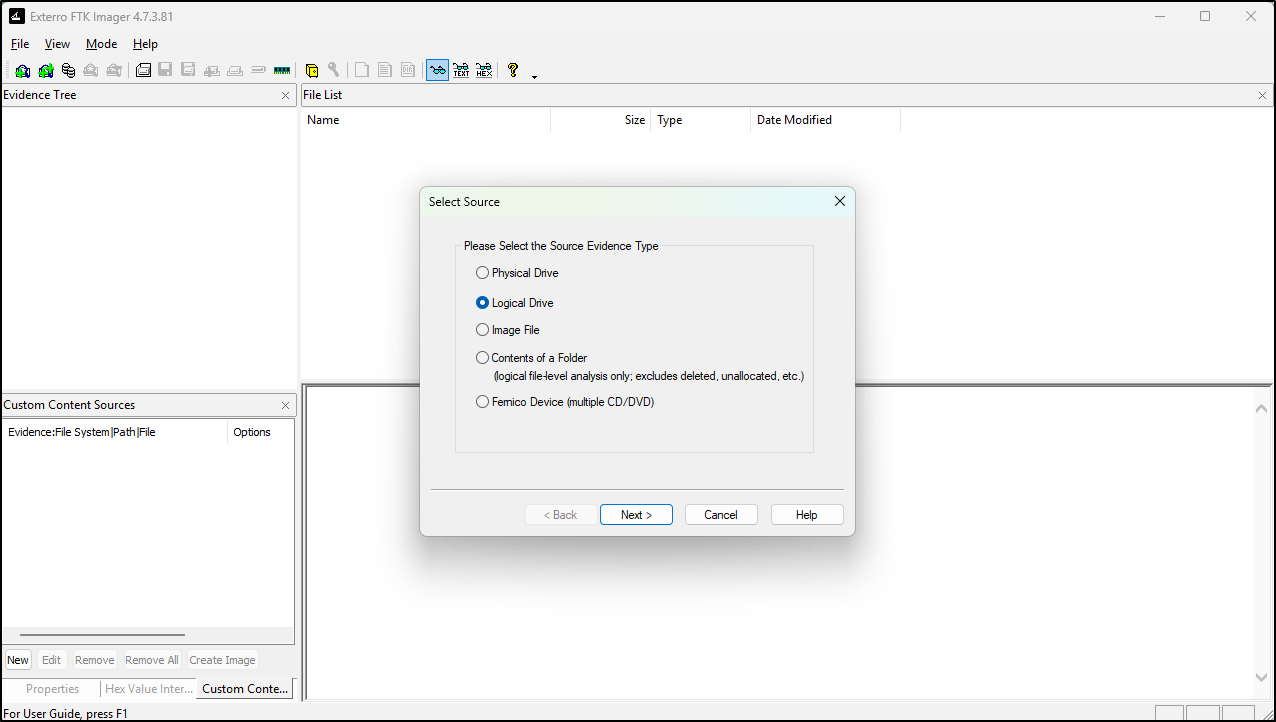
Figure 7. Choosing FTK Imager logical-drive acquisition.
Select C drive as the source drive and click Finish.
This is a logical-drive/volume image, not a targeted KAPE artefact collection or necessarily a whole physical disk image. Keep these representations distinct; renaming a file does not convert between them.
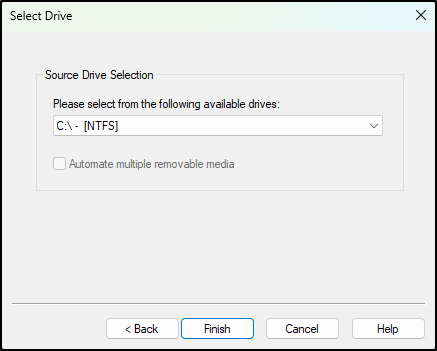
Figure 8. Selecting the source C: volume.
Click Add for Image Destination and select E01 as the image type. Click Next.
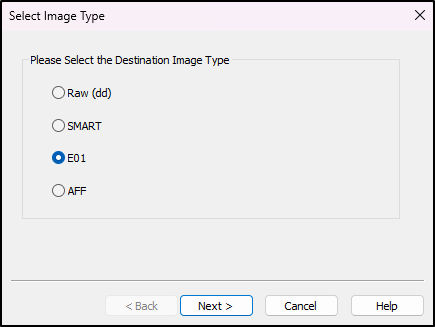
Figure 9. Choosing E01 as the image format.
Training screenshot context
The next original step leaves evidence fields blank for demonstration. In a case, record the case identifier, source host/volume, acquisition time/timezone, examiner and tool version; populate the evidence fields where appropriate. Retain the acquisition and verification reports.
Leave Evidence Item Information as blank and click Next.
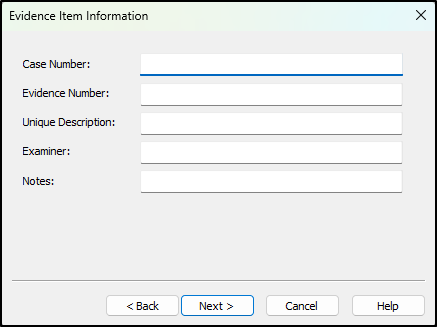
Figure 10. Original blank evidence fields; record case context in actual work.
Select Image Destination Folder as E drive. Put cdrive as the Image Filename, select 0 for Image Fragment Size and click Finish.
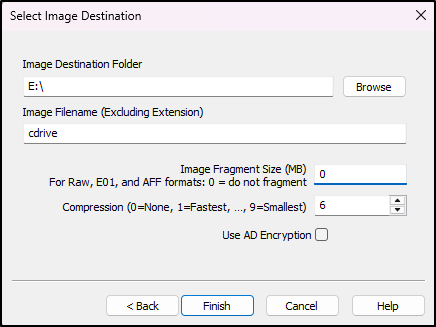
Figure 11. Setting the image destination and filename.
Click Start.
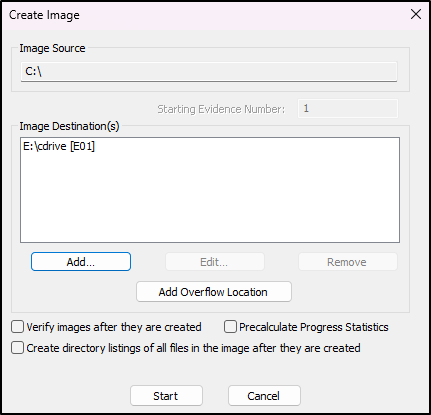
Figure 12. Starting the acquisition.
One the image creation is complete, click Close.
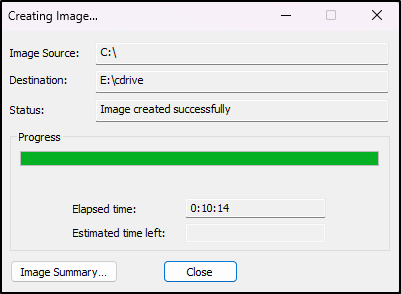
Figure 13. Completing the image acquisition.
Copy the cdrive.E01 file into the forensics VM’s G drive.
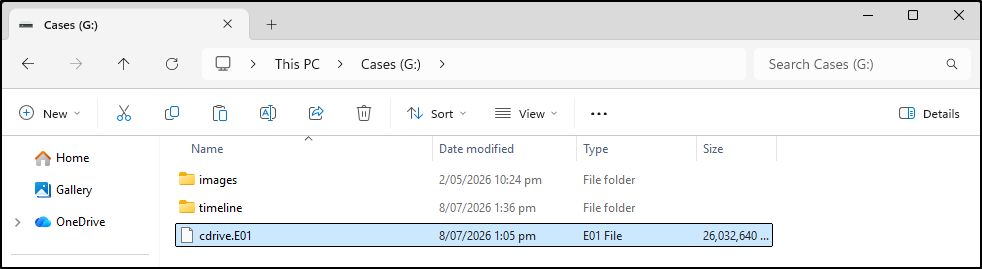
Figure 14. Copying the acquired image to analyst storage.
Create Triage Timeline Bodyfile using fls
The fls tool within the TSK suite extracts filename and metadata information for files.
Run in Windows Command Prompt. Verify the source image and working copy against the acquisition record first. Create a fresh analyst output folder with mkdir G:\timeline. If it already contains results, use a new folder and change every output path consistently. The following original command reads the image and redirects metadata to a body file; it does not yet create a chronological CSV.
Open an administrator Command Prompt and run the following command to create triage timeline bodyfile:
The elevated prompt is retained from the original demonstration. Parsing a readable working image normally does not require administrator rights; live acquisition can.
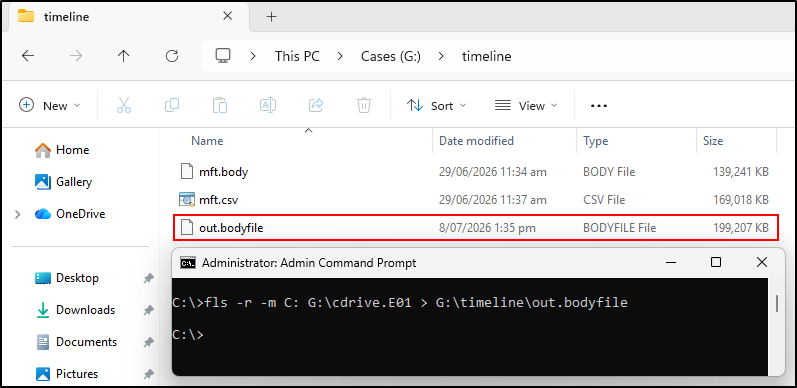
Figure 15. fls creates out.bodyfile from the volume image.
Parse the bodyfile using mactime
The mactime is a tool within TSK suite that parses the bodyfile, make it human readable and sort chronologically.
Create Filesystem Timeline in CSV Format
Choose one body-file route below. A body file is a pipe-delimited intermediate file; mactime sorts its timestamp values into dated rows. Windows G:\timeline is normally /mnt/g/timeline in WSL. Check the mapping on your VM.
Main route: use the body file you created with fls
In WSL, run:
Look for: a non-empty CSV with a header and timestamped file paths. -b is the input body file; > writes a new CSV. Read errors before accepting the output. If processing fails, the shell can still leave an empty output file.
Continue from MFTECmd
If you arrived with verified mft.body, use this original command instead. Skip FTK acquisition and fls; record the input hash and MFTECmd provenance. Use a fresh output directory for each route. To compare routes, use separate output names or folders rather than overwriting a result.
Open WSL terminal and run the following command to create the filesystem timeline in CSV format:

Figure 16. Original MFTECmd continuation: mactime reads mft.body. The main fls route above reads out.bodyfile.
[Useful Options for mactime]
-b: Bodyfile location (data file) [minimum parameter]
-y: Dates are displayed in ISO 8601 format
-z: Specify the time zone (see time zone chart)
-d: Comma-delimited format
Verify and interpret the timeline
In WSL, run these checks on the chosen body file and the generated CSV. Substitute mft.body for out.bodyfile when following the MFTECmd route:
ls -lh /mnt/g/timeline/out.bodyfile /mnt/g/timeline/filesystem-timeline.csv
head -n 3 /mnt/g/timeline/out.bodyfile
head -n 5 /mnt/g/timeline/filesystem-timeline.csv
sha256sum /mnt/g/timeline/out.bodyfile /mnt/g/timeline/filesystem-timeline.csv
Look for: non-zero sizes, body-file rows separated by |, a CSV header such as Date,Size,Type,Mode,UID,GID,Meta,File Name, and plausible source paths. Record both hashes, tool versions and exact commands. A matching hash verifies file identity, not timestamp accuracy.
Understand body-file fields and MACB times
A TSK version 3 body-file row has 11 fields: hash, name, metadata address, mode, UID, GID, size, access time, modification time, metadata-change time, and creation time. Hash values may be placeholders. The final four values are epoch timestamps; a single file can produce several timeline rows, or one row with several type letters when times match.
| Type letter | What the exported timestamp represents |
|---|---|
m |
File content modification |
a |
Access |
c |
Metadata/status change, not file creation |
b |
Birth/creation, where available |
These are recorded metadata values, not proof of execution or a complete history. NTFS attribute types can produce multiple records; inspect the supporting source and attribute before interpreting a lead. fls -r does not recurse into deleted directories, and record reuse or incomplete paths can limit coverage.
Check the time basis and a known file
The original commands retain -z UTC -y. TSK's Perl mactime implementation uses UTC for its -y ISO output; its help notes that -z does not control that mode. Check the help/version on your VM and confirm a known time and the Z suffix in the output. Record the source timezone separately from the timeline's display timezone. Do not shift timestamps again merely because Windows displays local time.
Replace the filename with a known file from your training evidence. Compare the full source path and Type field. If there is no match, check collection scope, spelling, source volume, and parser errors; absence from this export does not prove the file never existed. Preserve the row or the documented no-match result with a limitation and next check.
Optional: create a filtered review view
The following original filtering demonstration is retained. It is optional and the list is an example, not a rule that these paths are irrelevant or false positives. First review the complete timeline. Save filters and their purpose with every derived view.
Preserve the complete timeline
Keep mft.body and filesystem-timeline.csv unchanged. The exclusions below create a review view; routine-looking paths or $FILE_NAME timestamps can still be relevant. Record the filters and inspect excluded material when testing a lead. Display paths need not be converted to backslashes for analysis; the later sed command changes only the derived review file's presentation.
Create a keyword_filter.txt that contains a filter list to remove files from the timeline that are noisy and likely to show false positives.
\(\$FILE\_NAME\)
\/WinSxS\/
\/assembly\/
odlsent
\.odl
Cache_Data
Code\ Cache
Service\ Worker
\/Packages\/
\/windowsapps\/microsoft\/
\/Program Files\/WindowsApps\/
SystemApps
\/Microsoft\ Office\/
\/Acrobat\ Reader\ DC\/
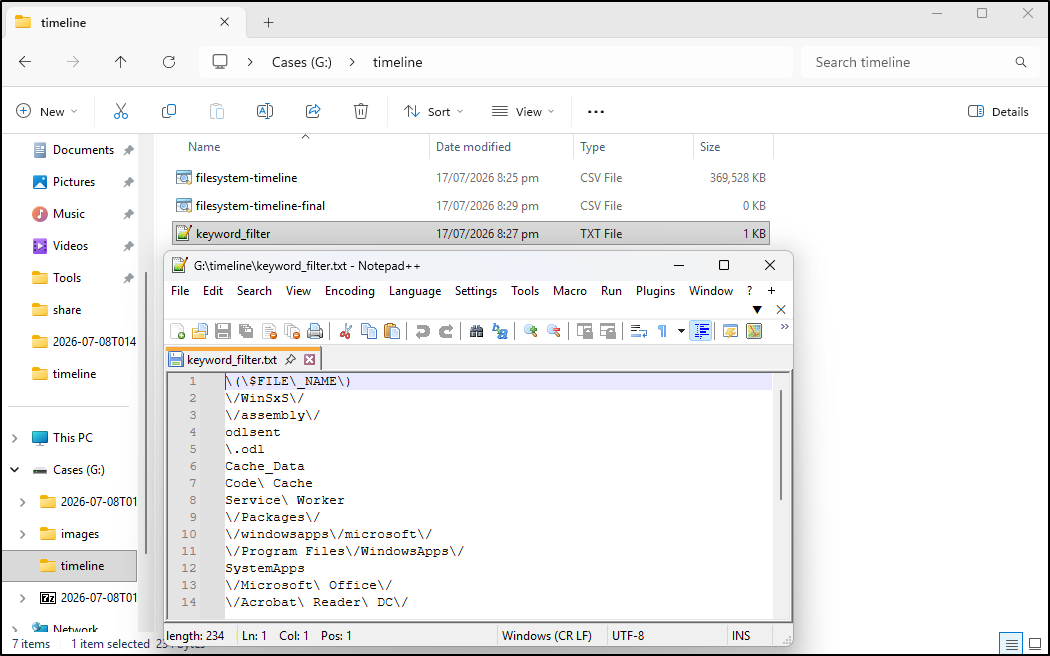
Figure 17. The original example exclusion list.
On the WSL terminal, navigate to the /mnt/g/timeline directory, and filter the timeline using grep and keyword_filter.txt
cd /mnt/g/timeline
grep -a -v -i -f /mnt/g/timeline/keyword_filter.txt filesystem-timeline.csv > filesystem-timeline-final.csv

Figure 18. Creating a filtered CSV review derivative.
Optional: reproduce the original path presentation
Presentation only
Backslash conversion is not required for Windows analysis or Plaso import. The original wording and screenshots below demonstrate a presentation choice. The broad substitution changes every slash in the derived file, not only a path column. Prefer the unmodified CSV; never apply this command to your sole original export.
The mactime output formats file paths using the Unix nomenclature of forward slashes. We need to replace those forward slashes with backslashes since we are investigating Windows systems.

Figure 19. Original optional path-presentation command.
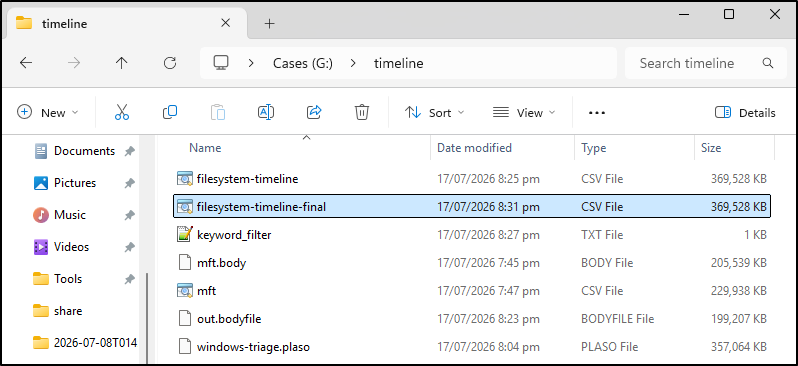
Figure 20. Inspecting the derived path presentation.
Review in Timeline Explorer
The filesystem timeline can be opened in Timeline Explorer for further analysis.
Open filesystem-timeline.csv for the complete timeline, or filesystem-timeline-final.csv for the documented review derivative. Record which you used, display timezone and active filters. Locate the known training file, identify its timestamp meaning, and retain the unfiltered output.
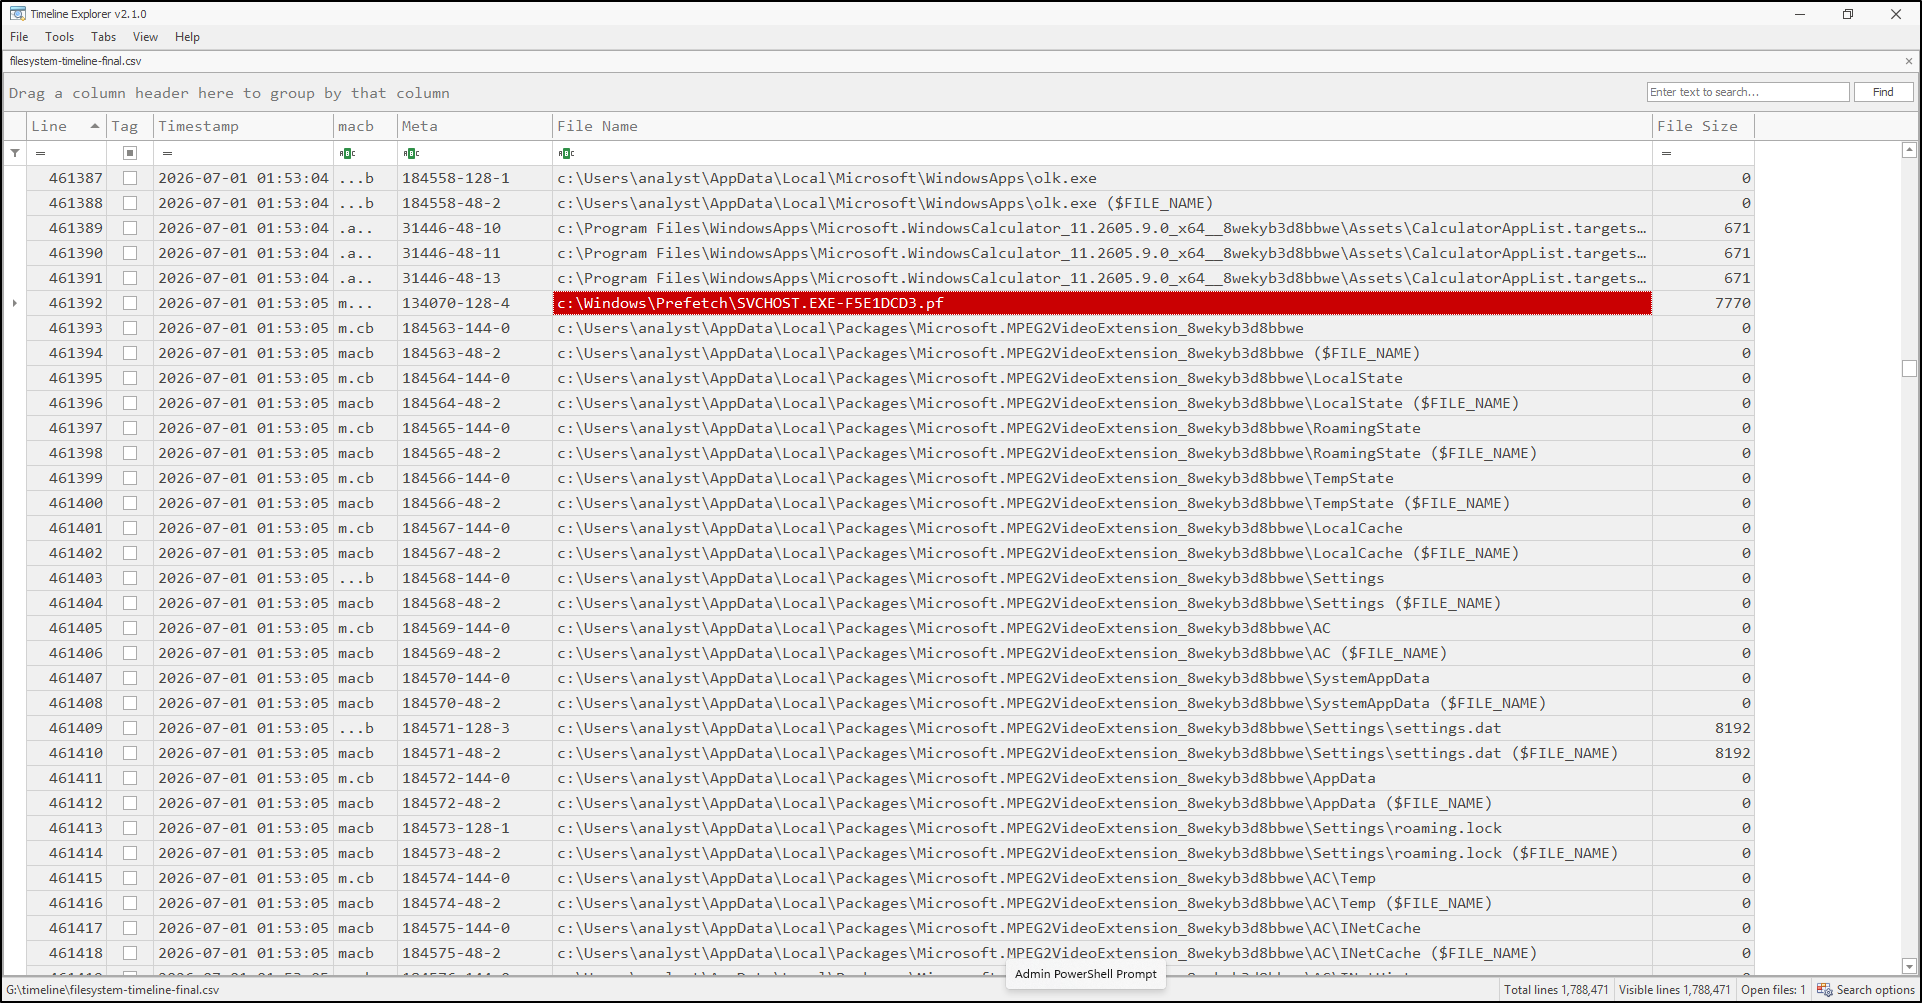
Figure 21. Reviewing the timeline in Timeline Explorer.
Continue to Plaso
Keep the chosen body file with its provenance and hash: out.bodyfile from fls, or mft.body from MFTECmd. Plaso's demonstration combines a body file with other collected artefacts from the same host. Its worked import uses mft.body (or a documented derivative); substitute your out.bodyfile if that is your chosen source. Do not import both overlapping exports by default, and do not substitute the TSK CSV for a body file.
TSK's mactime executable creates the file system timeline. Plaso's preset also named mactime selects its bodyfile parser. A Super Timeline broadens the evidence sources; merely exporting this CSV does not create one.
Troubleshooting
| Symptom | Check |
|---|---|
| fls is not recognised | Reopen Command Prompt after changing PATH, or use the full executable path. |
| Image type is unsupported | Use fls -i list to check the installed build's image support, including E01/EWF; keep every segment of a split image. |
| Cannot determine filesystem type | Confirm whether the evidence is a volume or whole-disk image. For a whole disk, use mmls to identify the filesystem start and pass the actual sector offset with fls -o; do not guess one. |
| Body file or CSV is empty | Inspect command errors, selected input, free space, permissions, and output path before retrying. Keep failed runs with an explanation. |
| WSL cannot see G: | Check /mnt/g and the Windows drive mapping; do not silently use another file with the same name. |
| Times or paths look unexpected | Check source identity, NTFS attributes, timezone, and the chosen route before filtering. |
References: fls, mactime, mmls, and Plaso parsers.